Photographics: Toning
March 21, 2009 by Jamie
For our first assignment in our Photographics class we were required to do toning. There are many different kinds of toning and and many different ways to do toning. Our professor Michael Lanoue showed us how to do sepia toning, split toning and selenium toning both in the darkroom and in Photoshop.
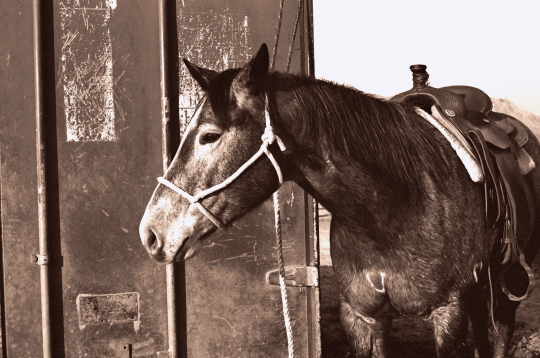
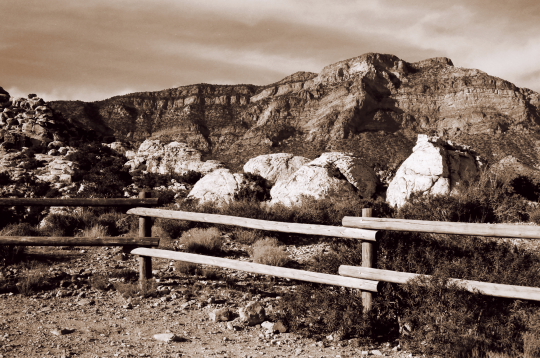
For sepia toning in the darkroom you first must take a print and soak it in water so the photo paper will be receptive to the toning chemicals. You then put the photograph in a bleach solution, this is not household bleach, it’s a bleach specially formulated for photo paper. This lightens the photo and make the highlights look more high contrast. After you wash it again to get off all the bleach solution then put it in the sepia toner. Sepia toning turns the print a brownish hue and I noticed that prints made in the darkroom as opposed to digitally have a more chocolate-brown look to them. After the sepia toning you wash, then fix and then wash a final time. Sepia toning in Photoshop is much easier, you just desaturate the image and then tone it. You can adjust the hue of the tone by using any number of methods including levels, curves and colorizing. I chose to do sepia toned digital prints which I’ve shown below. Both photos were shot with film but I worked on them in GIMP (the cheap person’s Photoshop) to get the sepia tone effect.

Digital sepia toning by Jamie

Digital sepia toning by Jamie
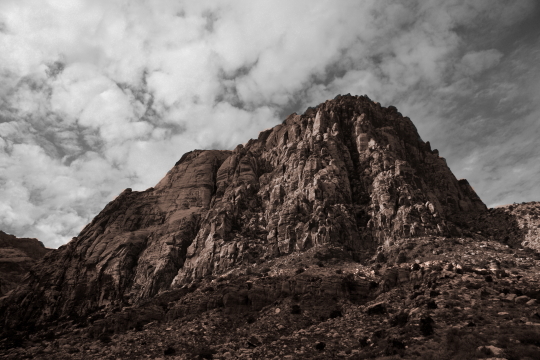
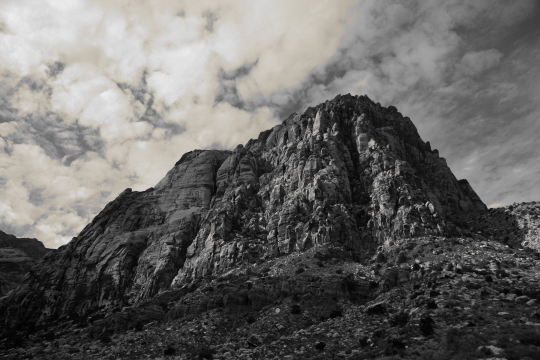
Split toning and selective toning is where you have two different tones in the photograph such as black & white and sepia. The way you selective tone in the darkroom is very interesting. You first take a black & white photograph and paint over the areas that you don’t want to be toned with a removable liquid mask solution. Then you follow the same steps as in sepia toning; soak in water, bleach, wash, sepia tone, wash, fix and wash again. You then remove the liquid mask solution you painted over the photograph and you see that it prevented those areas from toning. So you have a black & white and sepia toned image. To get the same effect in Photoshop you would simply mask the areas you wanted to tone. Bryan chose to do split and selective toning with some digital images in GIMP. Even though the first image appears to be in color, the sky is actually black & white and the mountain is sepia. He did this by creating a layer mask.

Digital selective toning by Bryan

Digital split toning by Bryan
Bryan and I chose not to do this assignment in the darkroom because of time constraints. In order for the prints to be more archival you must use fiber-based photo paper which has a longer wash time. Even though our prints didn’t have the same chocolaty brown tint of the darkroom prints we did manage to get a nice brown hue to them which I believe made them look even better.


Comments
Feel free to leave a comment...
and oh, if you want a pic to show with your comment, go get a gravatar!
You must be logged in to post a comment.