


2013 Lake Hodges Trail Fest
October 26, 2013
The 2013 Lake Hodges Trail Fest is less than a day away. After the race, check back here for updates and a link to the photos.
Update 30 October 2013: Thanks for another great trail run event. Here is the gallery of photos. We do offer other services beyond those published on Zenfolio. Just send an email to orders@shezphoto.com to inquire.
It was fun photographing you all. I think I found a couple of places to hide to get the best shots. I also had fun biking the entire 15k course this year after the last runner had gone through. There is some great single track up there.
Adobe Creative Cloud
May 18, 2013
I have had the fortune of getting to spend a lot of time watching videos on tv.adobe.com and learning about things I never spent time learning about. This includes Illustrator and InDesign and really how to do all that cool stuff I knew was possible but never understood before. This comes at an interesting time for Adobe with respect to their recent announcement about how all software will be licensed via Creative Cloud. In other words, there will be no more boxed versions of Creative Suite after CS6.
This actually has a lot of people frustrated at Adobe. I am not one of them. The frustration goes something like this. If you are a design studio and buy every version of every product when it comes out then the CC way of licensing will lower you overall costs and spread them out. However if you are an occasional user of these products then you will end up paying more then you did before. In addition, even though archived versions of Creative Cloud releases are available to install, by paying a monthly fee, you are in essence paying for the newest upgrade whether you want it or not.
However, I am not tied in a knot like the rest of the Internet seems to be. I can see myself paying around $80 to licenses the entire CC suite (equivalent to the old CS Master Collection) for one month, and then not paying it for three or four months. In the meantime, as long as I save down my files, I can still open up CS5 of Photoshop and work on small edits as needed. For me, its not a big deal. In addition, it opens up all the rest of the applications I couldn’t justify before like Illustrator, InDesign and Muse.
Hopefully Jamie and I will be posting more photography soon. In the meantime, enjoy this flower I drew using the shape builder tool, perspective tool, ellipse tool, and pen tool in Illustrator.

2013 San Diego 50 and San Diego Trail Marathon
January 20, 2013
UPDATE:
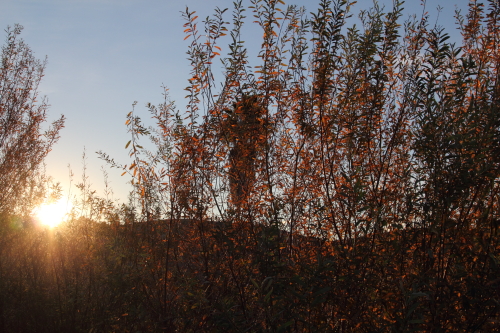
It was 37 degrees out when the inaugural San Diego 50 and San Diego Trail Marathon put on by Off Road Pursuits got its start. Still it was a beautiful clear day for a run. Jamie and I took many photos of the participants which will be finished uploading in the next day or so. I took the occasion of the event to dust off my mountain bike which has held up very well for me neglecting it for more than a year. Check back here often for updates on the upload and in the meantime enjoy some shots of the scenery and of course Orion.
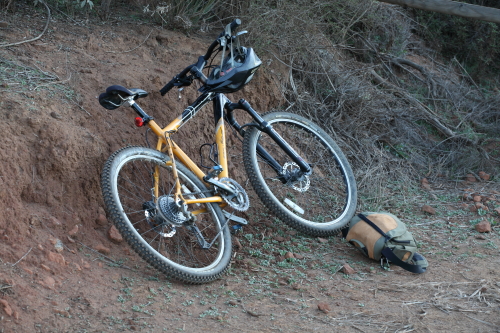
The trusty hardtail has held up well over the years.
It was cold when this was taken. Jamie made sure I knew that.

Twig & Berries: not that kind
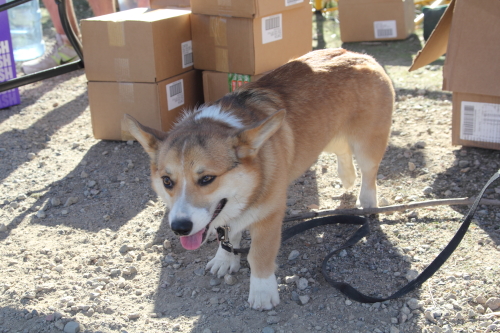
The friendliest dog ever
2012 Lake Hodges Trail Fest
October 21, 2012
The Lake Hodges Trail Fest is almost upon us. We know you are excited and we are excited too. Shez Photography will have three photographers placed throughout the courses and finish so we can best capture your participation in the great event. Lake Hodges is a very scenic location so we are looking forward to many great shots.
Make sure you look out for us on the trail. We will be wearing our new tan colored hats featuring our logo on the front and “Official Photographer” on the back. As always we will be photographing in full resolution so your photos will look just as good blown up on your wall as they are printed on a 4 x 6.
I’ve heard that some of you may be in costume for the event. This always makes it more fun. Be sure to check back on this post after the race for updates and for a link to your photos.
28 October 2012 Update: It was a great event. We took many great photos and they will be posted in the coming days. A quick shout out to Paul Jesse for putting on the event as well as the many volunteers. Also a shout out goes to the women who volunteered for the “Old Women can do it too” brochure. Check back here more more updates soon.
31 October 2012 Update: PHOTOS ARE UP! Check out the GALLERY to see all your race photos. Also click on the links below for individual course galleries.
5K Course Gallery: http://shezphoto.zenfolio.com/p973888984
15K and 50K Course Gallery: http://shezphoto.zenfolio.com/p999389648
Finish Line Gallery: http://shezphoto.zenfolio.com/p1015306275
Kids Fun Run Gallery: http://shezphoto.zenfolio.com/p893600105
Earn 50% off a Digital Download
August 28, 2012
Hello Athletes. Have you been eying that photo of yourself but put off purchasing it until now? Well this is the time to act. You can get a one-time coupon for 50% off a single Digital Download by simply starting a conversation. Go and register over with our friends at Amateur Endurance and make 5 posts in the forum. While you are there, check out the rest of the site including articles, free training and workout programs and a training tracker.
Then once you make 5 posts simply email Bryan@shezphoto.com for your coupon code. The code will be good until the end of the year so if you don’t see a photo you want yet then you can use it for a future event. So go on, strike up a conversation and save some money.
Hiking and Exploring in Yosemite National Park
July 15, 2012

View from Glacier Point. In the background you can Half Dome, Nevada Falls and Vernal Falls
Jamie and I recently went on a trip with some other family and friends to Yosemite National Park. It took eight hours including one stop to make it to the park. After an entire travel day we arrived in our cabin located within the park in Yosemite West. This is located well after Wawona and just before the turn off to Glacier point on highway 41. We stayed in a two story cabin with three bedrooms and another room that can convert the couch into a bed. Groceries were put away and we settled in to get some rest before setting out to explore the next day.

Bridalveil Fall
On the first day it was decided to go to the Valley and get a general feeling of Yosemite and visit some of the requisite locations such as the visitor center and the lower Yosemite Falls. The Valley is along Highway 41 and access by way of a long tunnel. There is also a second way in by way of El Portal road which eventually joins up to Highway 120. We did not explore any further north than the Valley however. When you exit the tunnel, you get a pretty good view of the valley. We also explored Bridalveil fall on the way into the Valley. It was on this first stop that we realized just how crowded Yosemite is this time of year. Hundreds of people scurried over the rocks where the path ended to get a closer look at the falls. The way past the end of the path was treacherous and even marked as such and not something that should be attempted while carrying a heavy DSLR. The path up to that point by contrast was paved and nearly flat.

Yosemite Falls
After we did all these things we went back to the Minivan and had lunch. We spent the rest of the day in the Valley looking for ice cream. Again we were reminded of the crowds. There is a shuttle system in the valley and each shuttle was so packed that every inch of the isle had someone holding on to the hand railings and standing. A vast percentage of the visitors were from foreign countries.

Sentinel Rock

Bridalveil Falls next to the Three Brothers
The last thing we did on our first day exploring was drive up to Glacier Point. There is also a path to this point but it is extremely strenuous and takes most of a day to do. At the top we found a crowded parking lot. Once we walked about a quarter mile though we saw the most amazing views. You are able to see everything from El Capitan to Half Dome to Cathedral Peak in the distance. Also visible are many of the falls including Upper and Lower Yosemite, Vernal, and Nevada. If you have Vertigo, you should stay well back from the railing. You can also see almost straight down into the Valley from here.

Nevada Falls (top) and Vernal Falls (bottom) as seen from Glacier Point

Half Dome as seen from Glacier Point
The next day we had breakfast at The Ahwahnee Hotel dining room. From there, Jamie and I went on our own hike and the rest of the group stayed around and explored the hotel. We went to hike Mist Trail. This is the trail which ends at Half Dome although we just took it to the Top of Vernal Falls. This is still a one and a half mile hike with one thousand feet of elevation gain. For most of this hike the trail is also called the “John Muir Trail” until just past the first spot you can see Vernal Falls and then the John Muir cuts right up some steep switchbacks. Mist trail continues along the water path and quickly becomes a path of makeshift stairs. Fortunately Jamie and I brought trekking poles which we put to good use on this section. The path brings you up to a section where the path is literally cut into the side of the mountain with a railing on one side and barely wide enough for two people to pass but only if they are touching. Once on top you can see Emerald Pool. This is a pool of water which sits pretty close to the edge of the falls although not immediately next to it. For this reason the signs say “no swimming” which the throngs of people who visited immediately disregarded.

View of Vernal Falls on the way up
Once at the top of Vernal, Jamie and I took a much needed rest and I put in a call to let people know where we were in the hike. Cell phone reception in the valley is pretty non-existent and this is one of the only places I could make a call from. We ate some snacks and finally started down. By this time of course our legs were like mush so the trekking poles came in handy yet again. For the decent we extended them about three inches and then took one step at a time until finally we got down to the shuttle again.

At the top of Vernal Falls

Emerald pool
The last day our group had to explore Yosemite was spent in Mariposa Grove. There is a shuttle in Wawona which will take people over there during times when the parking lot is full. From the shuttle stop it is about one mile to reach two of the more interesting trees including the “Grizzly Giant” and the “California Tunnel Tree”. These trees are in the lower grove and if you continue on you can find many more interesting trees in the upper grove. The trees in the grove are diverse but the ones people come to see are the giant sequoia. The Grizzly is by far the widest tree I had seen before and the tunnel tree is cut out so you can walk right through it. Most of these trees have lived through at least one fire and you can see where the trunk is burnt and then covered over with new bark.

California Tunnel Tree
Finally our trip was at an end and we packed up and headed back. Somehow the trip back only took six hours so we got in plenty early to get some rest before work the next day.
To see more photos from our trip to Yosemite visit our GALLERY.