


Dog Friendly vacation in Big Sur
September 16, 2015
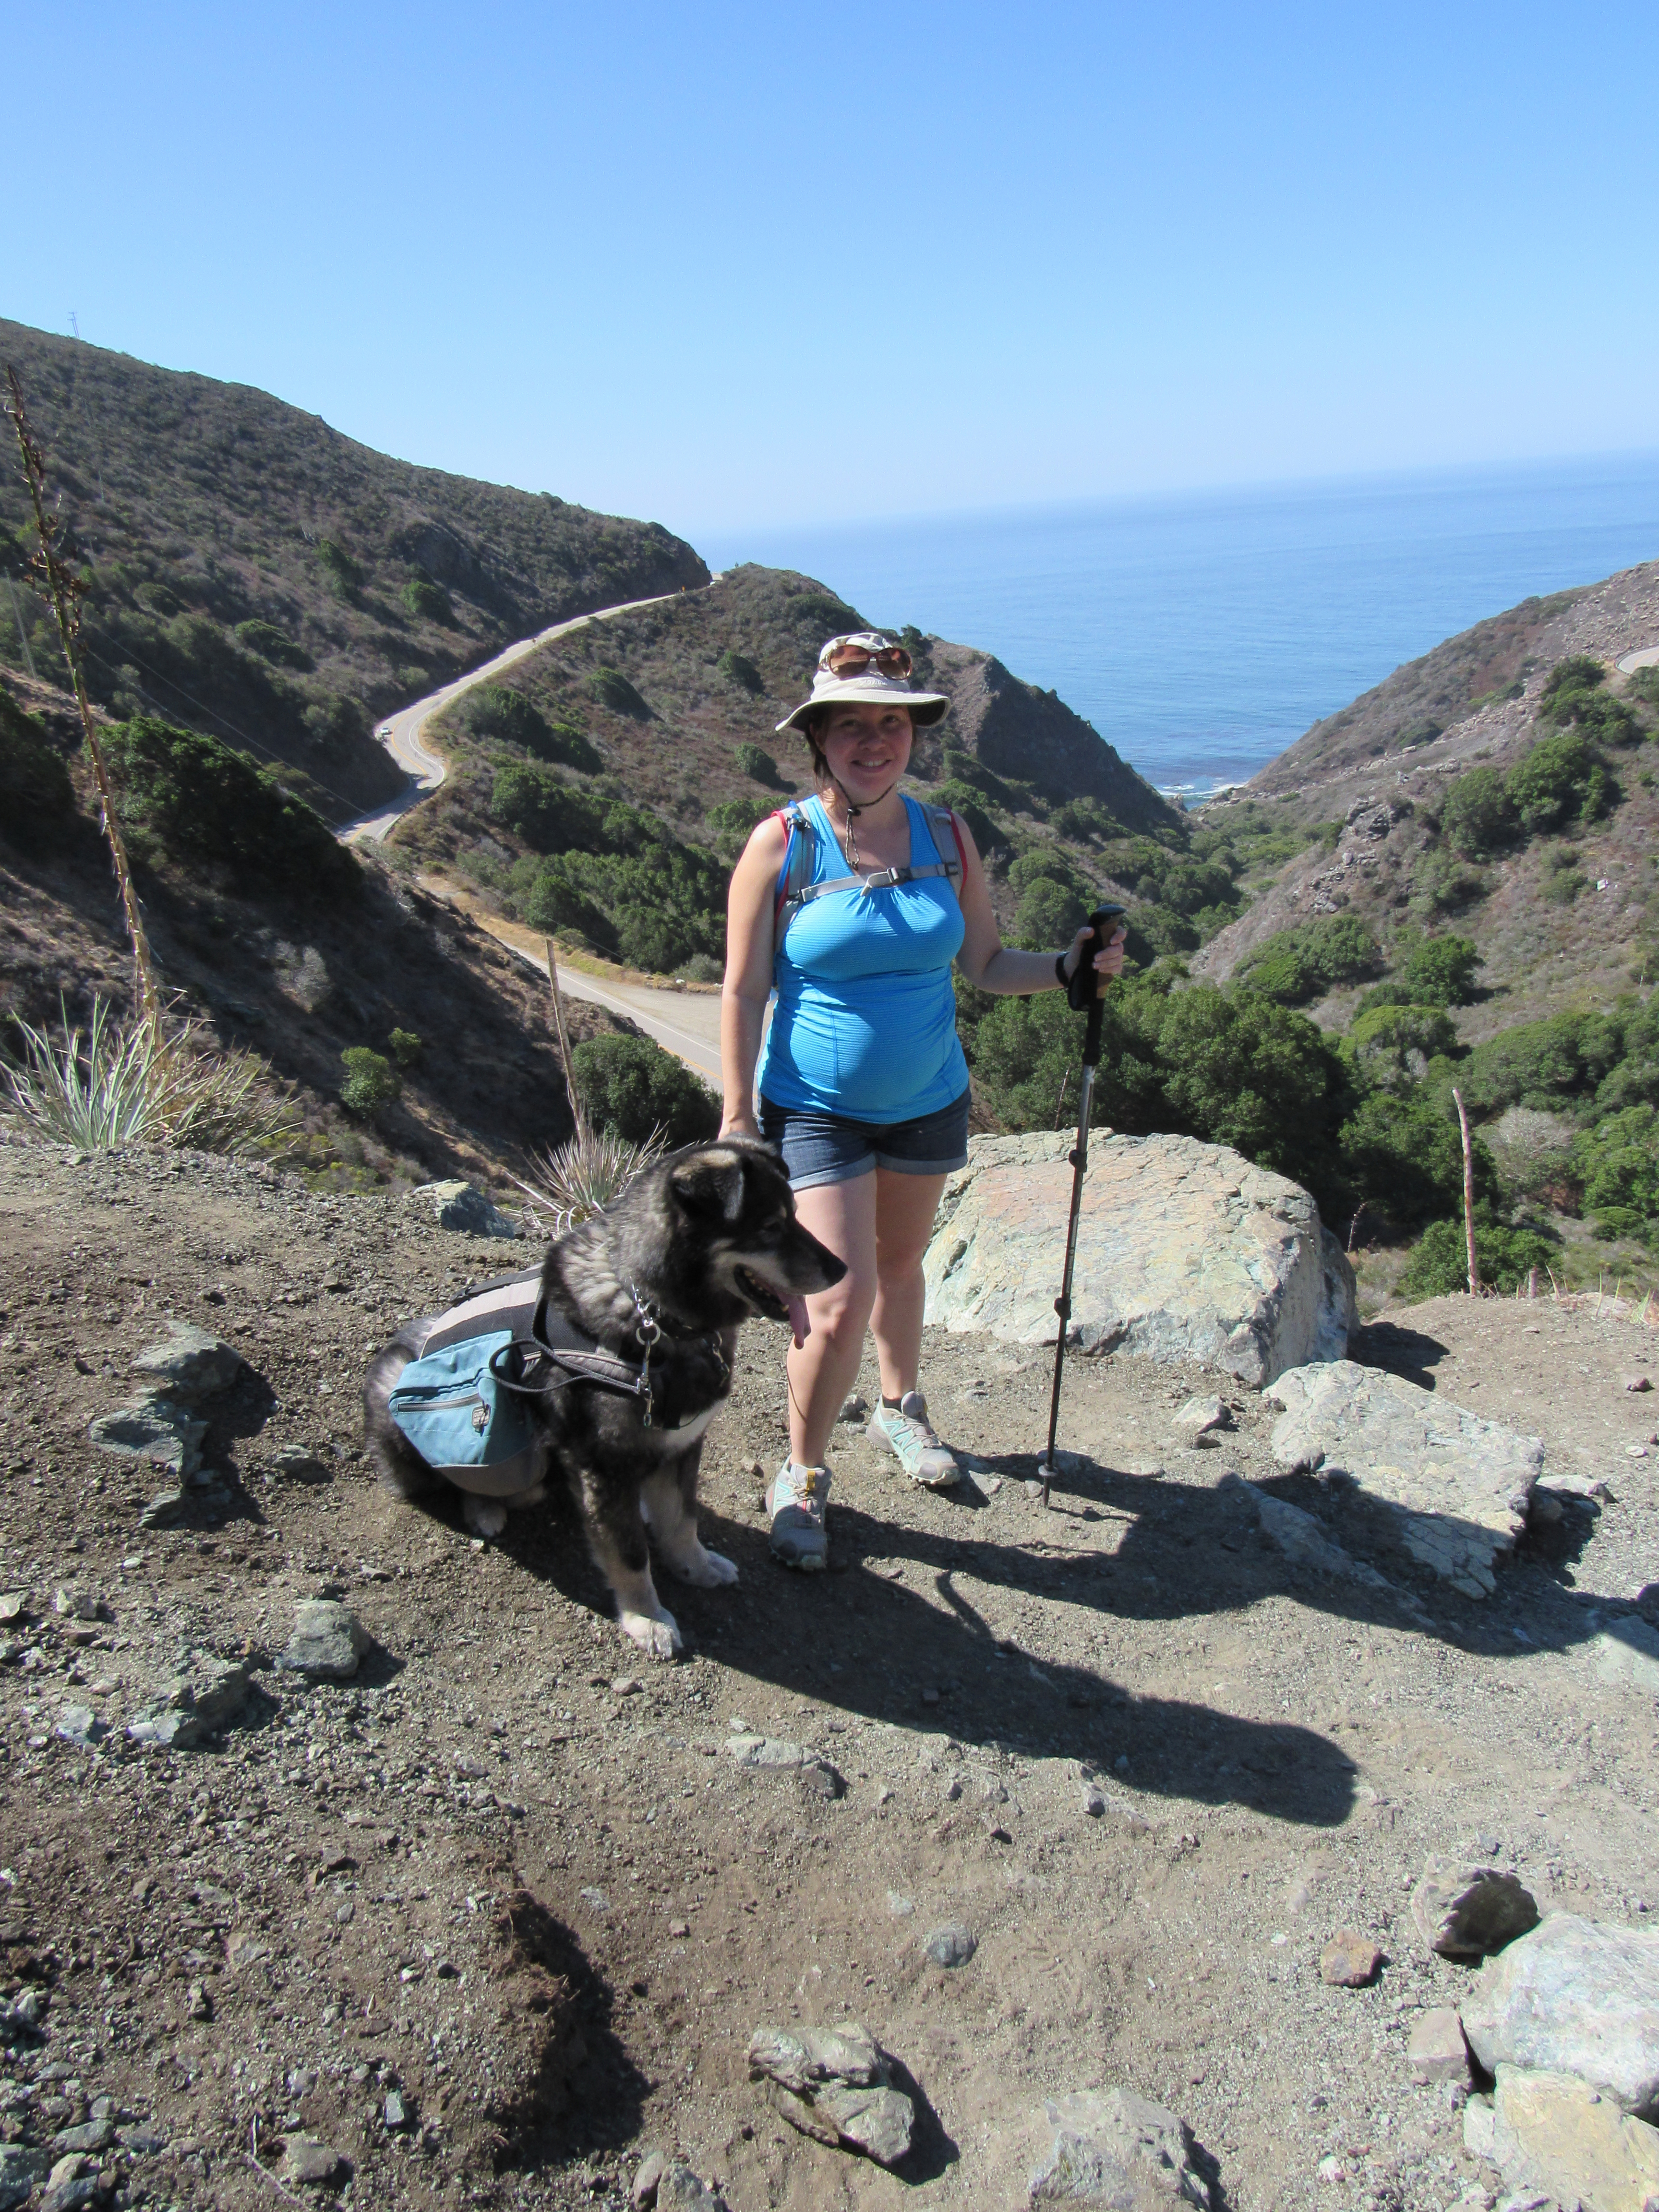
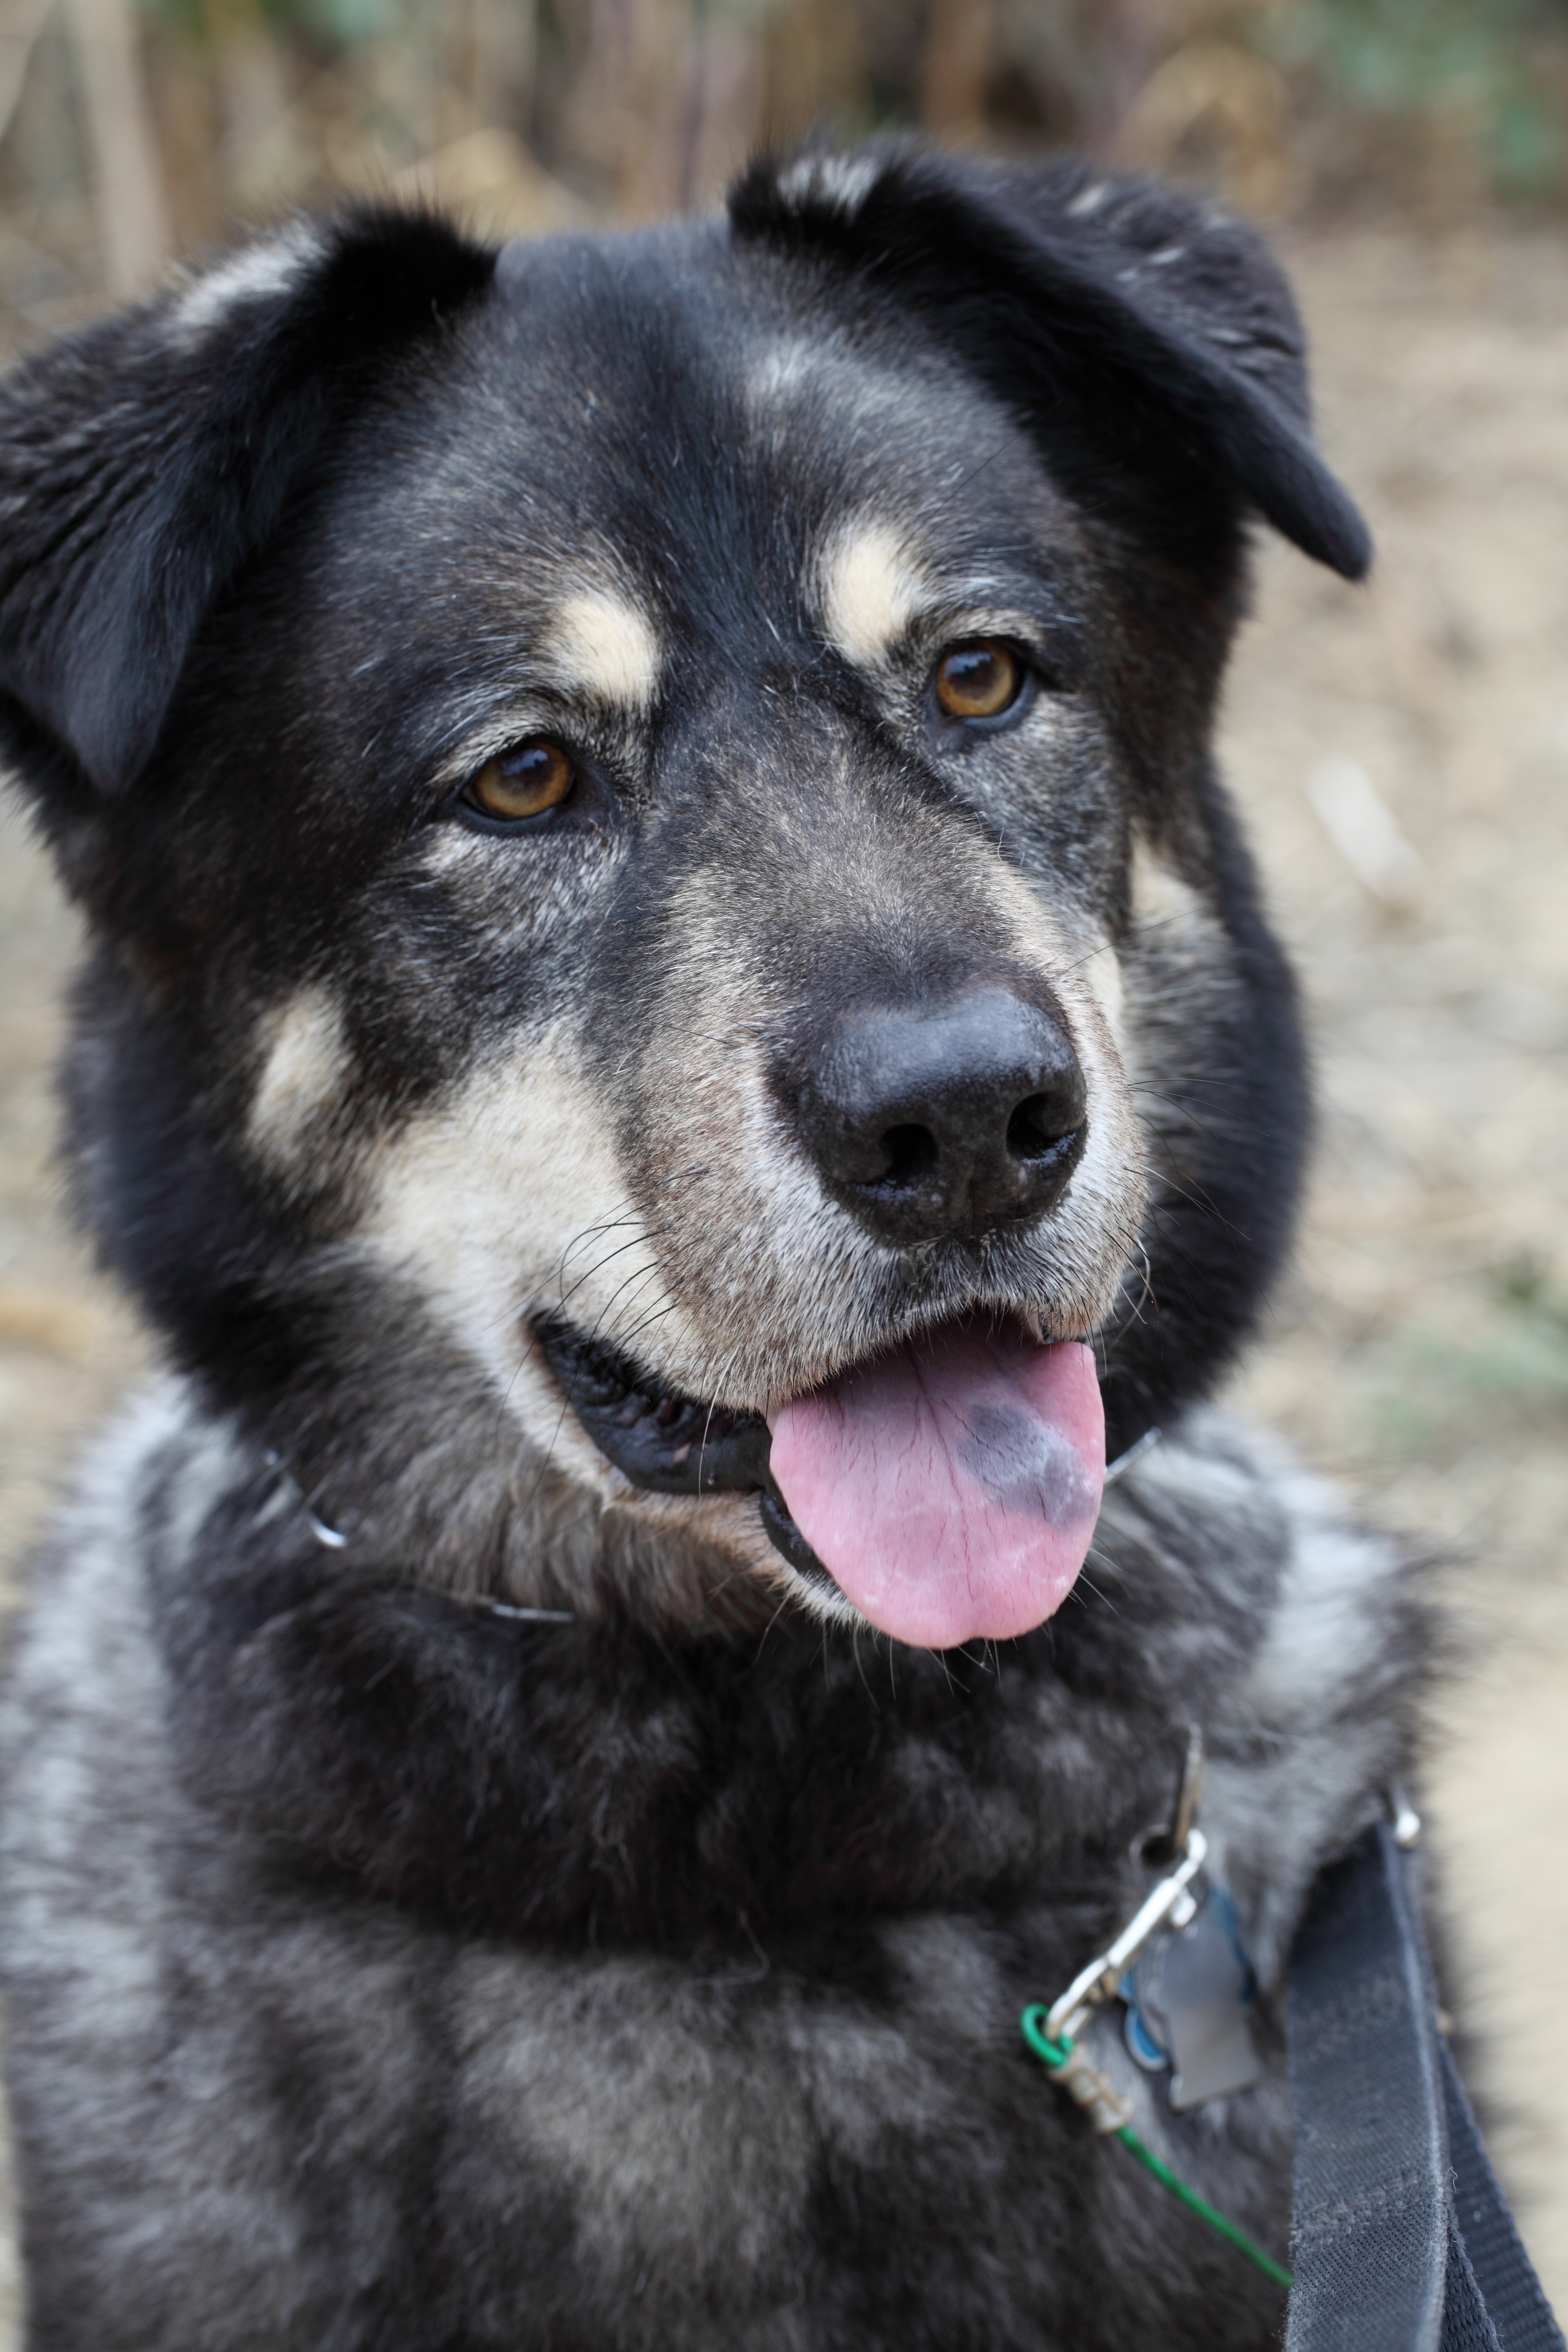
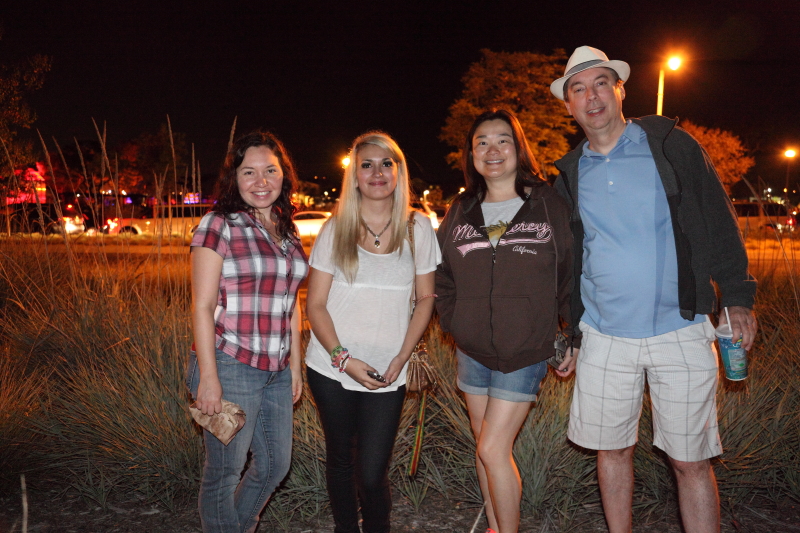
Jamie, Maxx and I went on a road trip “off the grid” to Big Sur. We also spent two days on the way up in Cambria. Before you ask, Jamie is about six months pregnant. This made the trip all the more exciting and challenging. We went on this trip as a much needed vacation, a last chance to get away before becoming very busy with a newborn, a dog vacation where Maxx got to walk or hike every day, a fitness/adventure vacation for us, and finally a chance to get some great photography in some of the premier destinations for landscapes in California.
The maps here detail almost all the locations we visited in case you want to visit them and see this amazing natural beauty for yourself.
http://www.mapmyride.com/workout/1154762655
http://www.mapmyride.com/workout/1156053111
WR Hearst Memorial State Beach
http://www.mapmyride.com/workout/1157300397
Salmon Creek trail and Salmon Creek falls
http://www.mapmyride.com/workout/1157866781
http://www.mapmyride.com/workout/1160595485
http://www.mapmyride.com/workout/1160595531
Carmel Beach City Park and Carmel Meadows
http://www.mapmyride.com/workout/1160975833
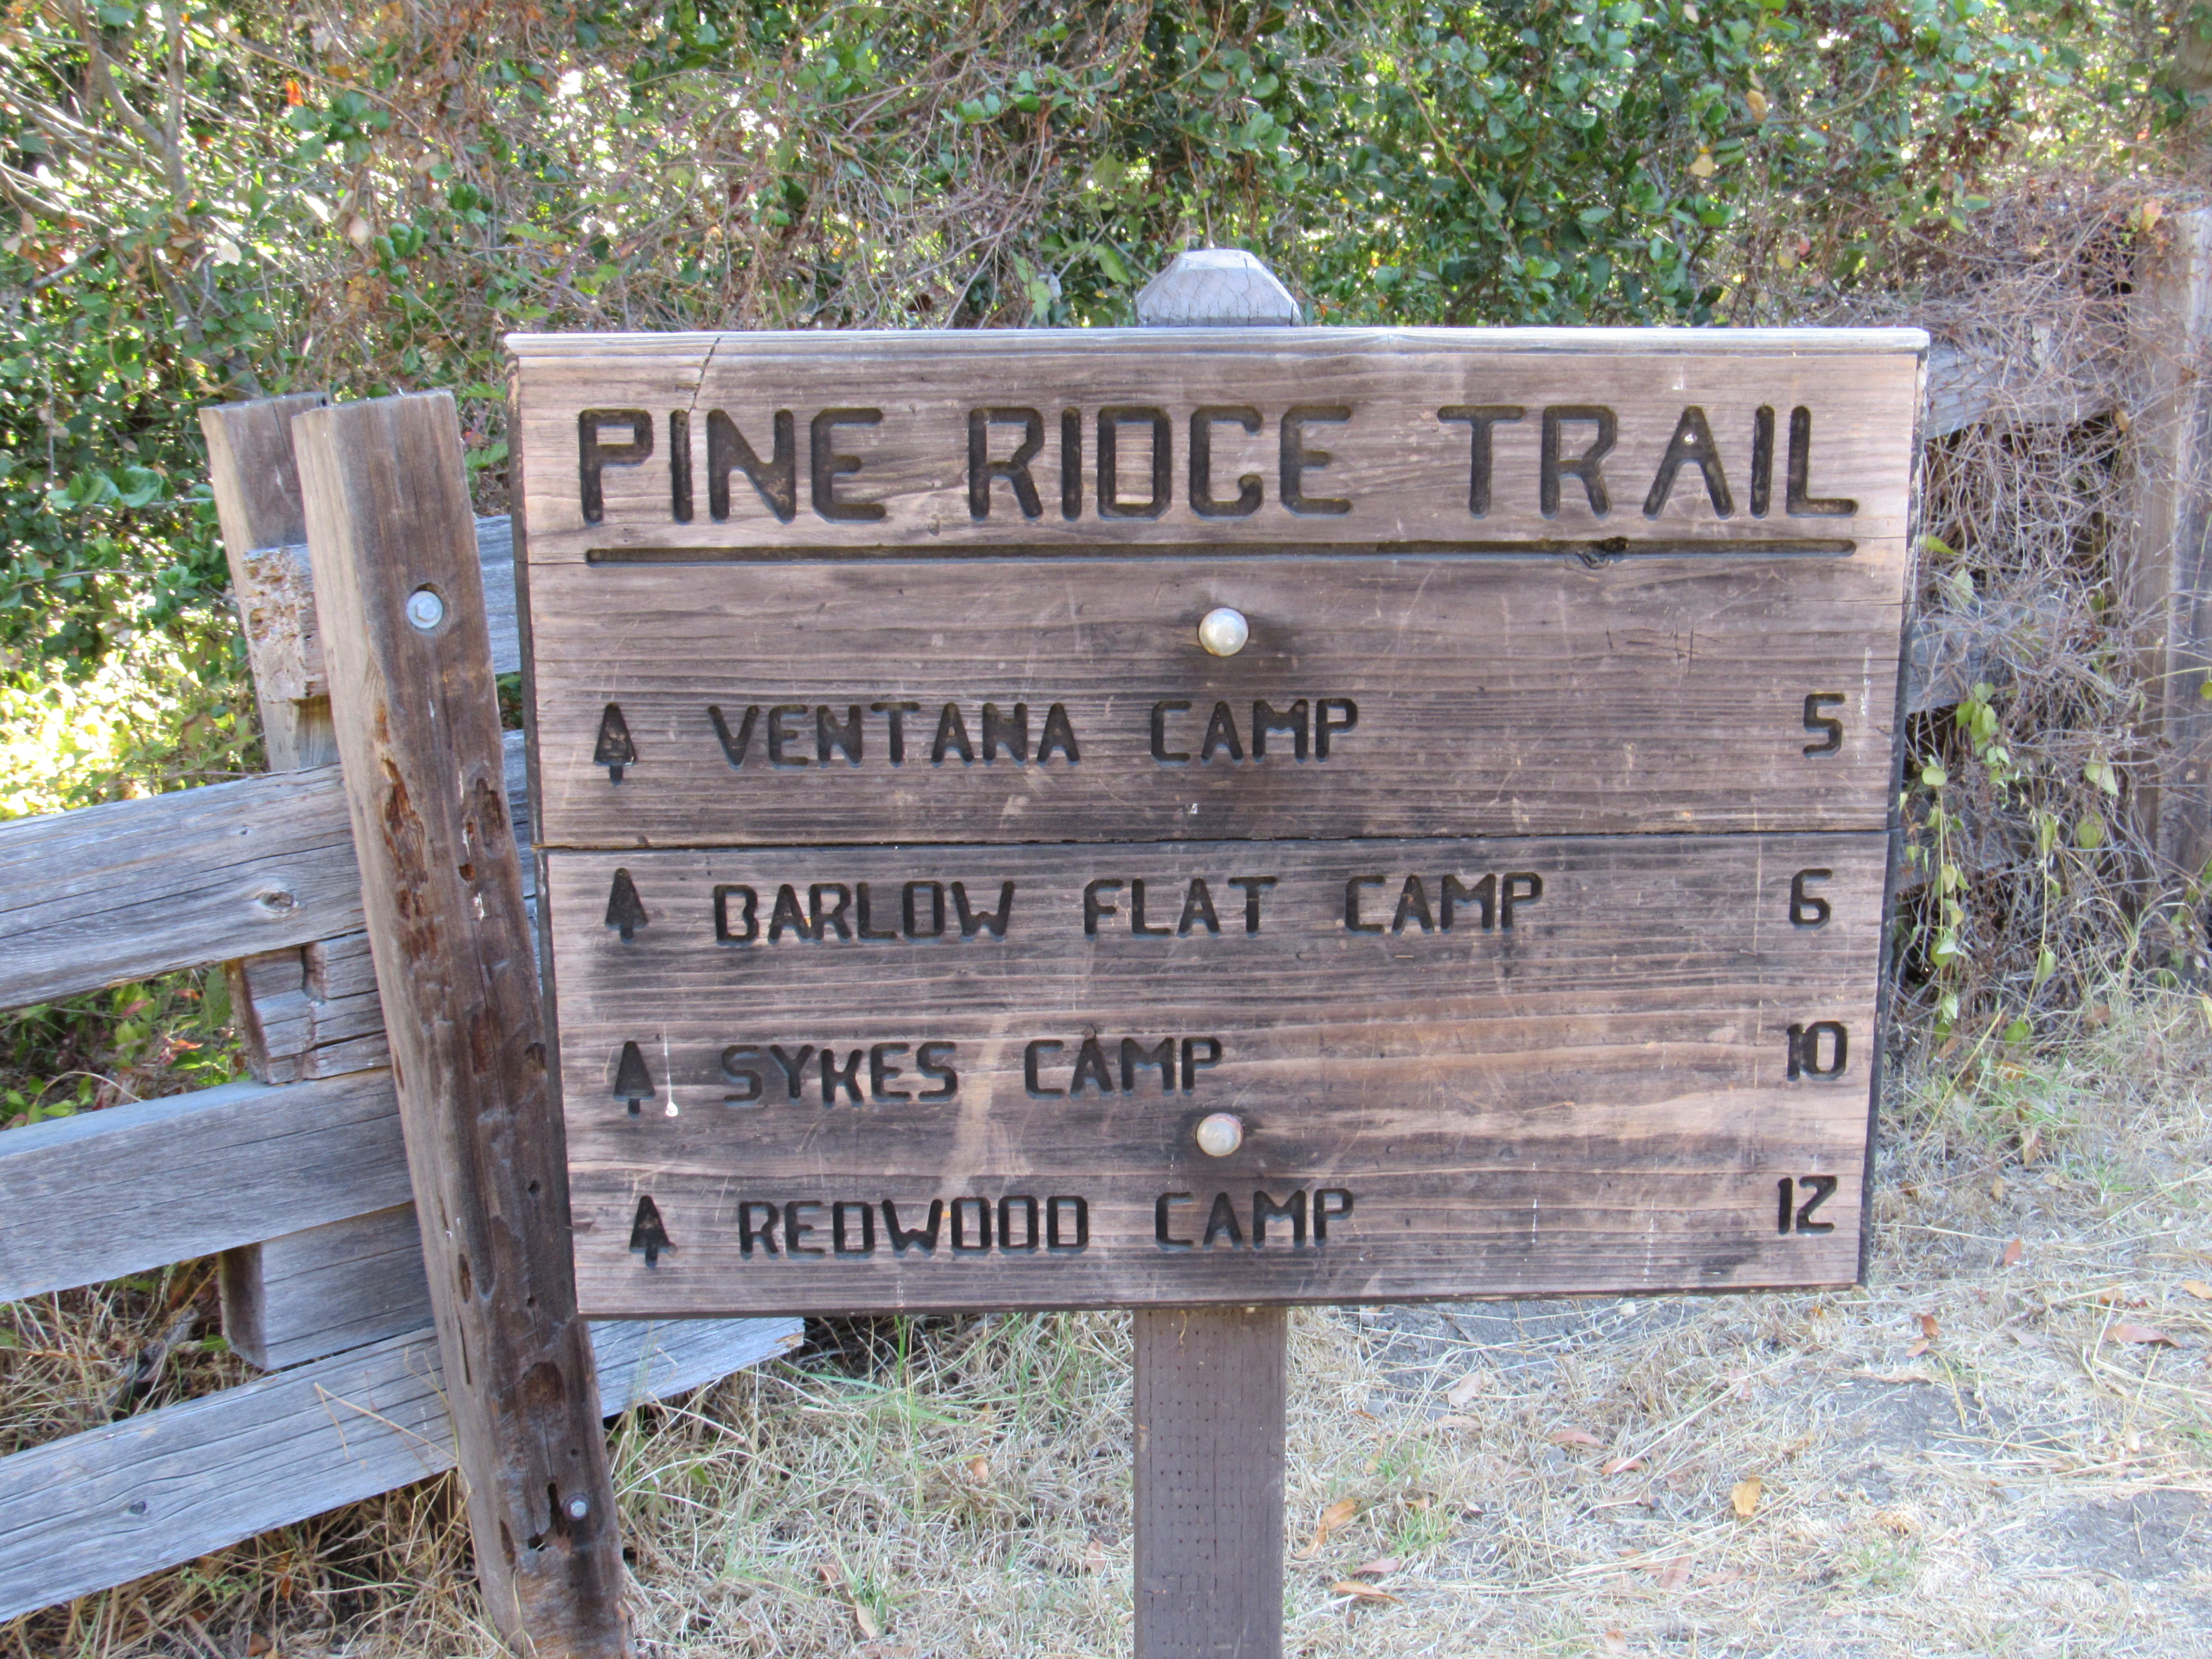
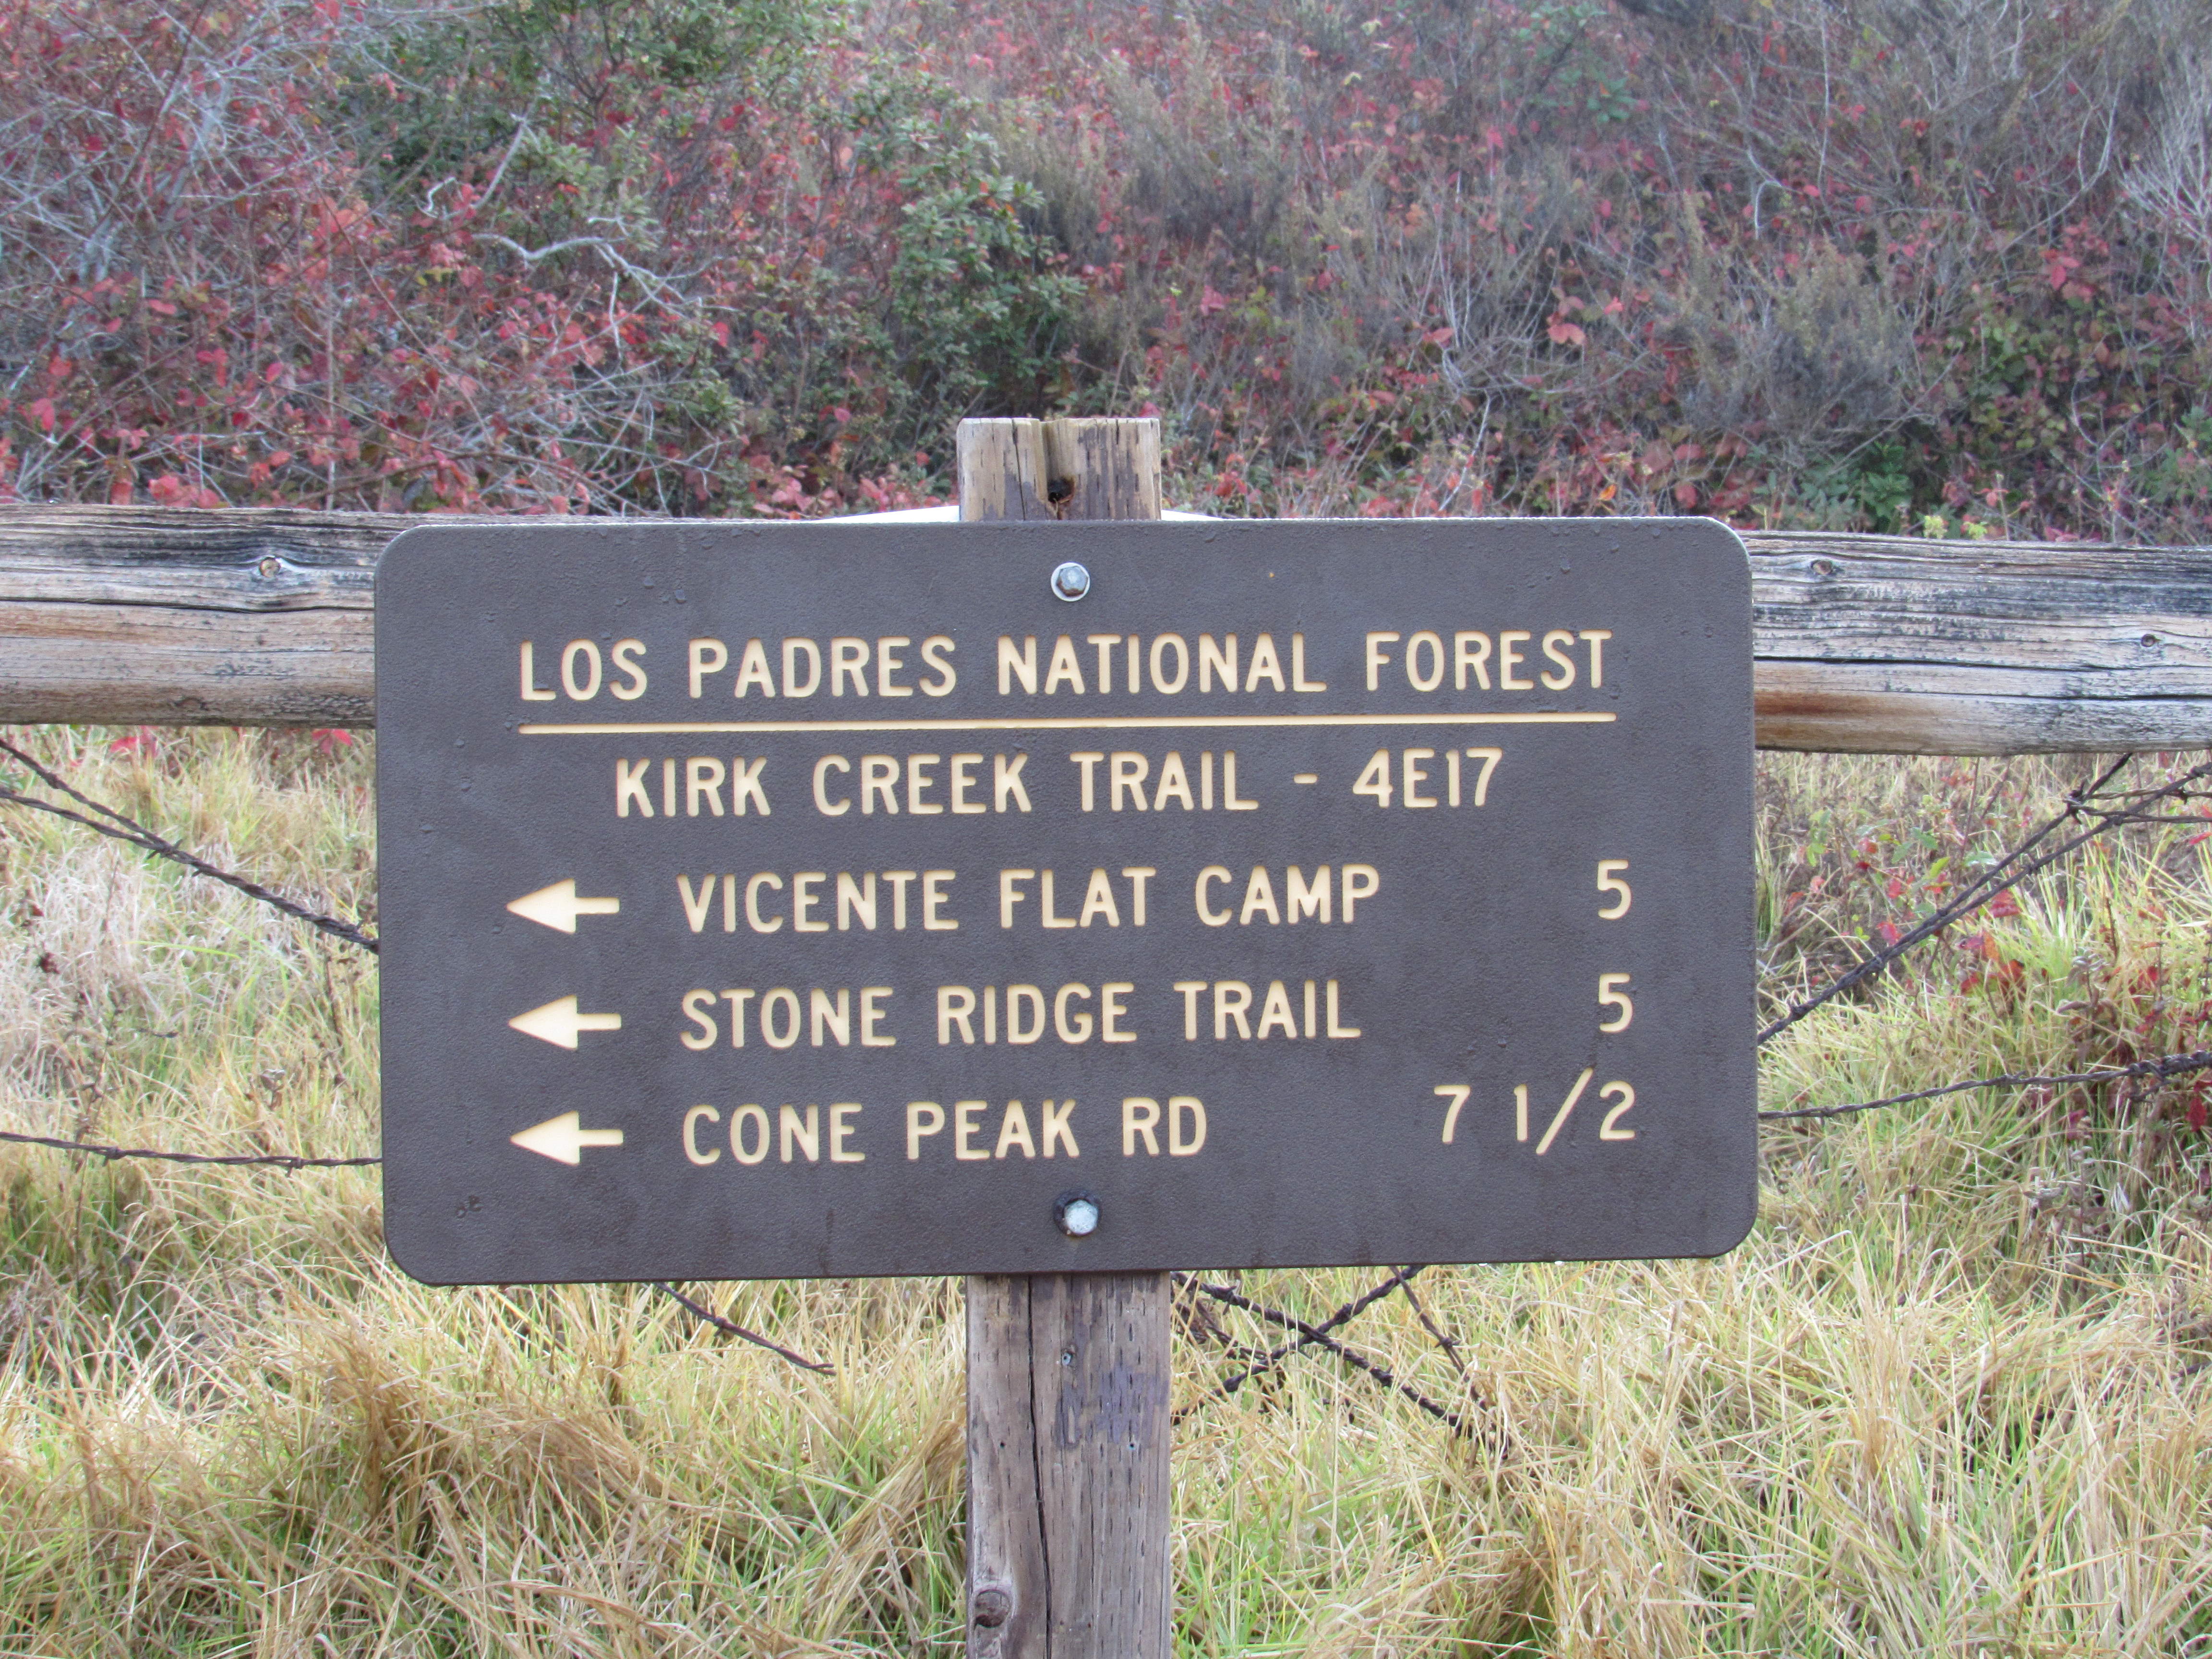
Vicente Flat Trail from the Kirk Creek campground
http://www.mapmyride.com/workout/1162664265
http://www.mapmyride.com/workout/1164660097
Some other places we stopped at include:
Click any link to jump to that section
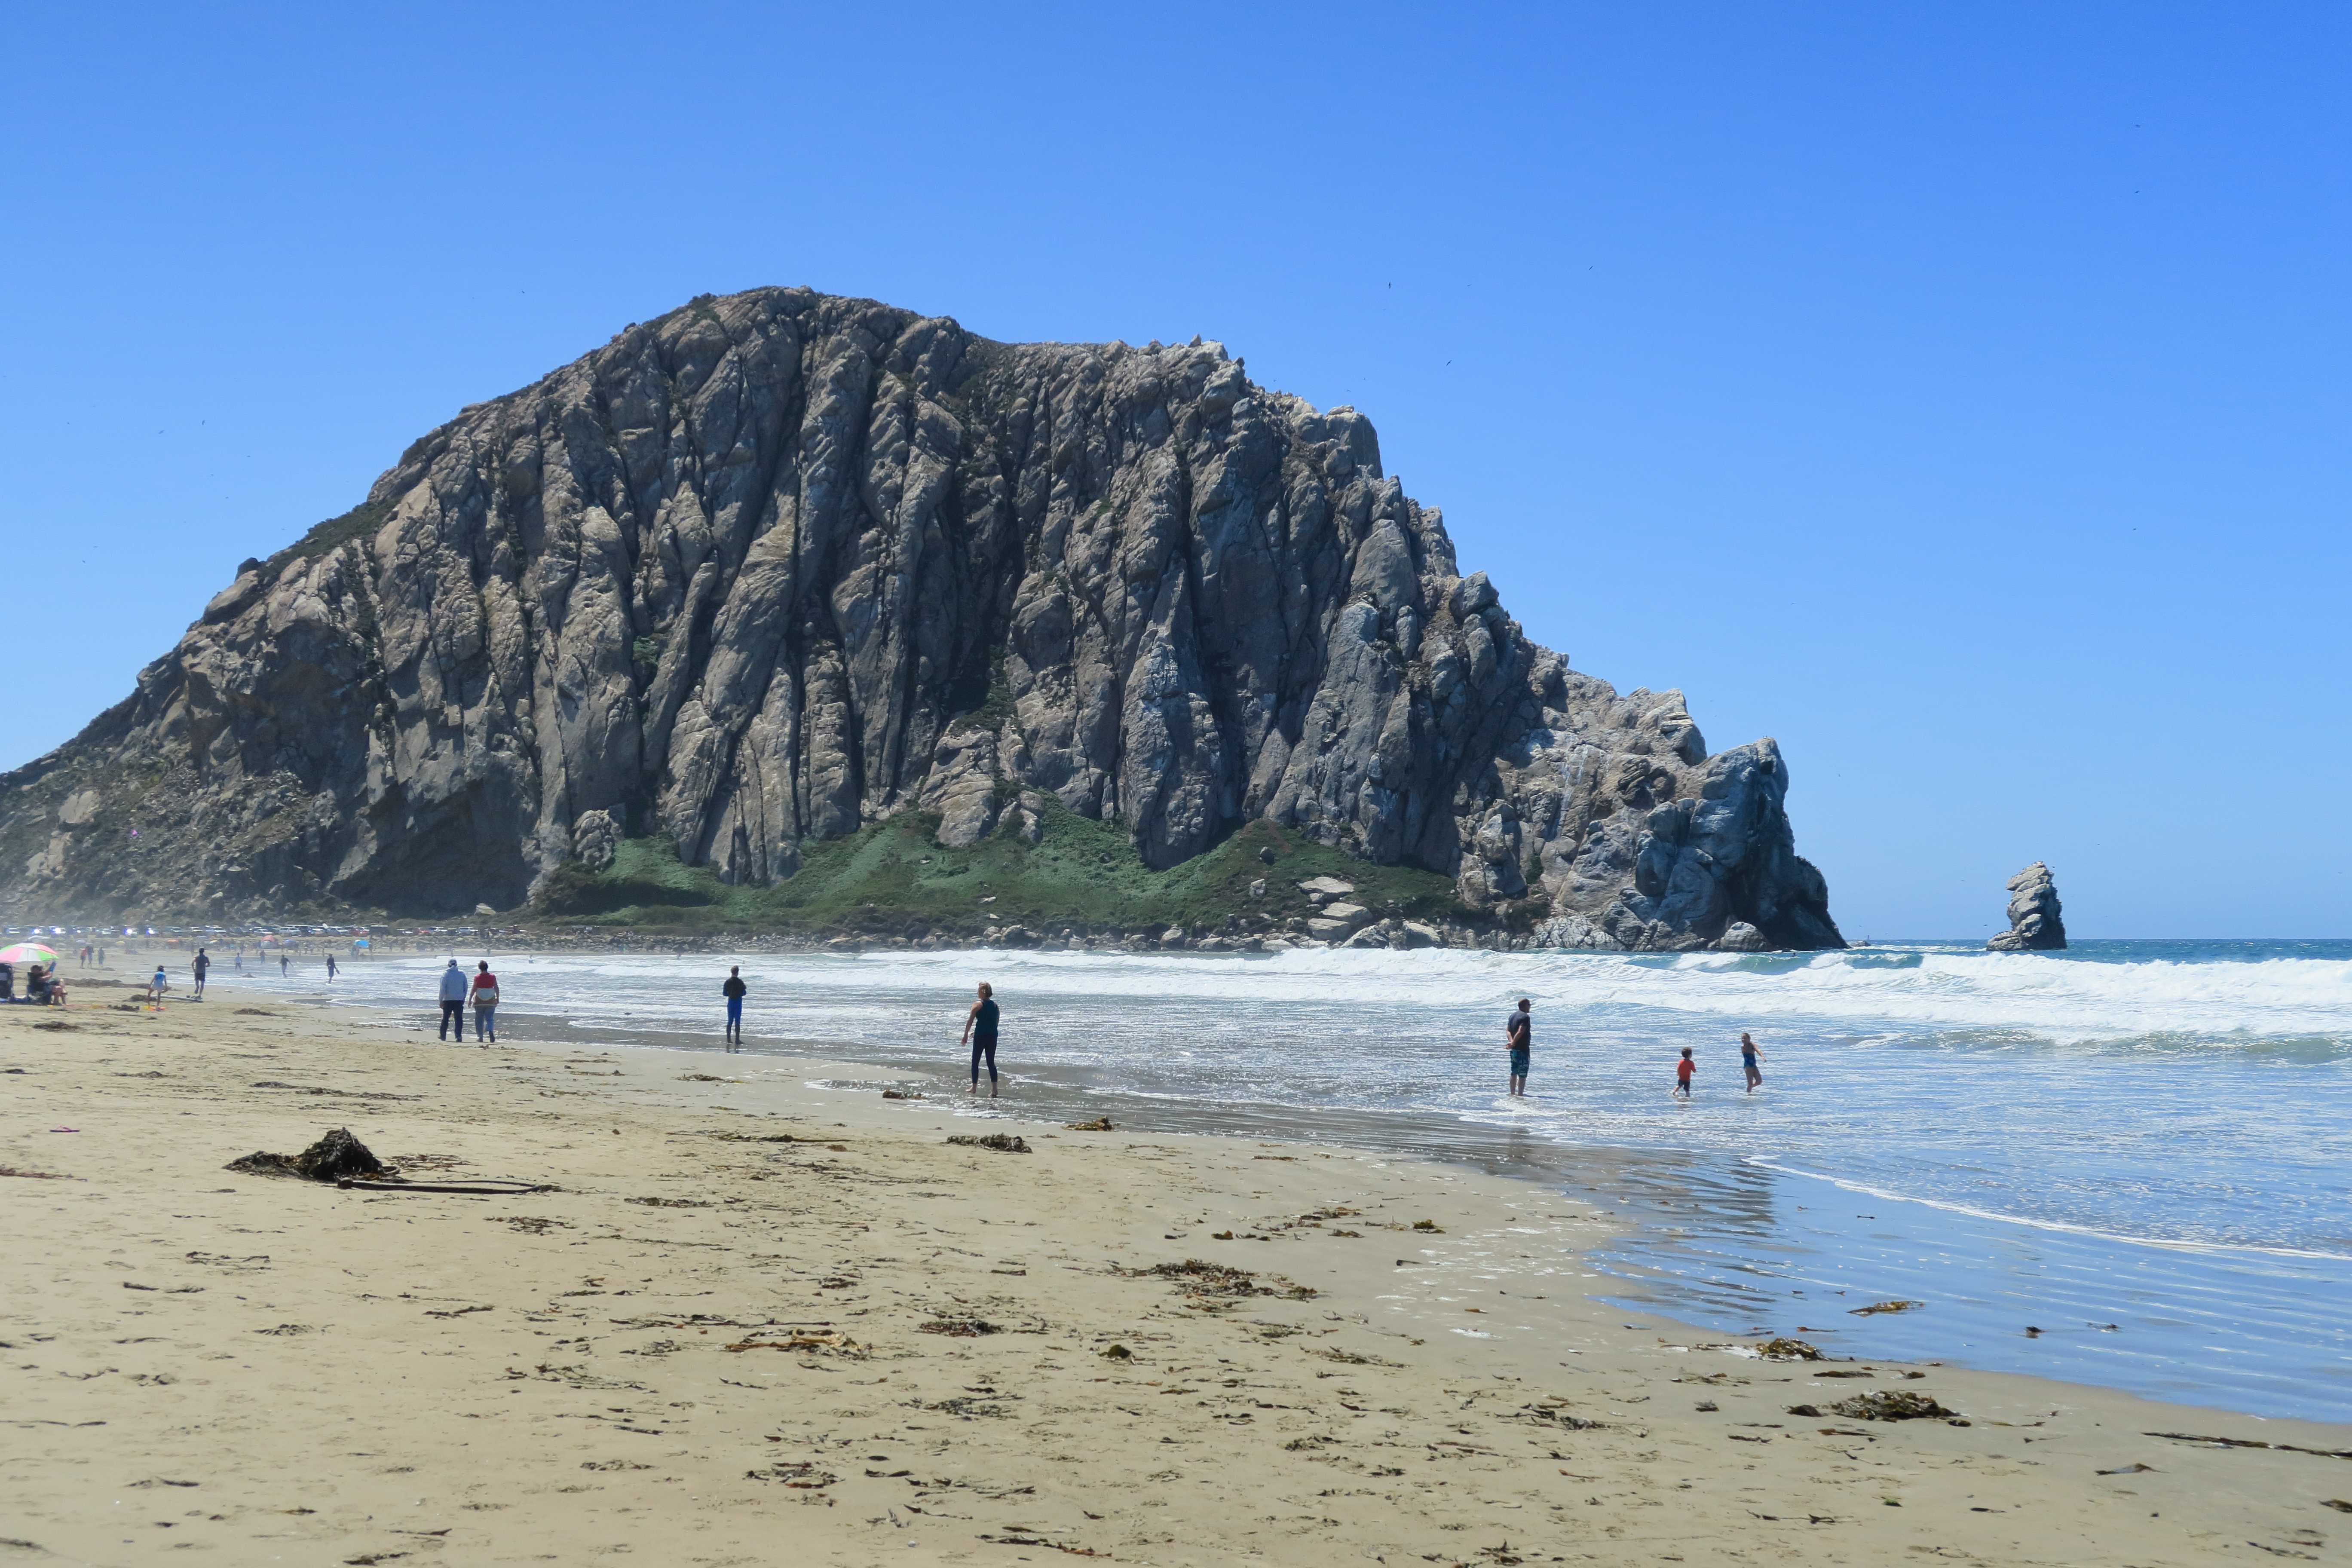
Morro Rock
Our first stop on our trip was to a dog friendly beach which also happened to be the site of a massive rock outcropping jutting out into the ocean in the form of Morro Rock. The formation functions as the northern tip of Morro Bay. We did a simple out and back walk along the beach, taking photos along the way. The first thing I noticed was the vast increase of birds on the beach compared to other more southern beaches. This would be a theme that continued right up the coast. Maxx had fun since it had been a long time since he went to a beach. There were a few off-leash dogs but none caused Maxx any trouble. The turn around in our walk was the point where dogs were allowed up to. The portion north of that point did not allow them. We were only at this stop for a short while but we managed to capture the birds and the rock itself.
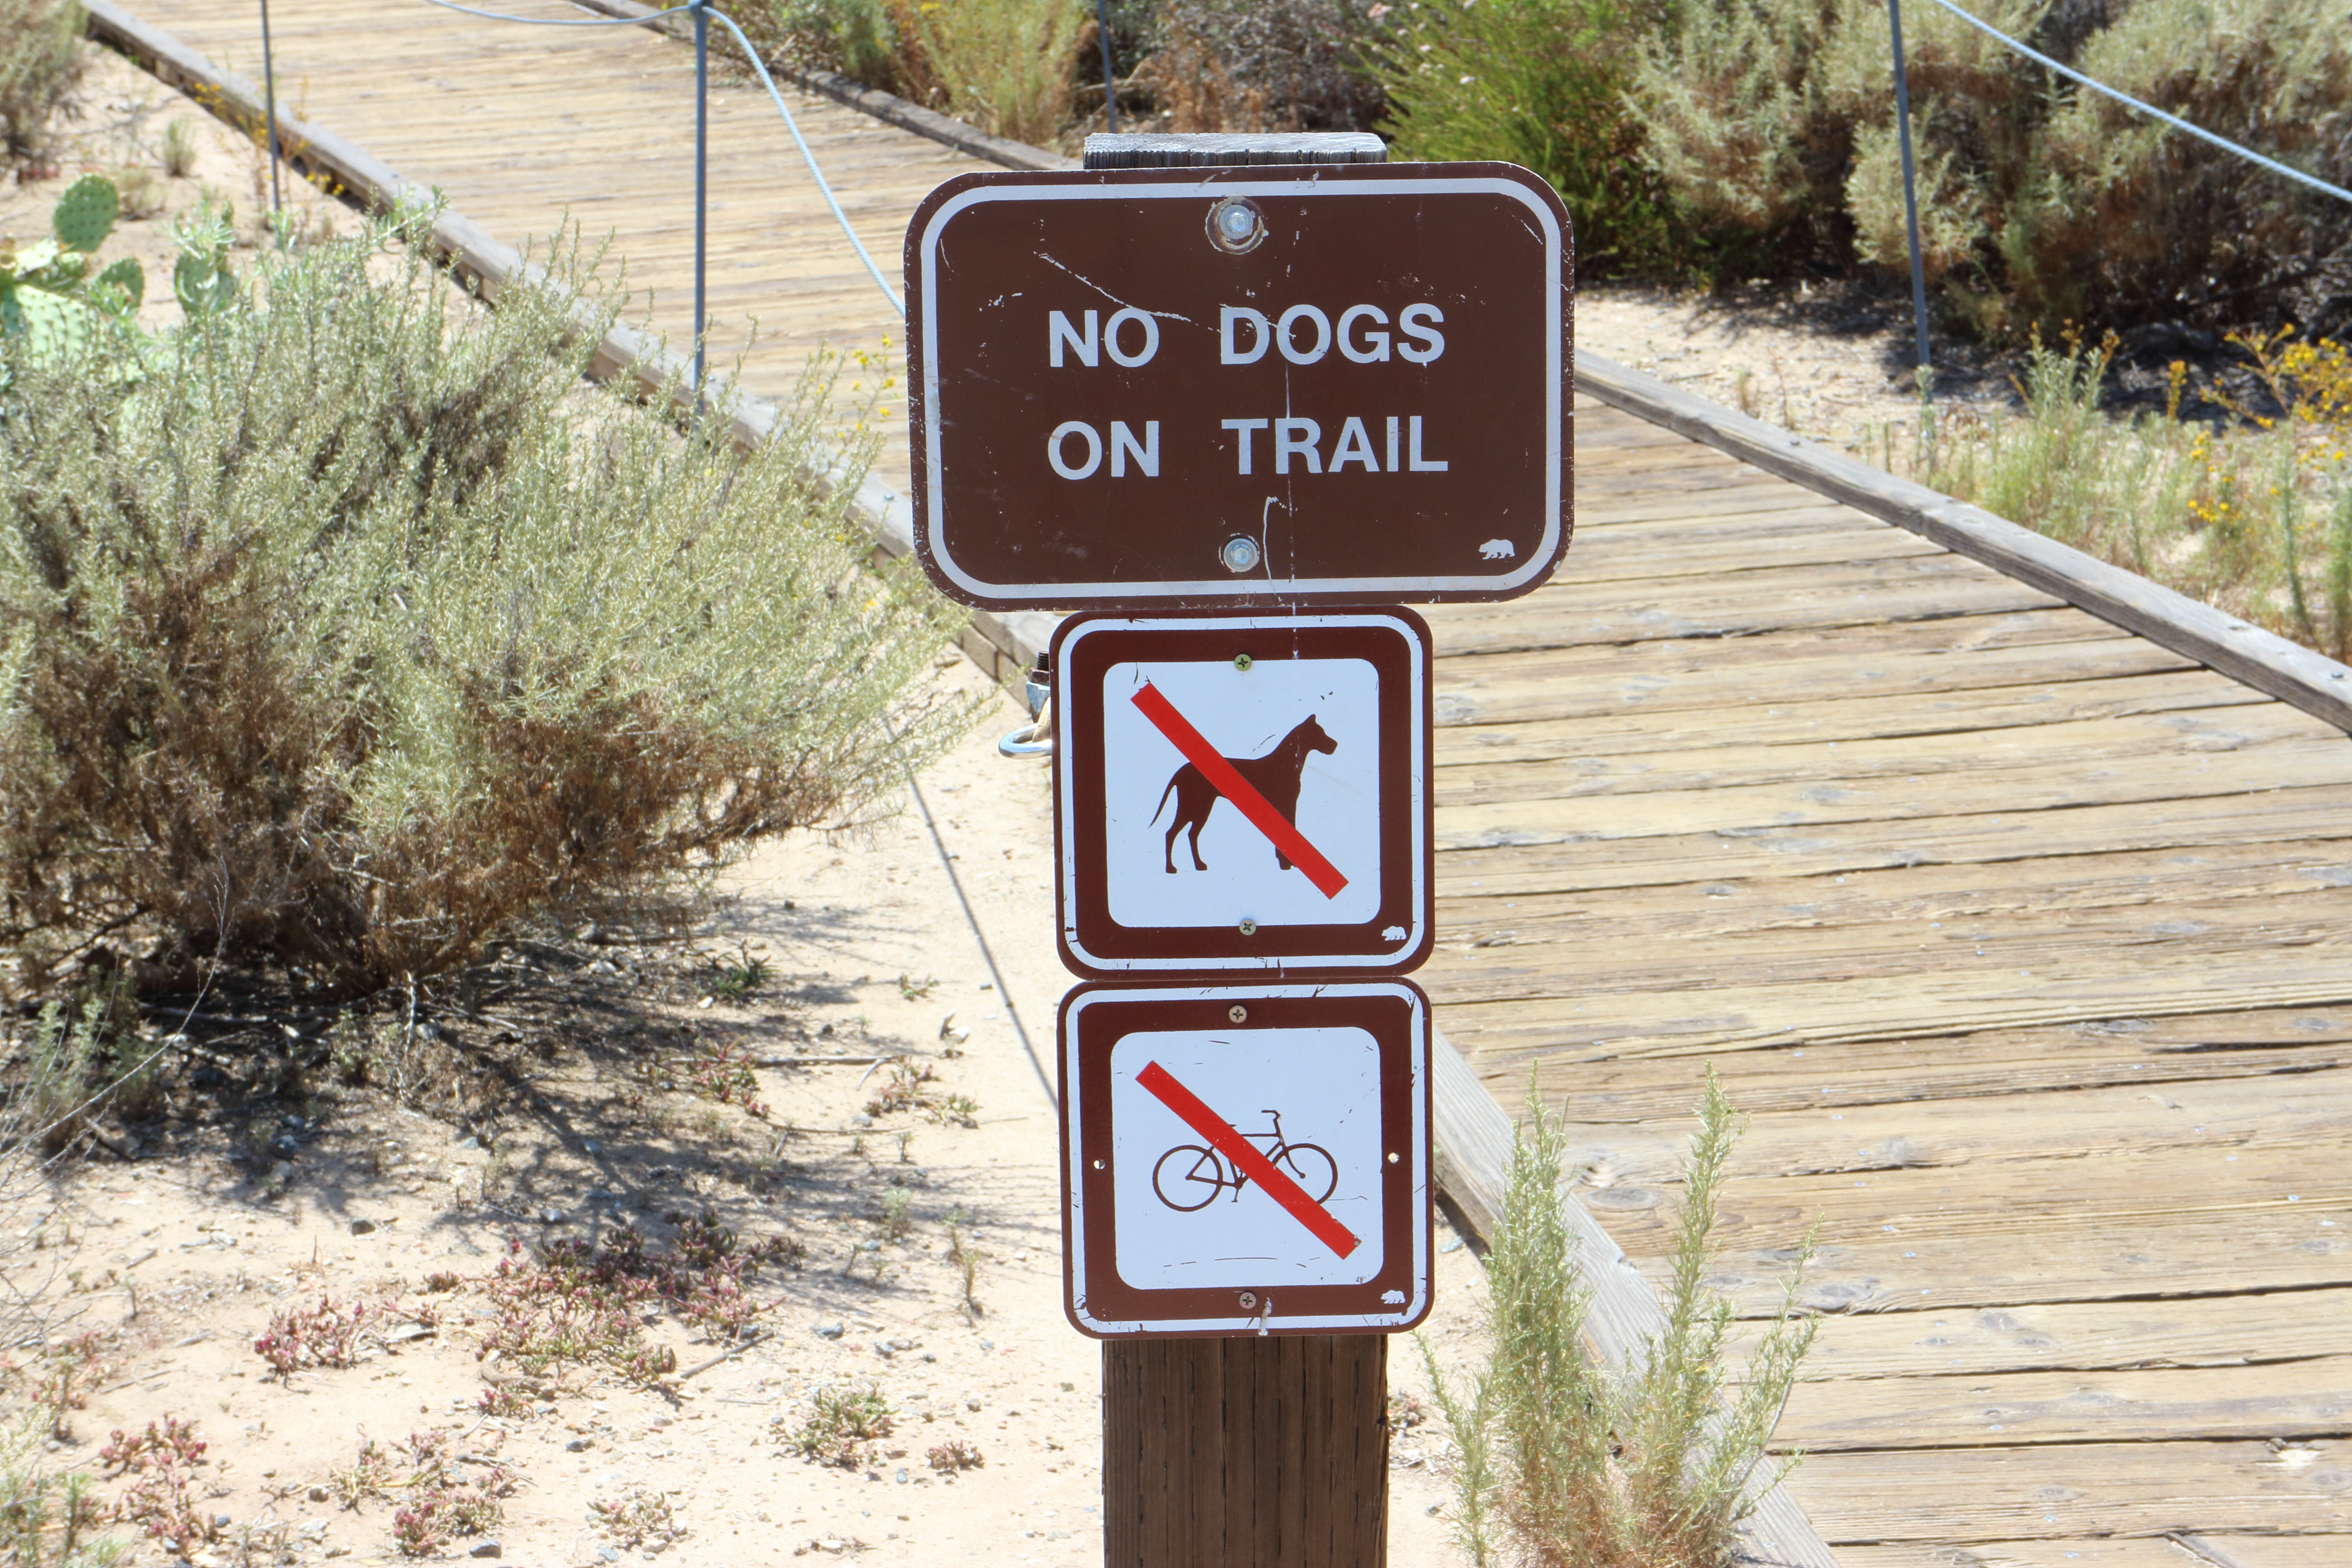
This beach in Cambria allows dogs on the boardwalk but not on the beach below. This is fine because all the views are really best from above. The boardwalk runs the length of the beach and on any given sunset, it is crowded with photographers trying to capture the hues of twilight and the effect they have on the coastline. Jamie, Maxx, and I walked the entire length of the boardwalk at some point or another in our stay in Cambria.
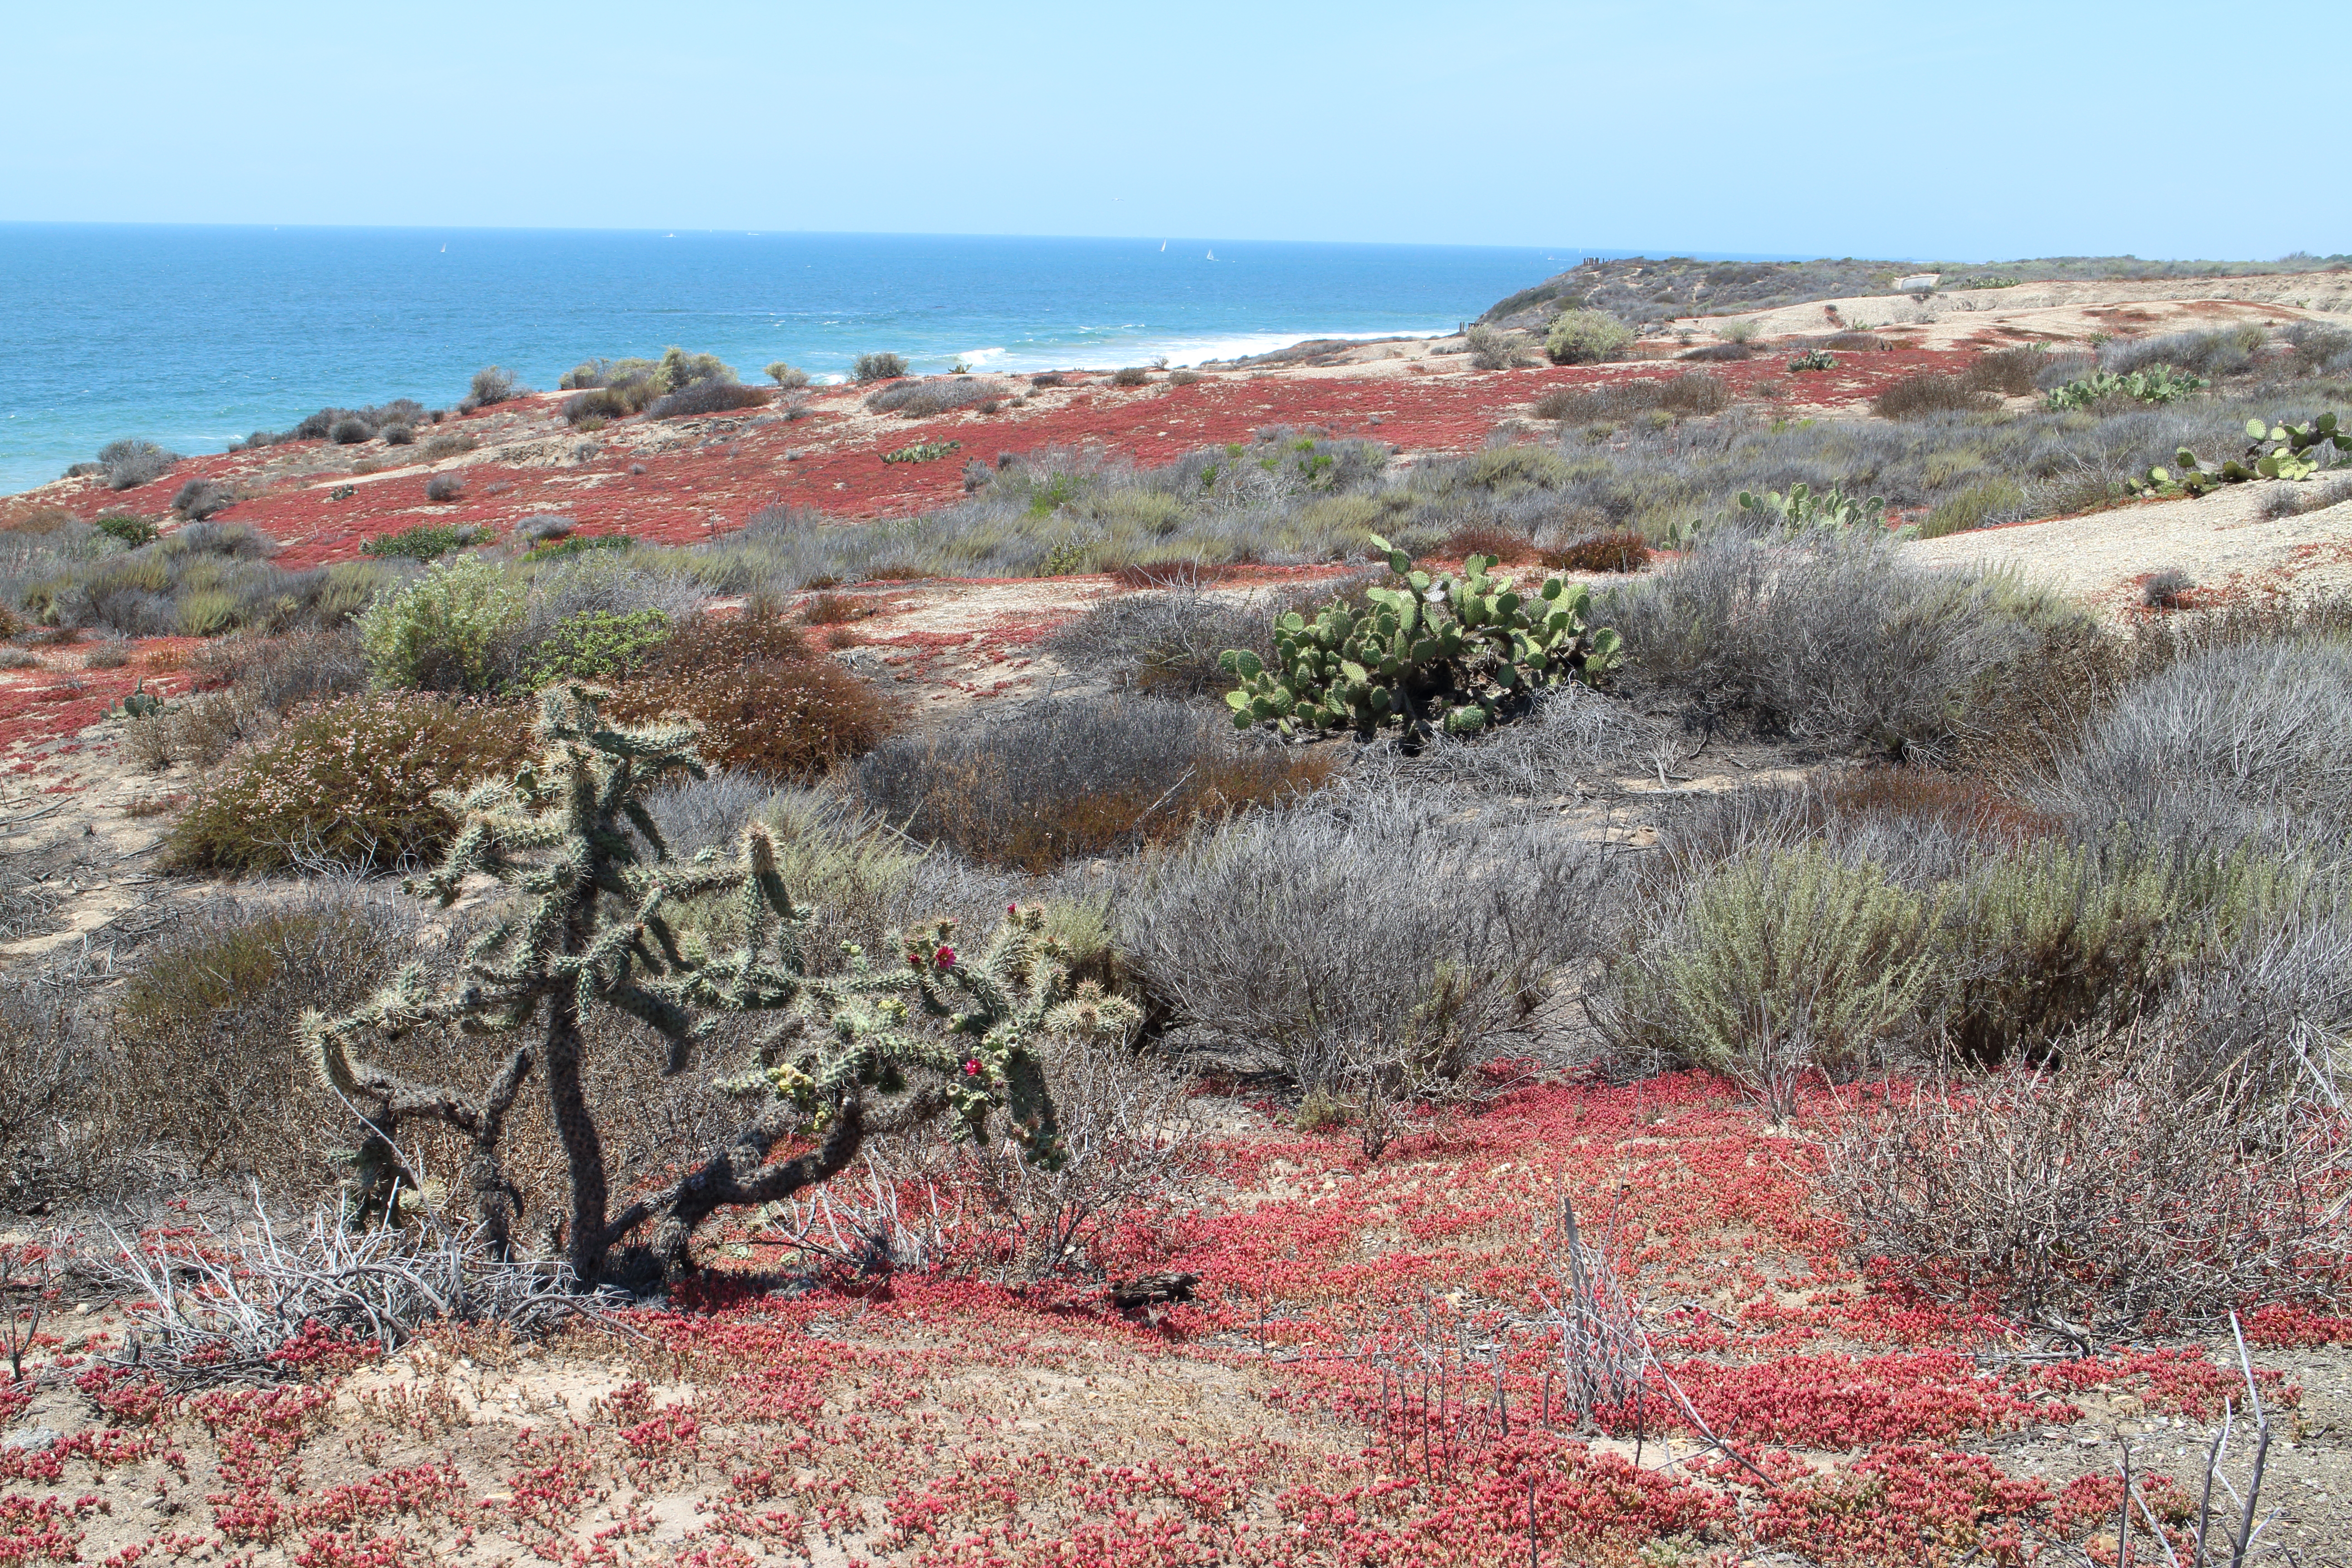
Cambria was the location of our first night in a hotel. We stayed in Mariner’s Inn for two days which gave us time to walk right from the front of the hotel over to the Fiscalini Ranch Preserve. Cambria is billed as the “Pines by the Sea” and Fiscalini embodies this with rich undergrowth leading into dense pine forest and then heading straight out into bluffs overlooking the shoreline. Here we saw more dogs and the only issue is the lack of shade on the bluff side of the trail. We saw more birds including the very common blue jay and some turkey vultures overhead. We also saw the very scenic coastline which repeats itself up for hundreds of miles. We made sure to bring plenty of water which was a good idea because even by the coast, the heat began to sink in and the one public restroom had the water shut off due to drought conditions.
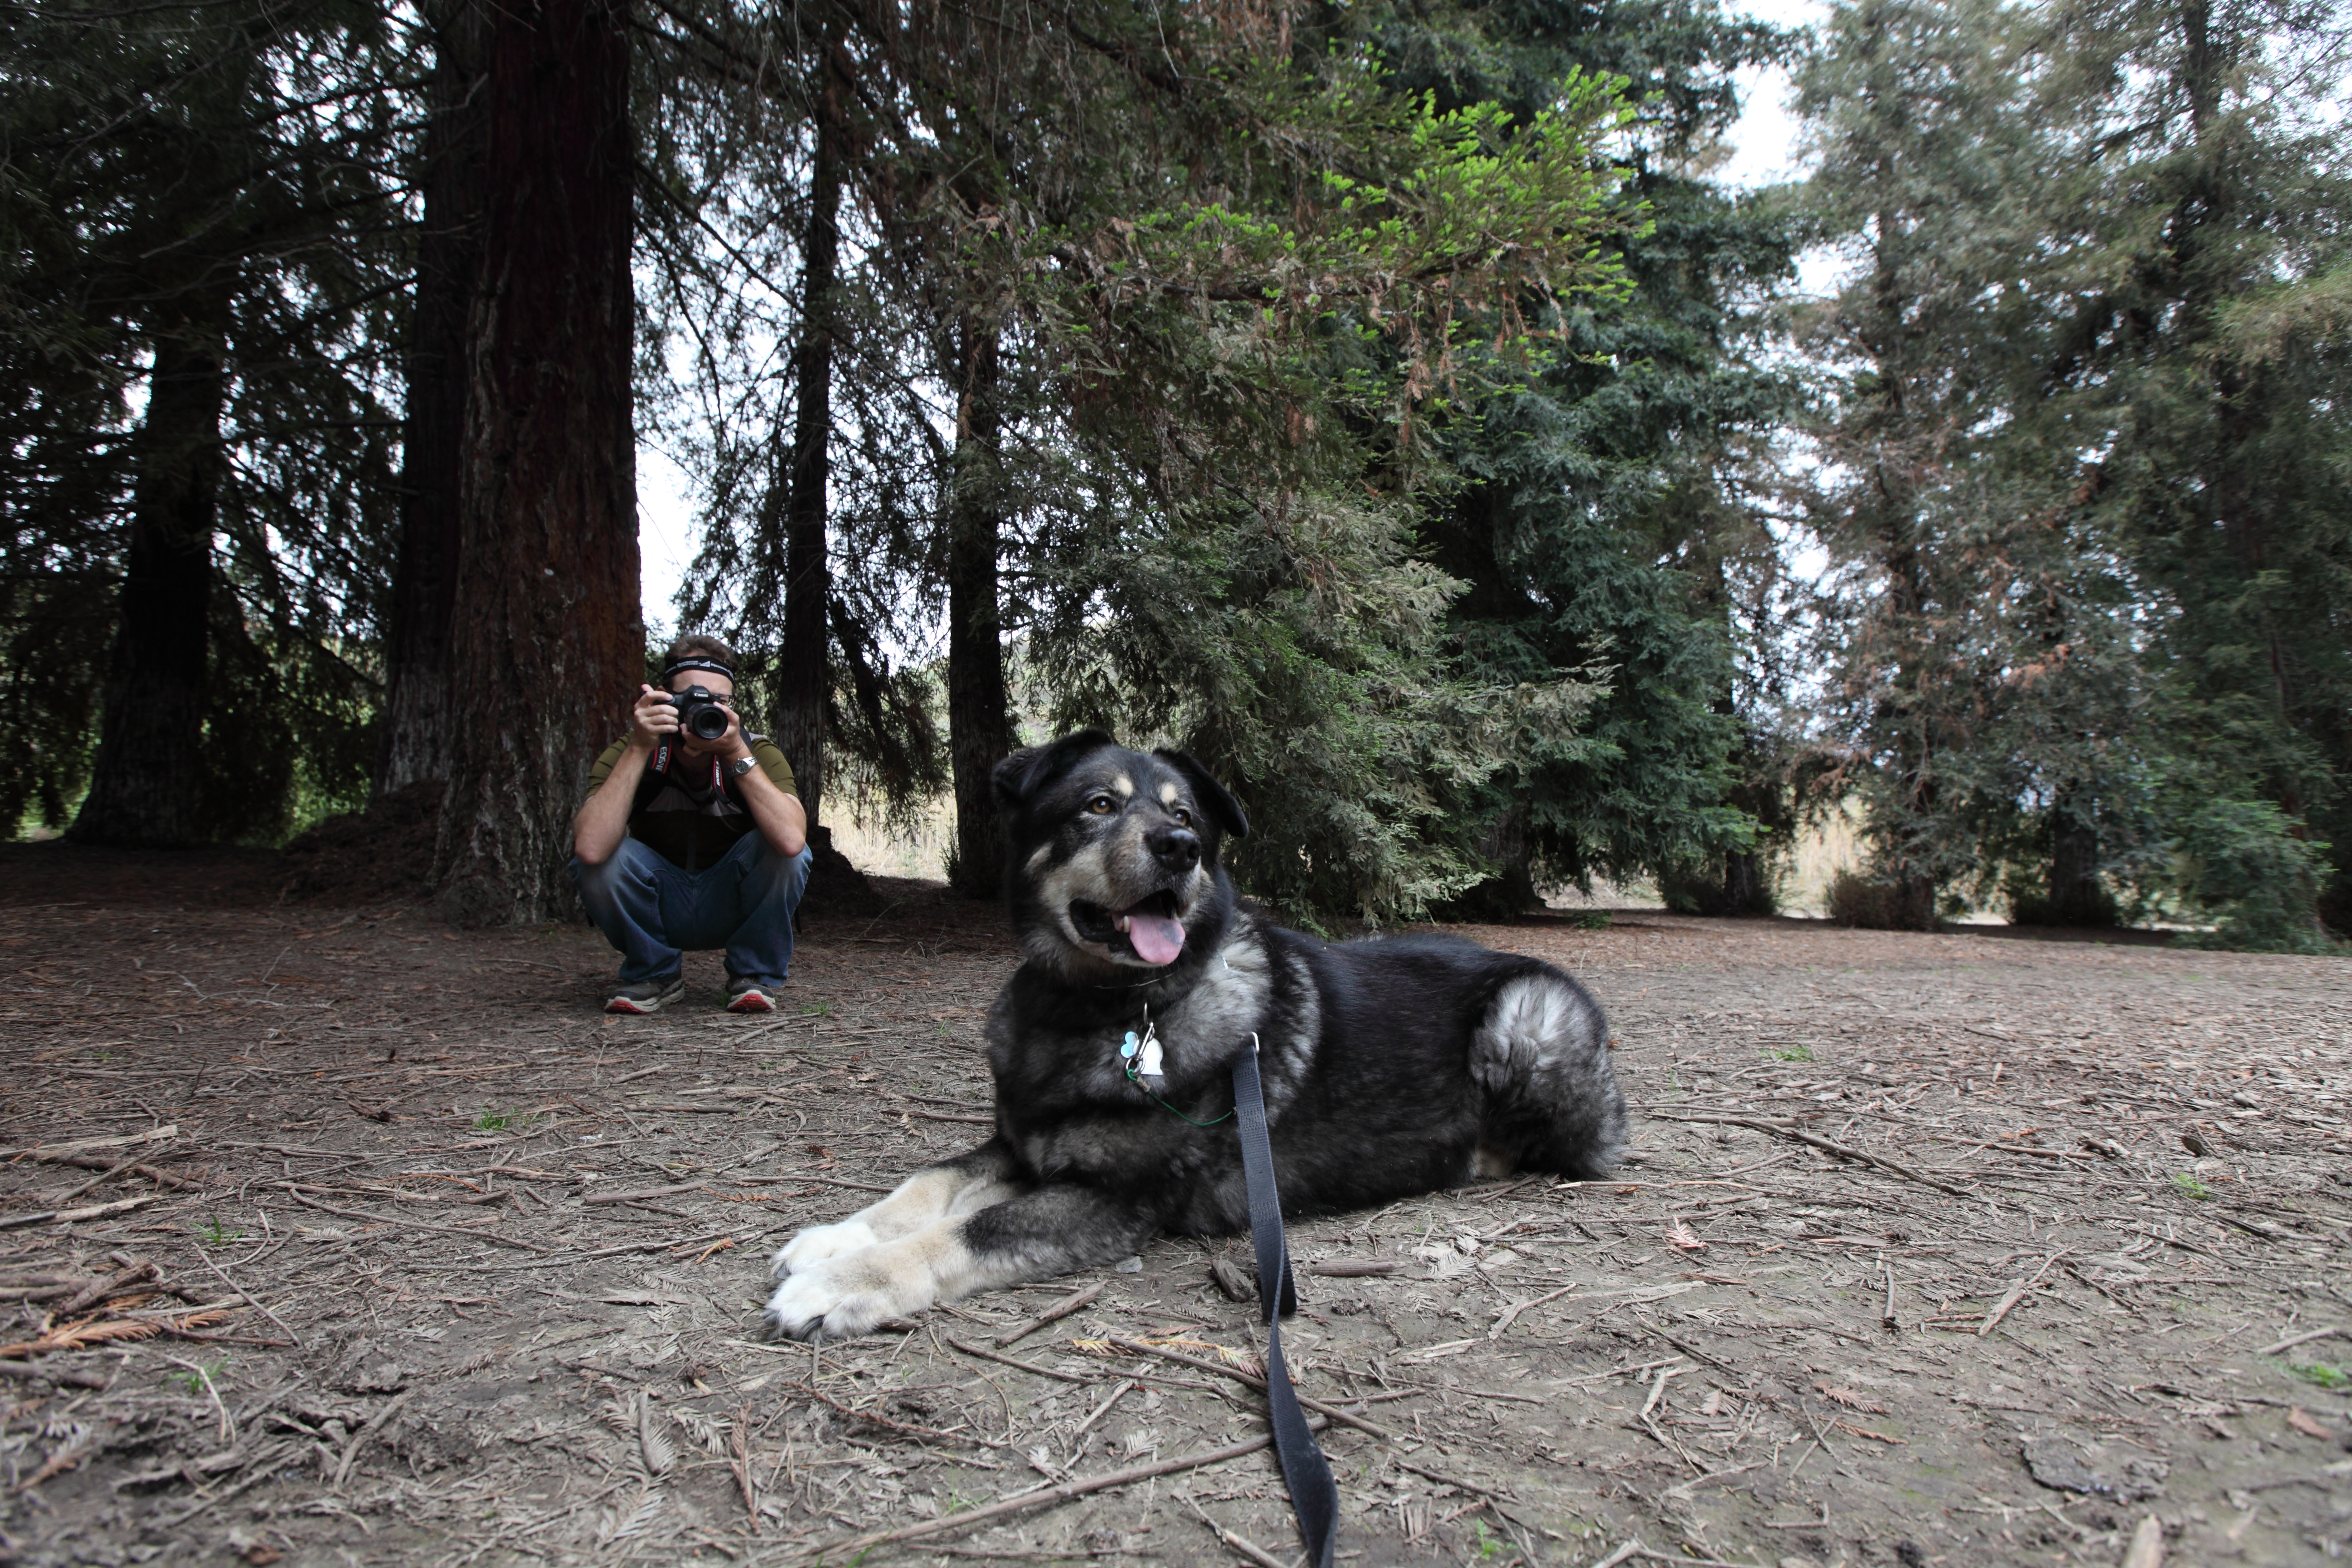
I could have brought out the 5D Mark II but I opted to bring the newer SX 530 HS instead as it is much lighter in weight and can hang from my neck on a hike and not bother me. Basically it trades weight for quality in the optics and ISO capability. However it was a trade I was willing to make and it proved a good decision because most of the images from this “prosumer” camera still came out satisfactorily. Jamie shot with a borrowed G7x.
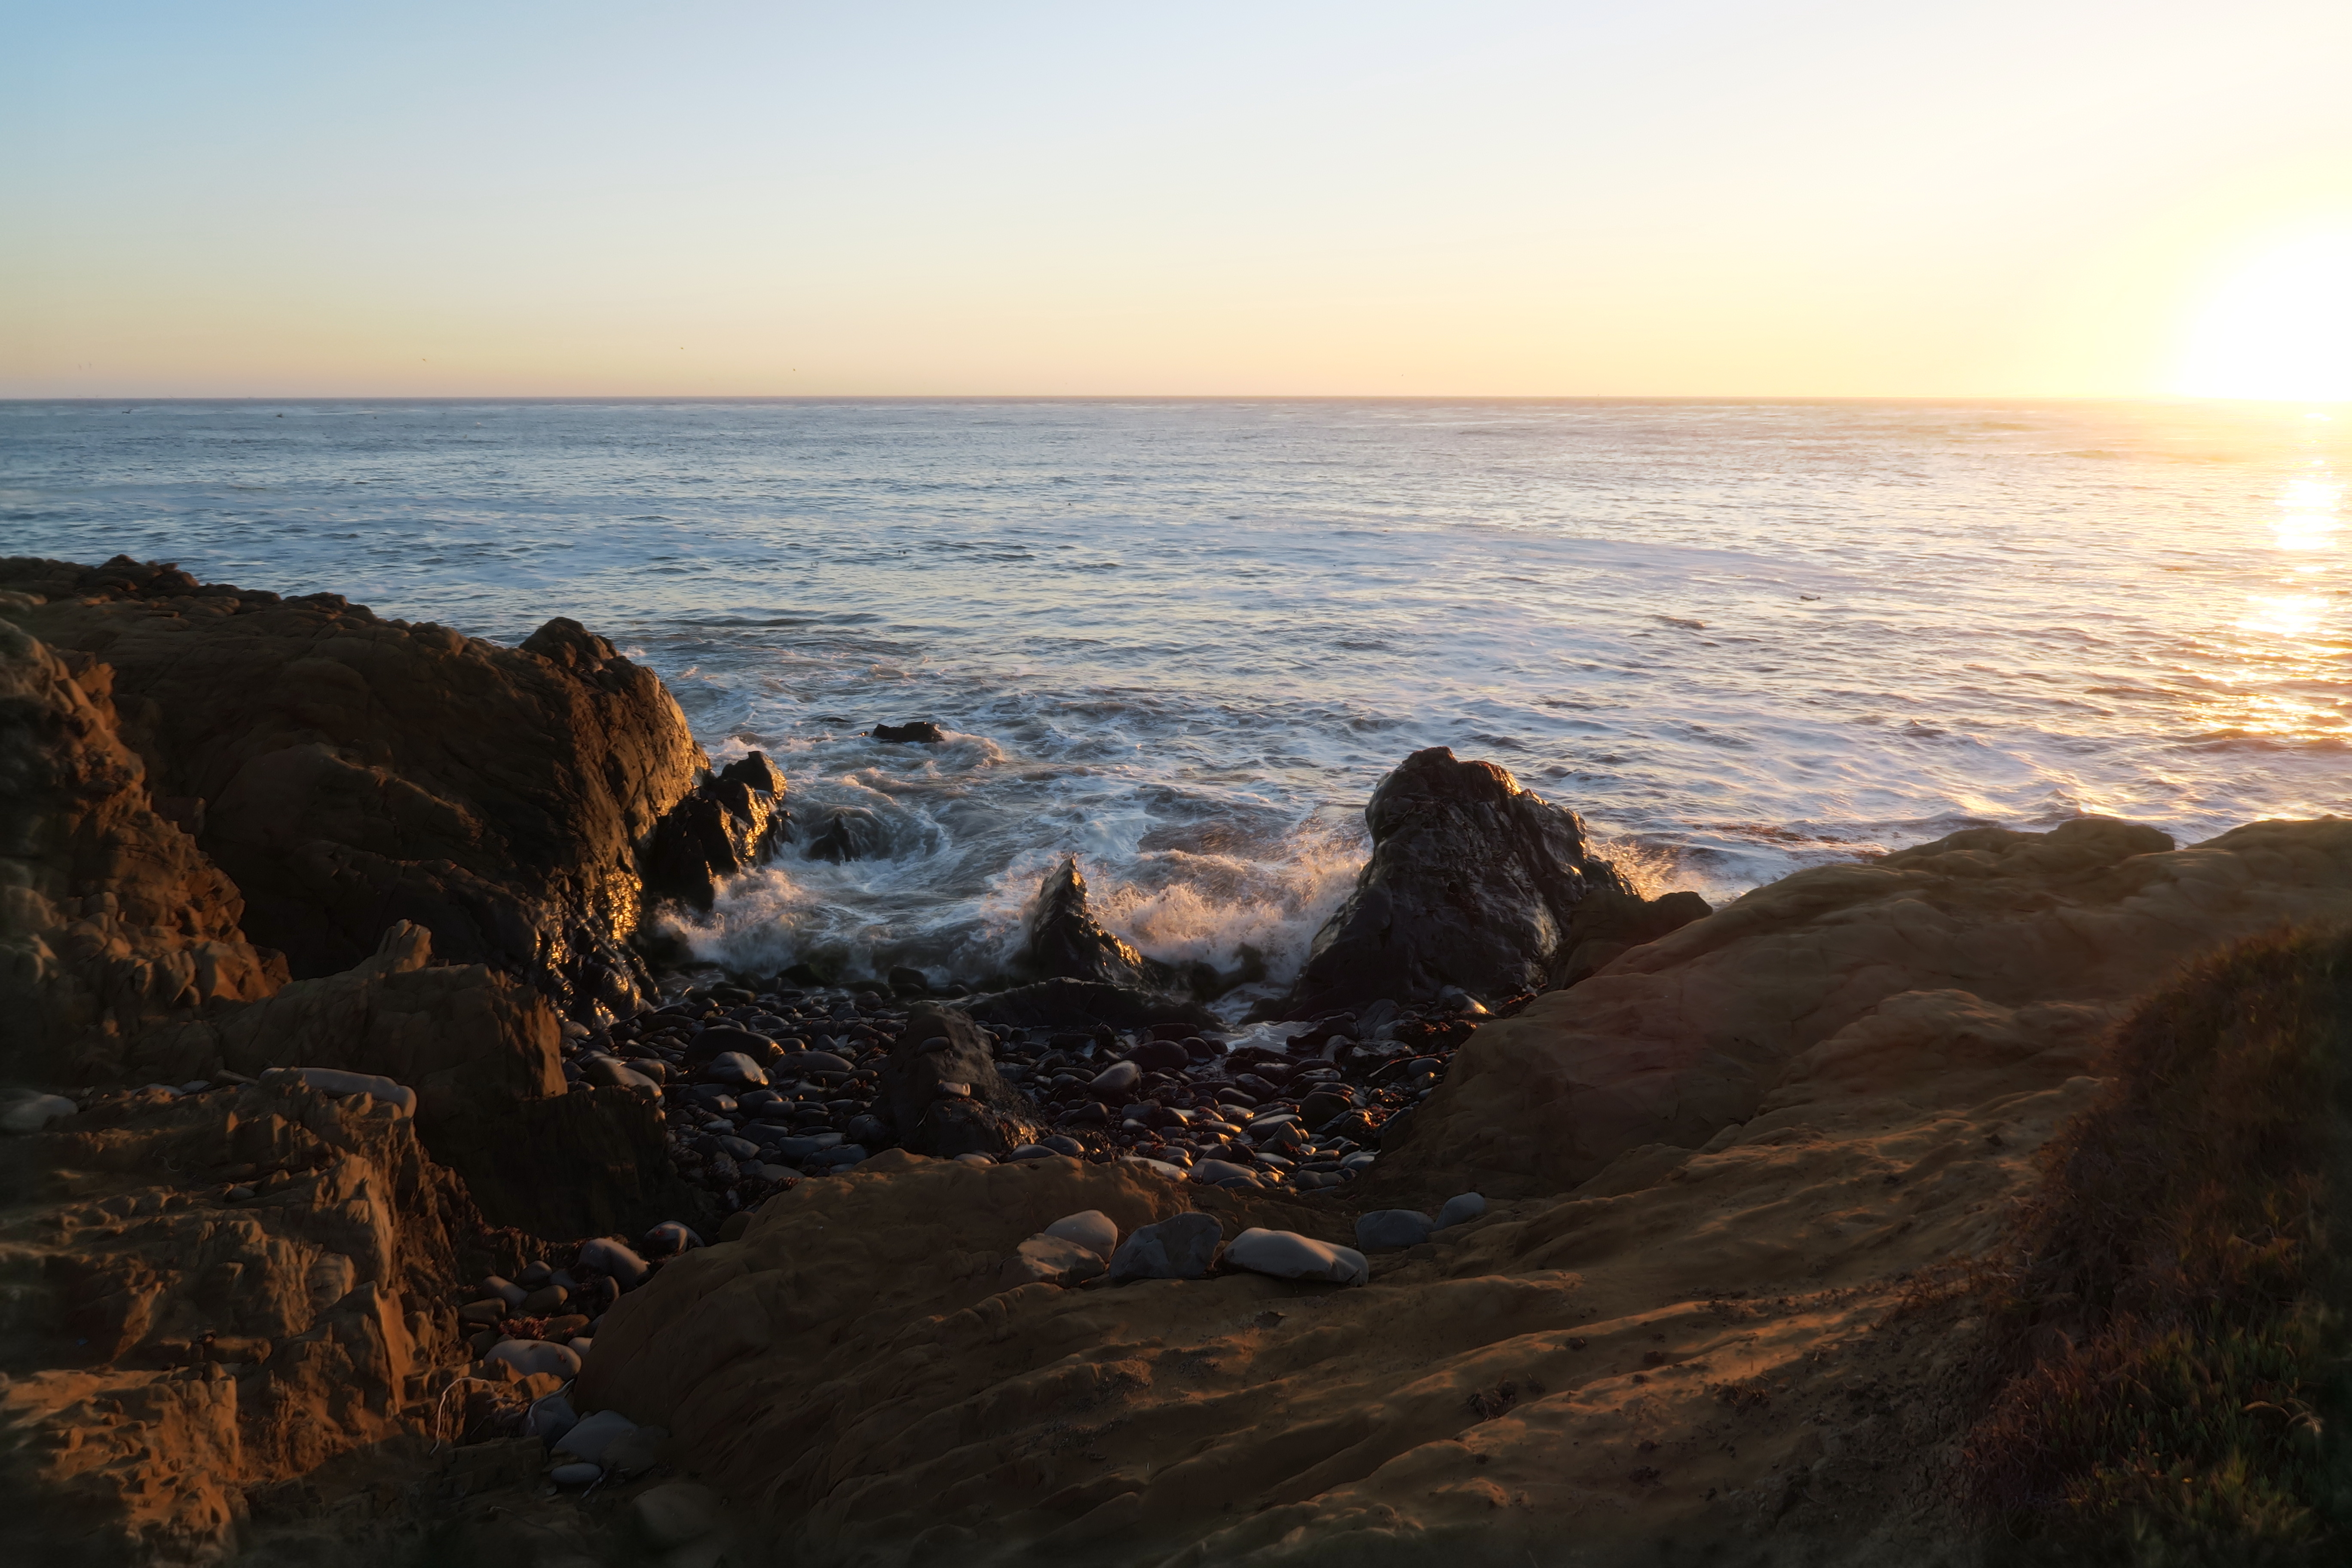
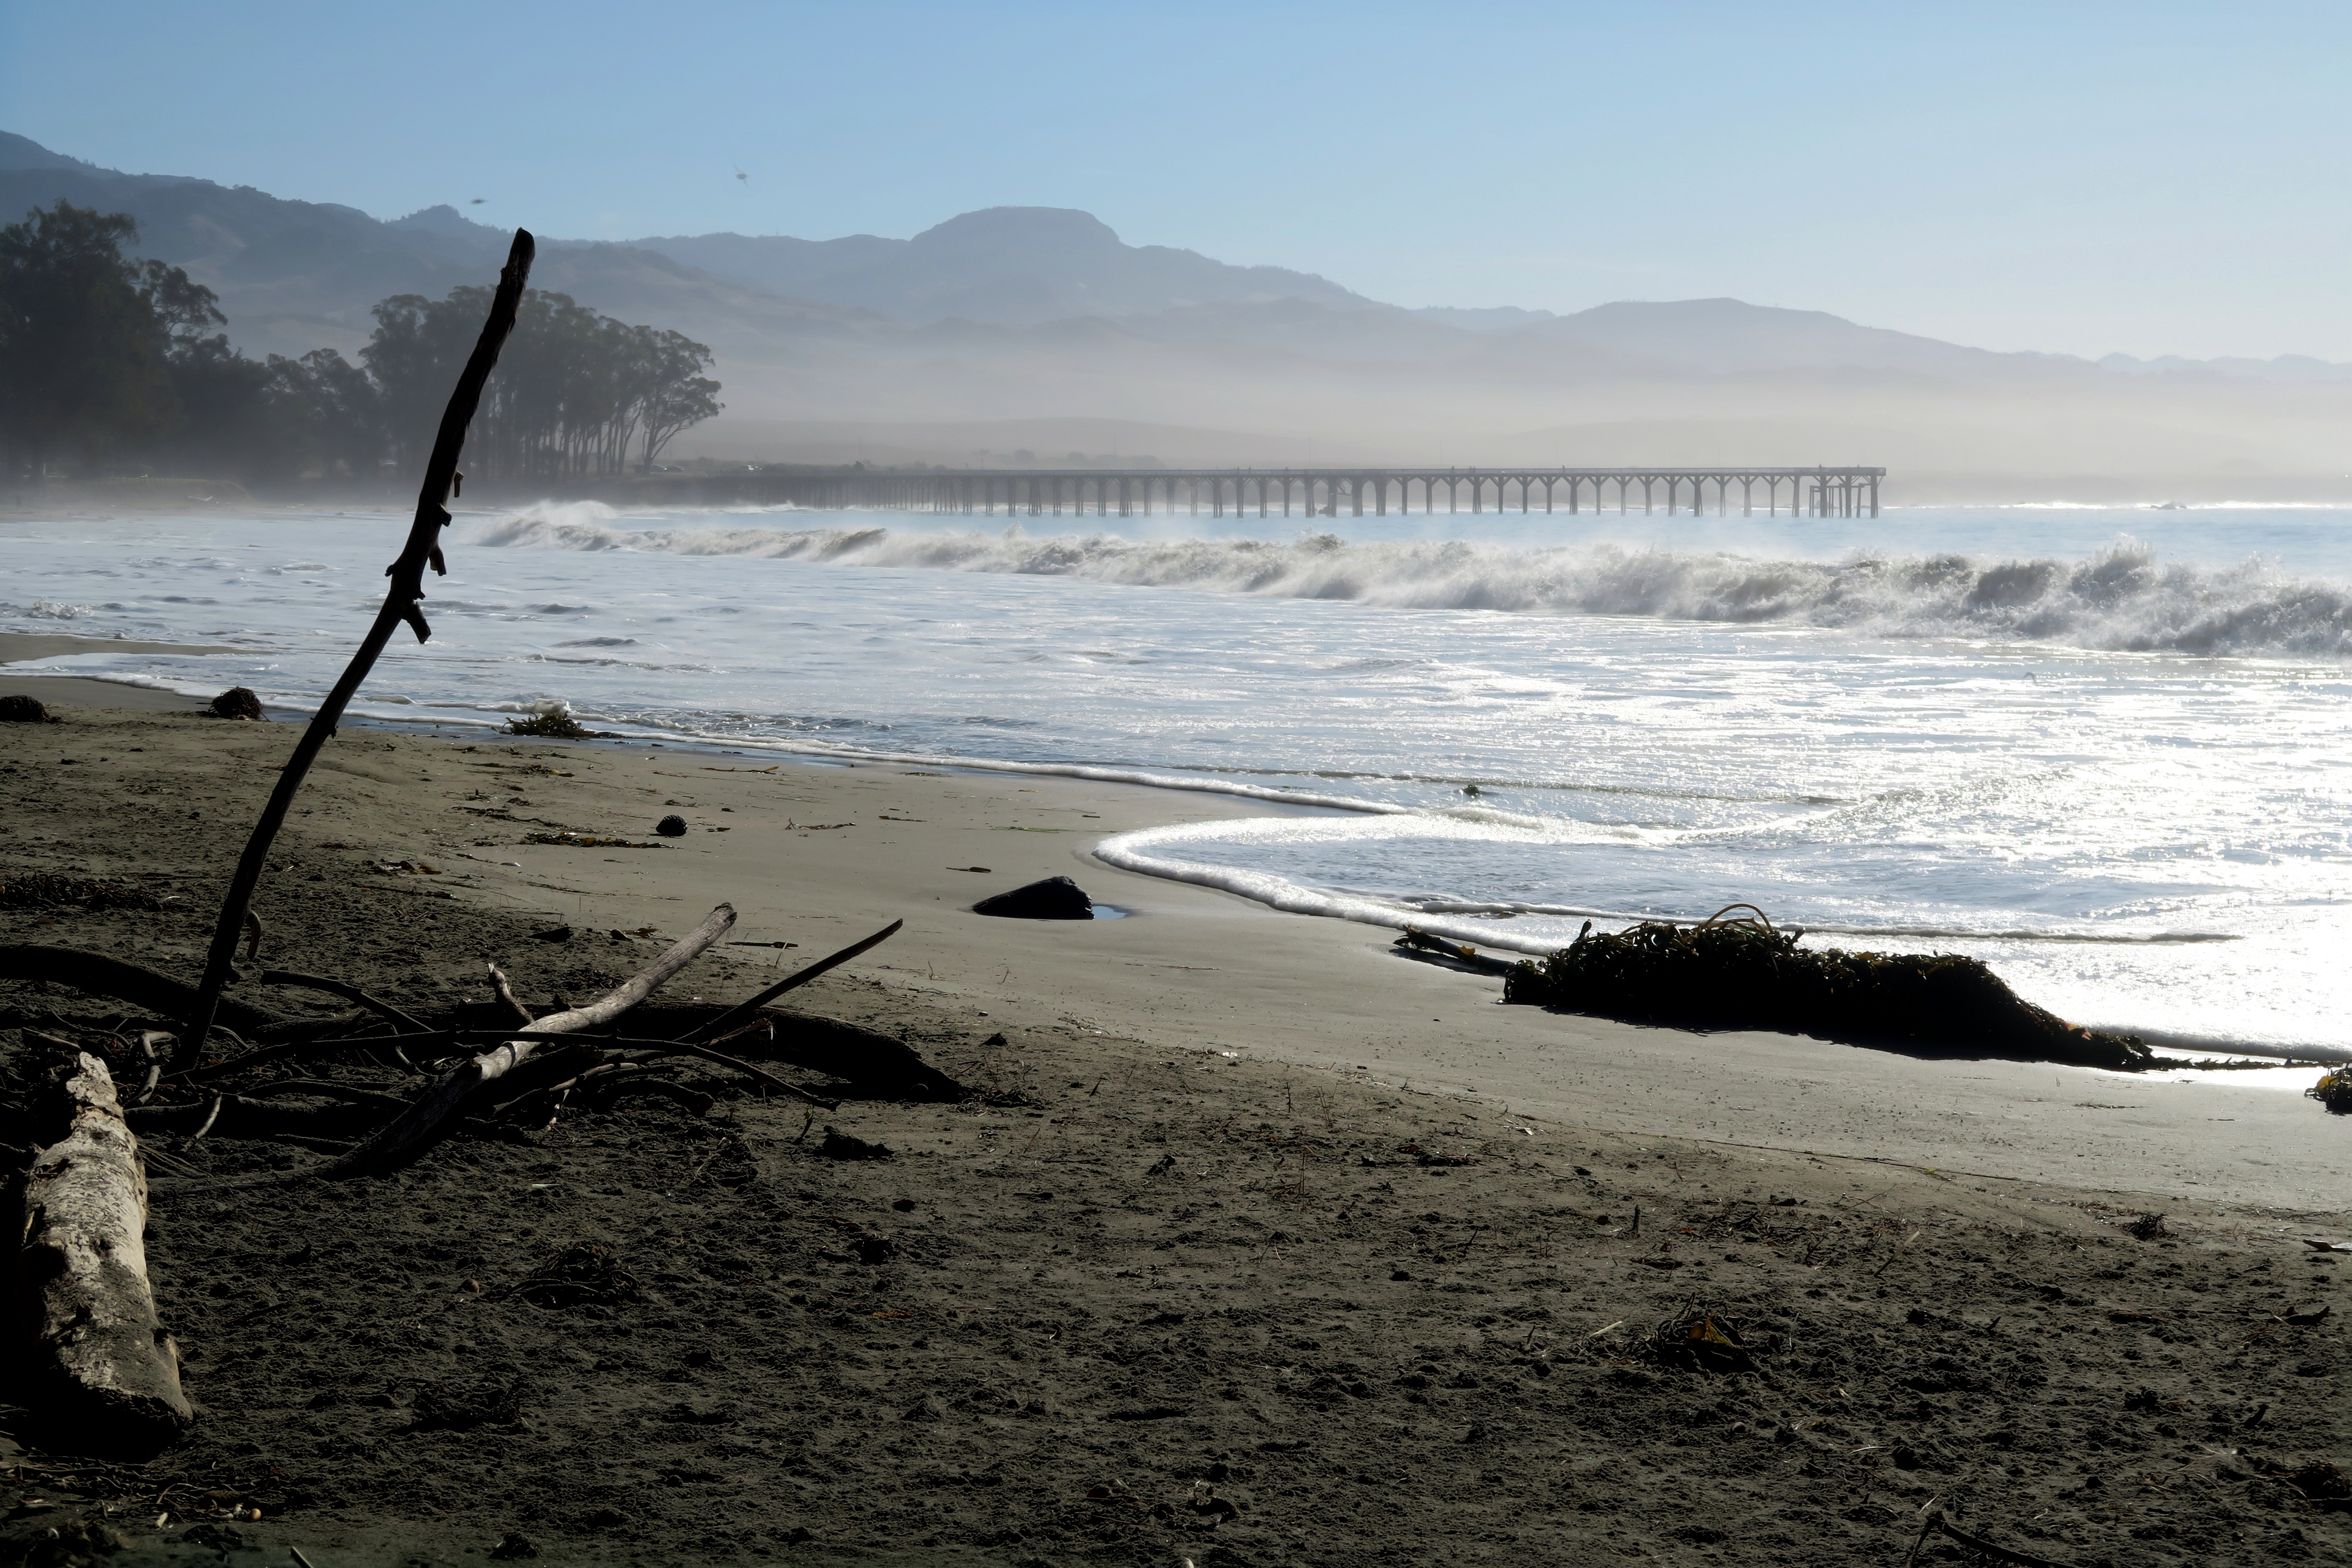
WR Hearst Memorial State Beach
For this relatively short beach, I did opt to bring the bulkier 5D Mark II along with a borrowed 16-35mm lens. Again dogs are allowed on this beach on leash but they are not allowed on the pier. The beach is covered in all sorts of interesting driftwood and sits next to a sheer rock cliff in the distance. We didn’t stay here long but I did sit around long enough to capture an HDR shot via three exposures bracketed and also a long depth of field shot of some driftwood with the ocean and cliffs in the background. Hearst Castle is just across PCH from here but we didn’t visit it because I’m sure they don’t allow dogs on their tours.
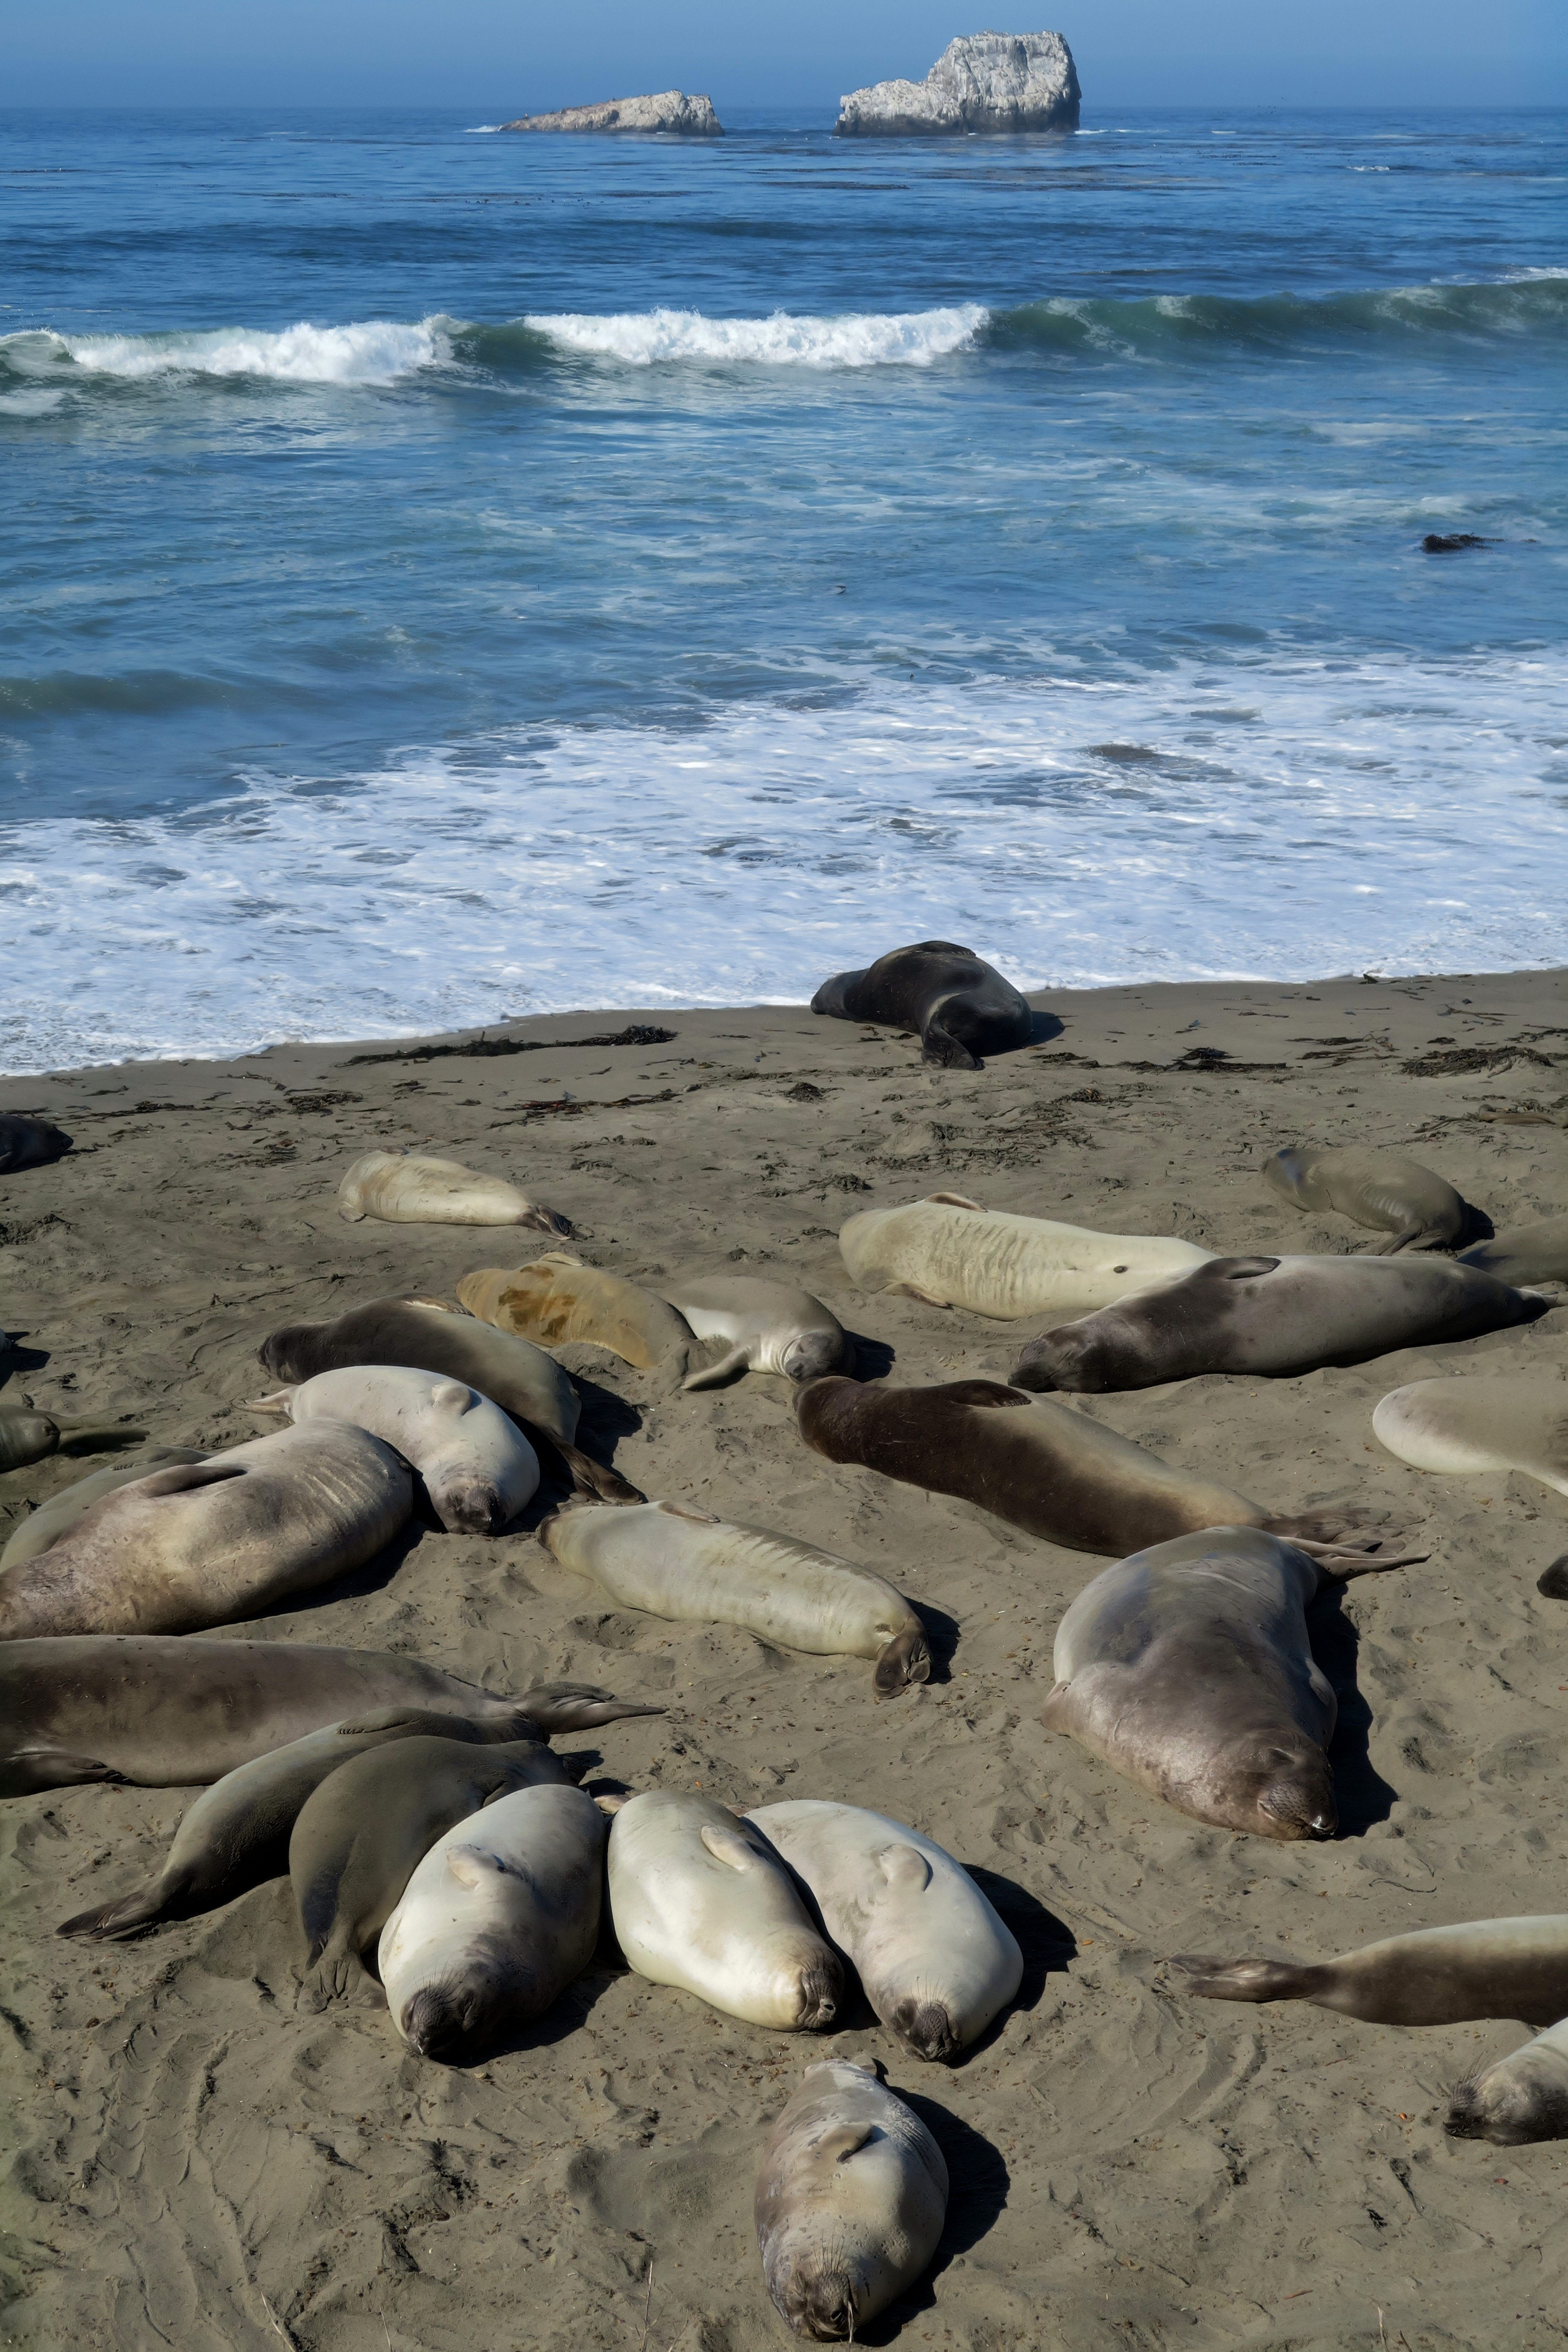
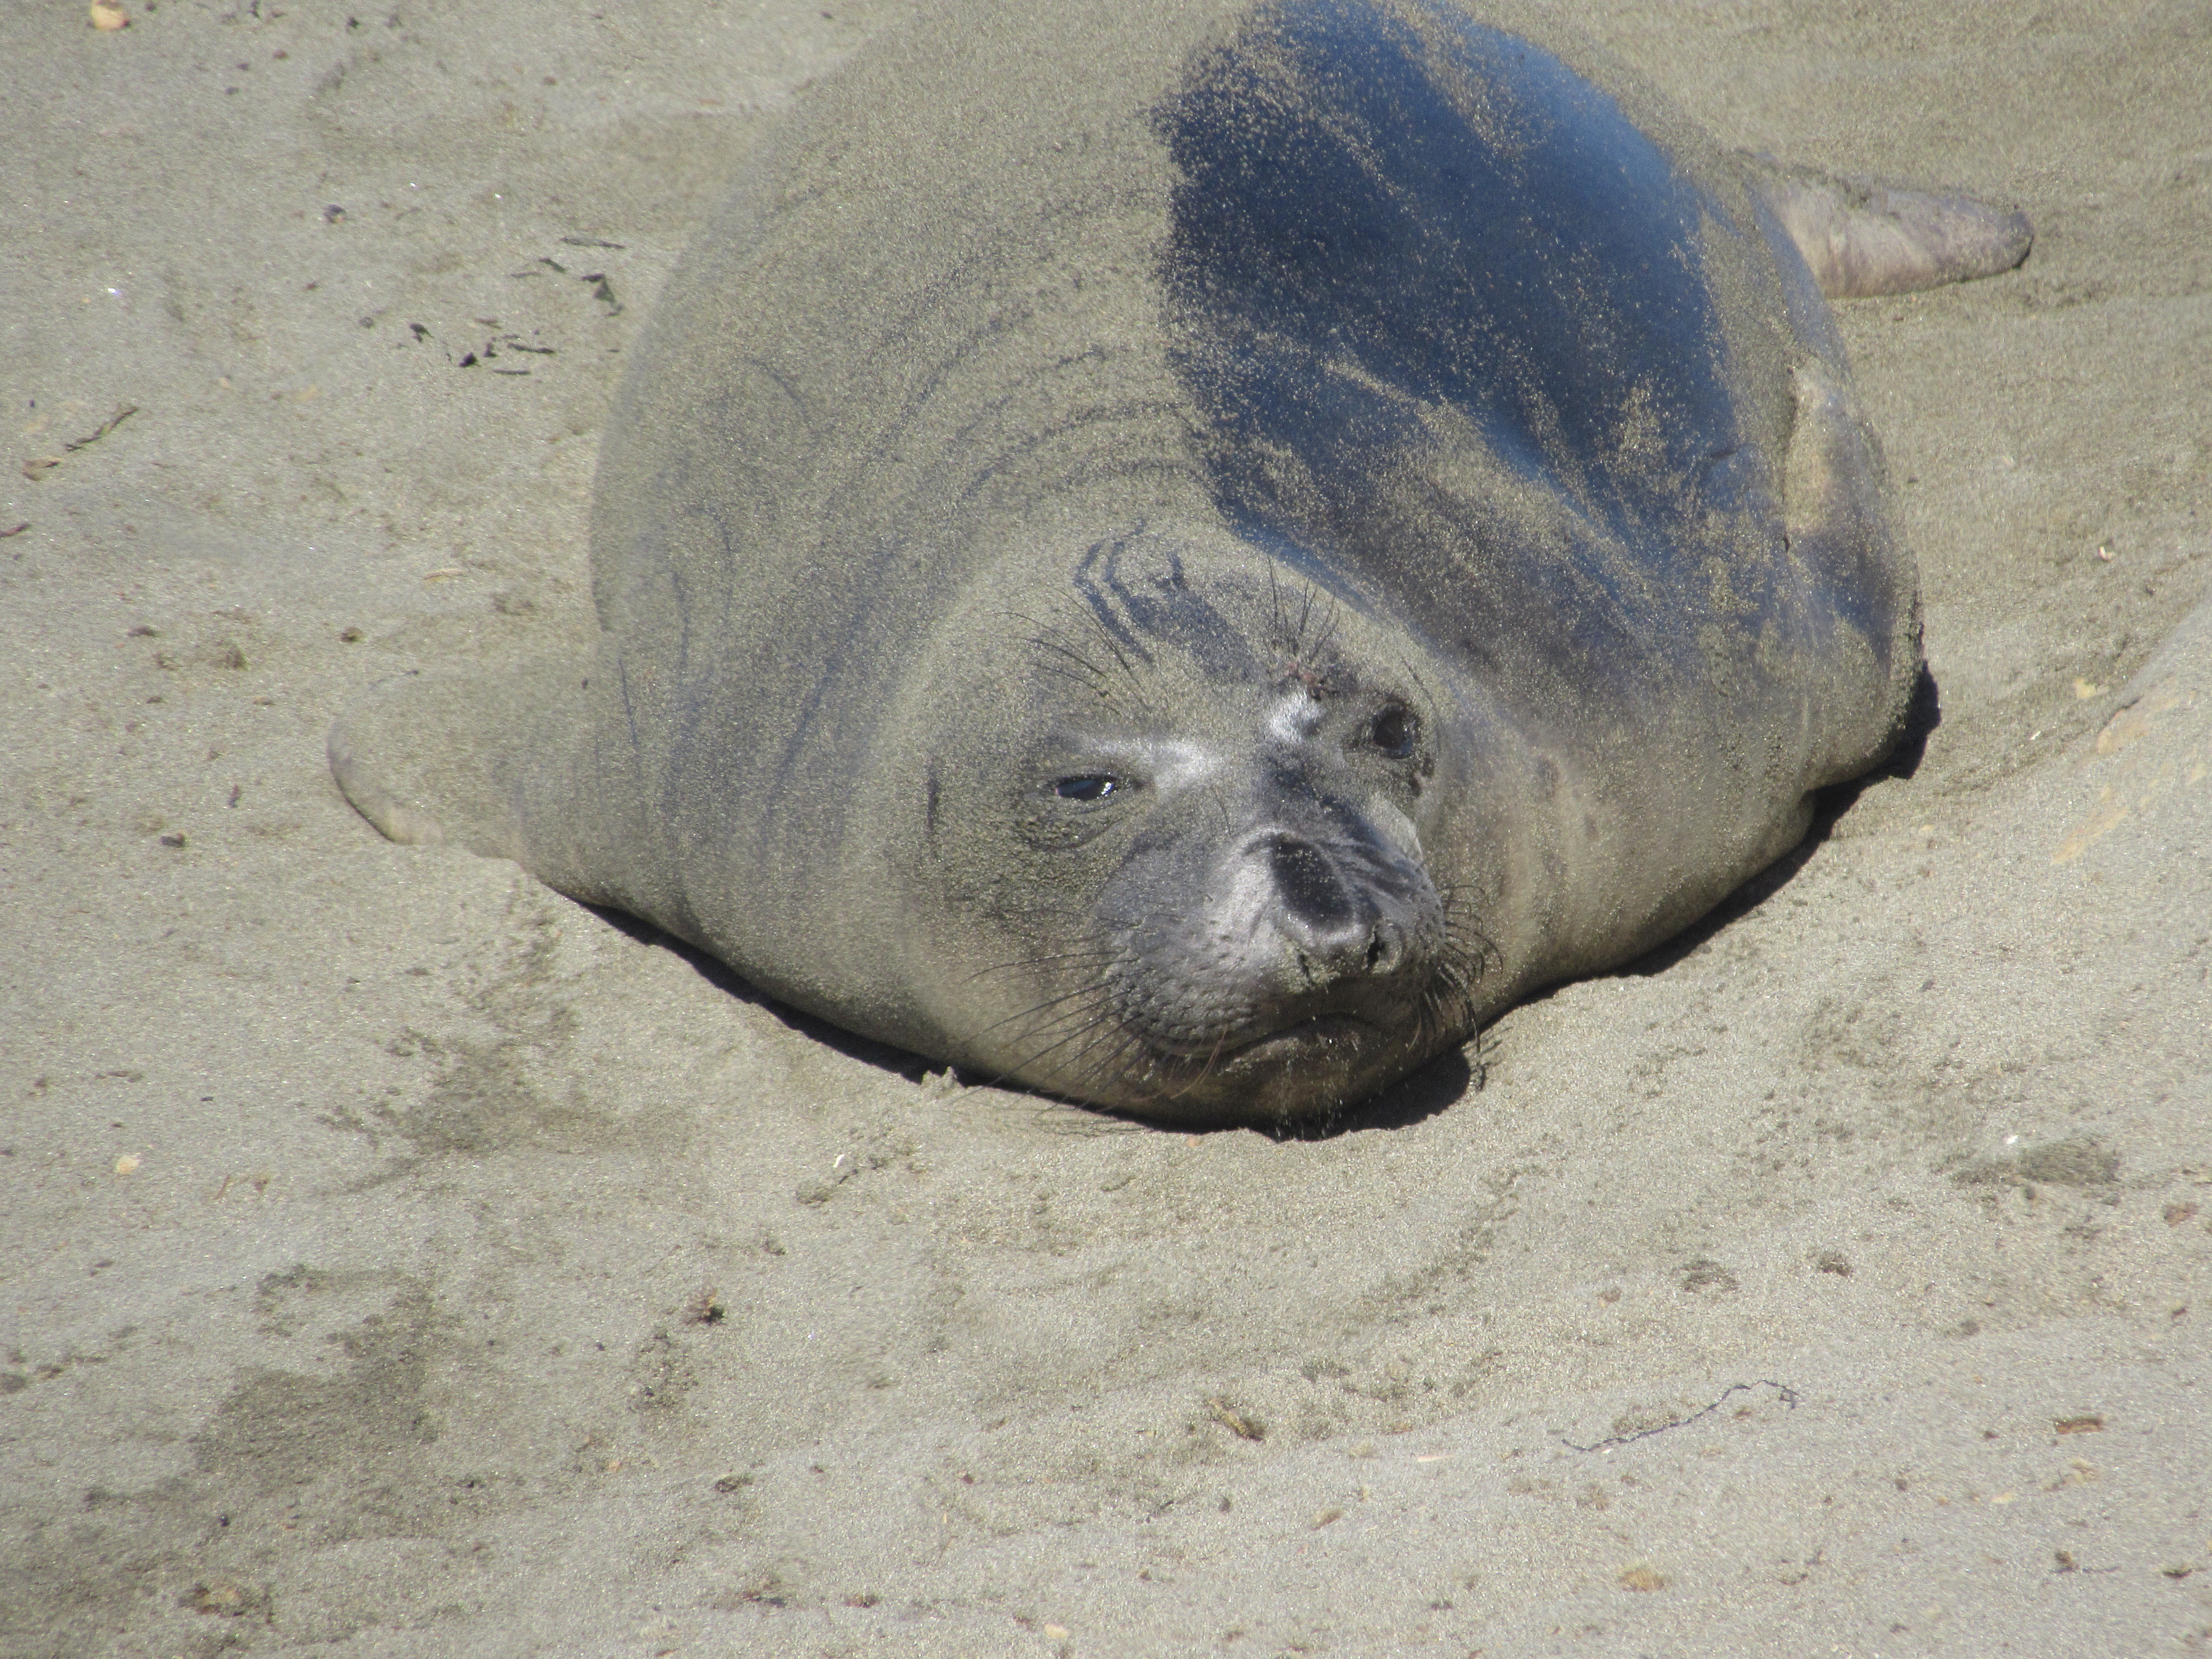
Just up the coast from Hearst Memorial State Beach is a vista point which is extremely popular with the elephant seal population. It’s so popular that there is a permanent display there with information on every facet of Elephant Seal life you could ever want to know. The most important thing they do however is lay around in the sand.

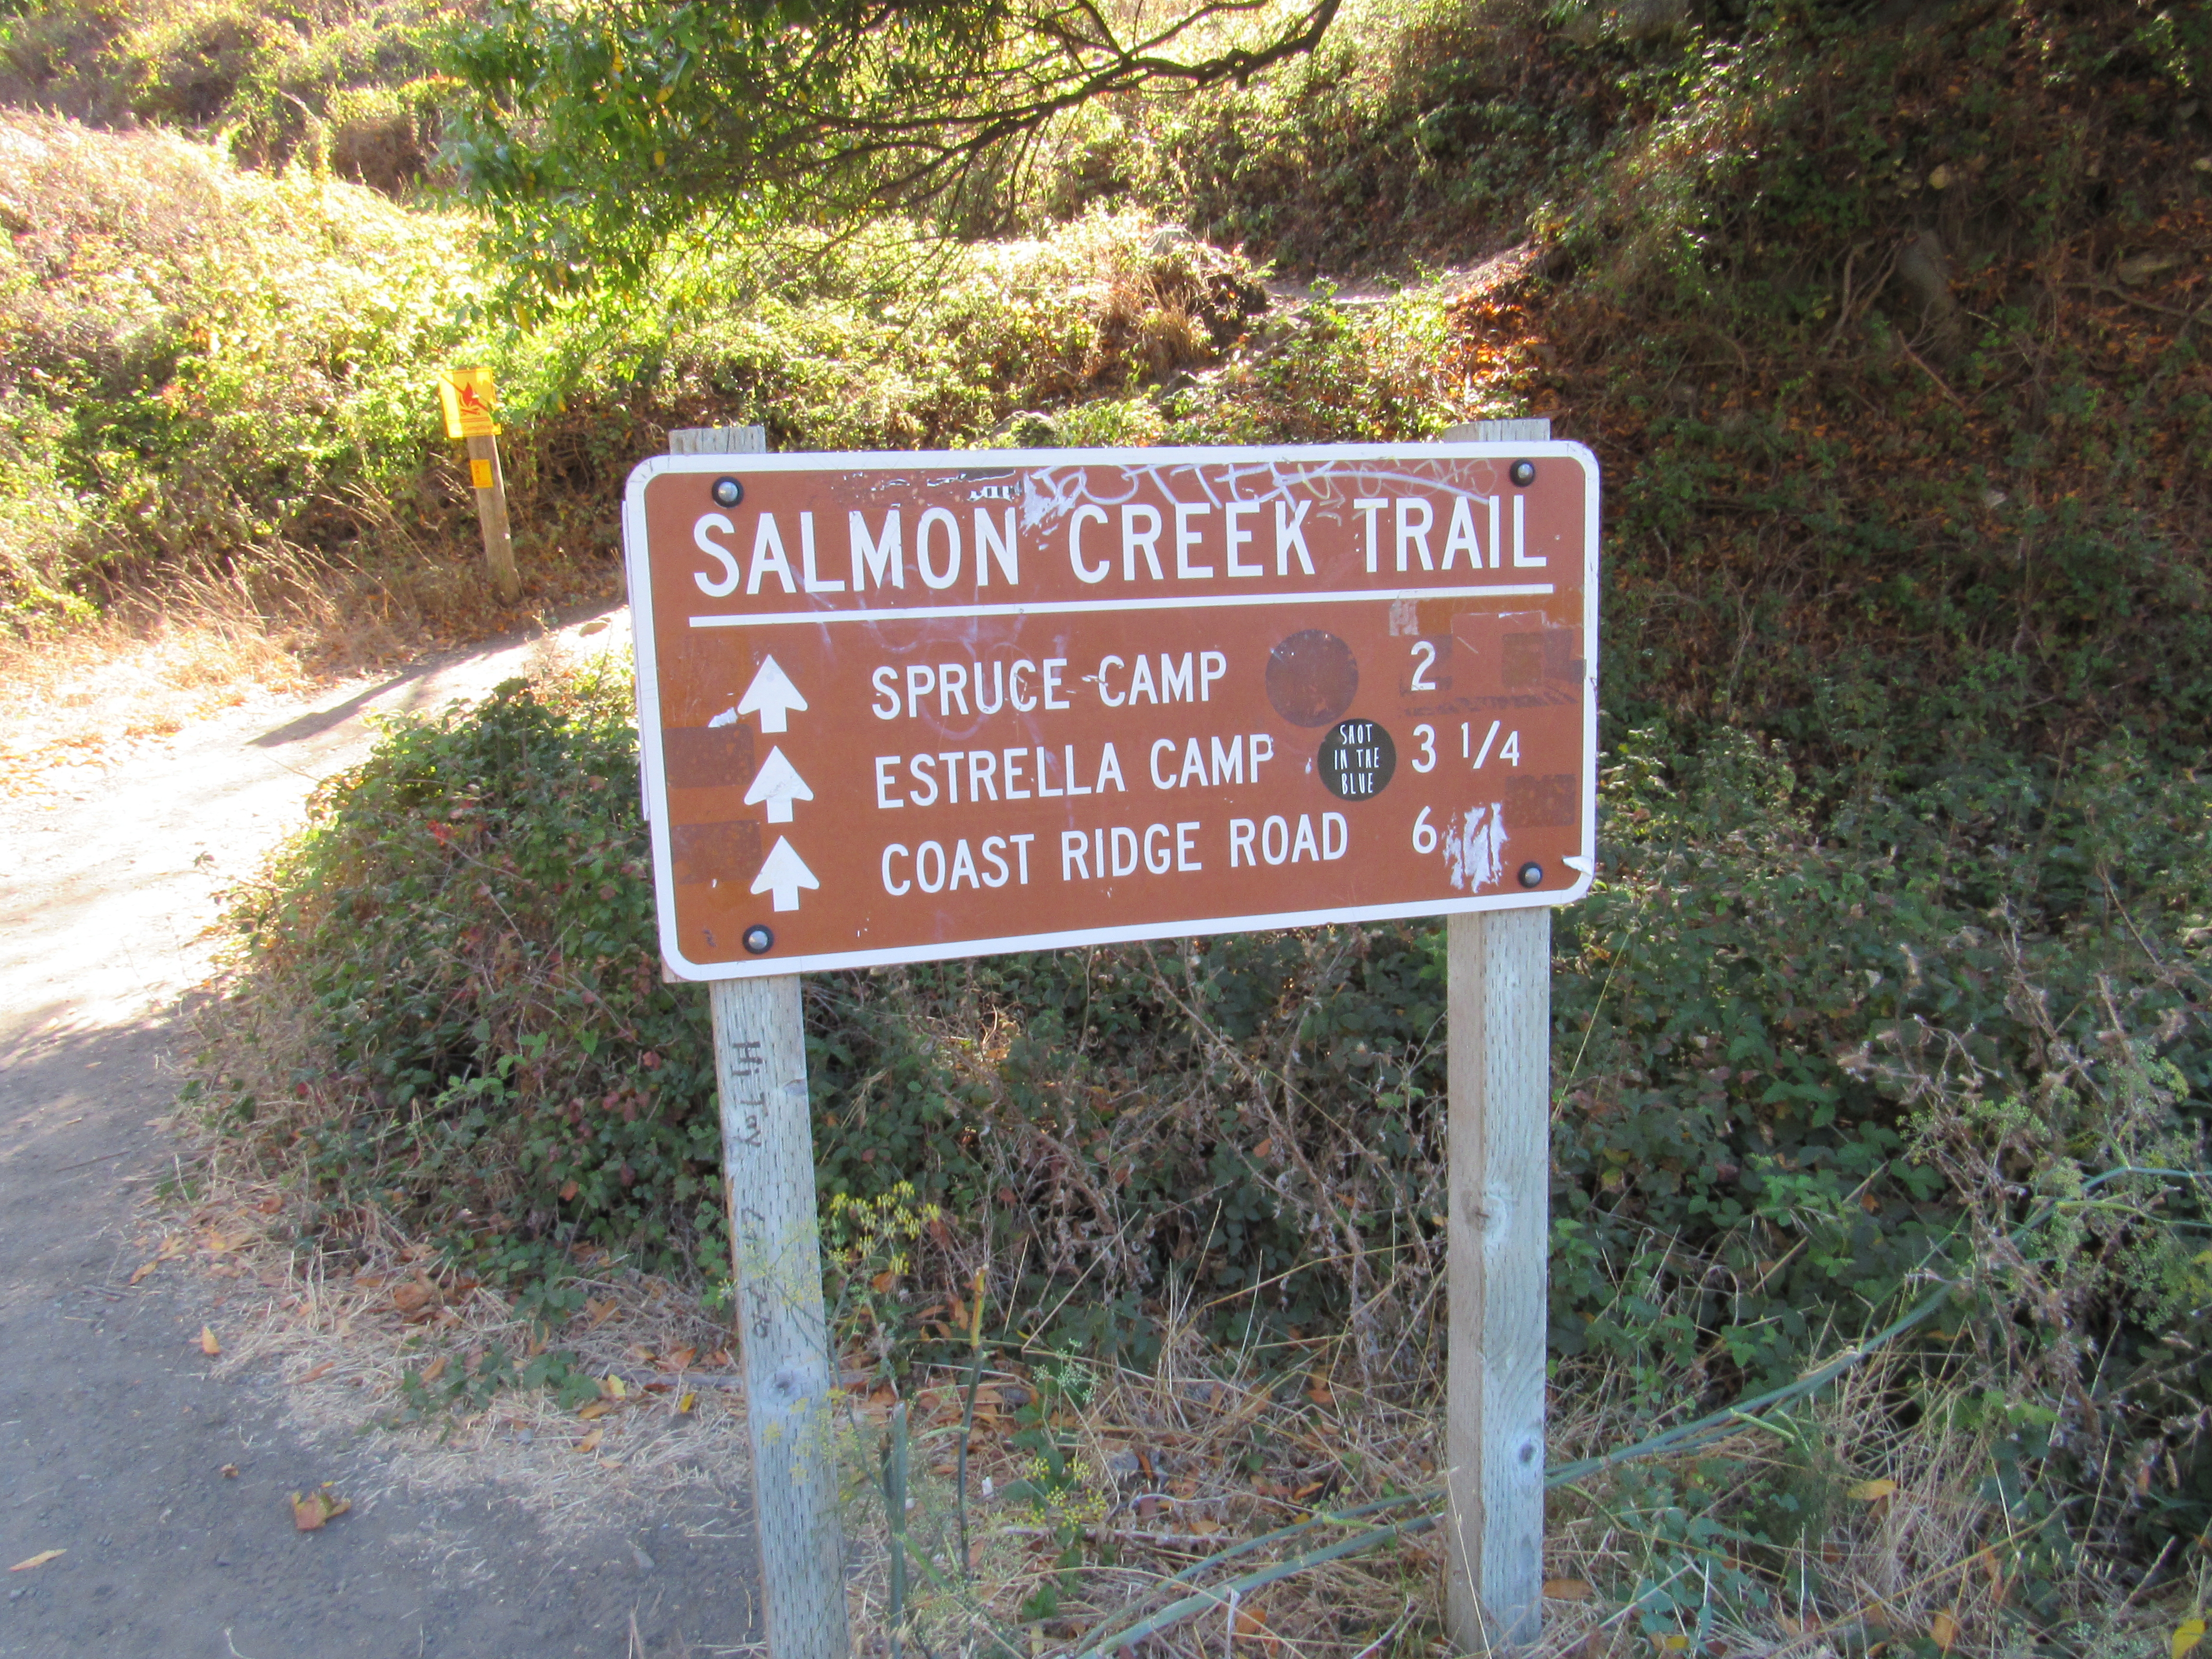
Salmon Creek trail and Salmon Creek falls
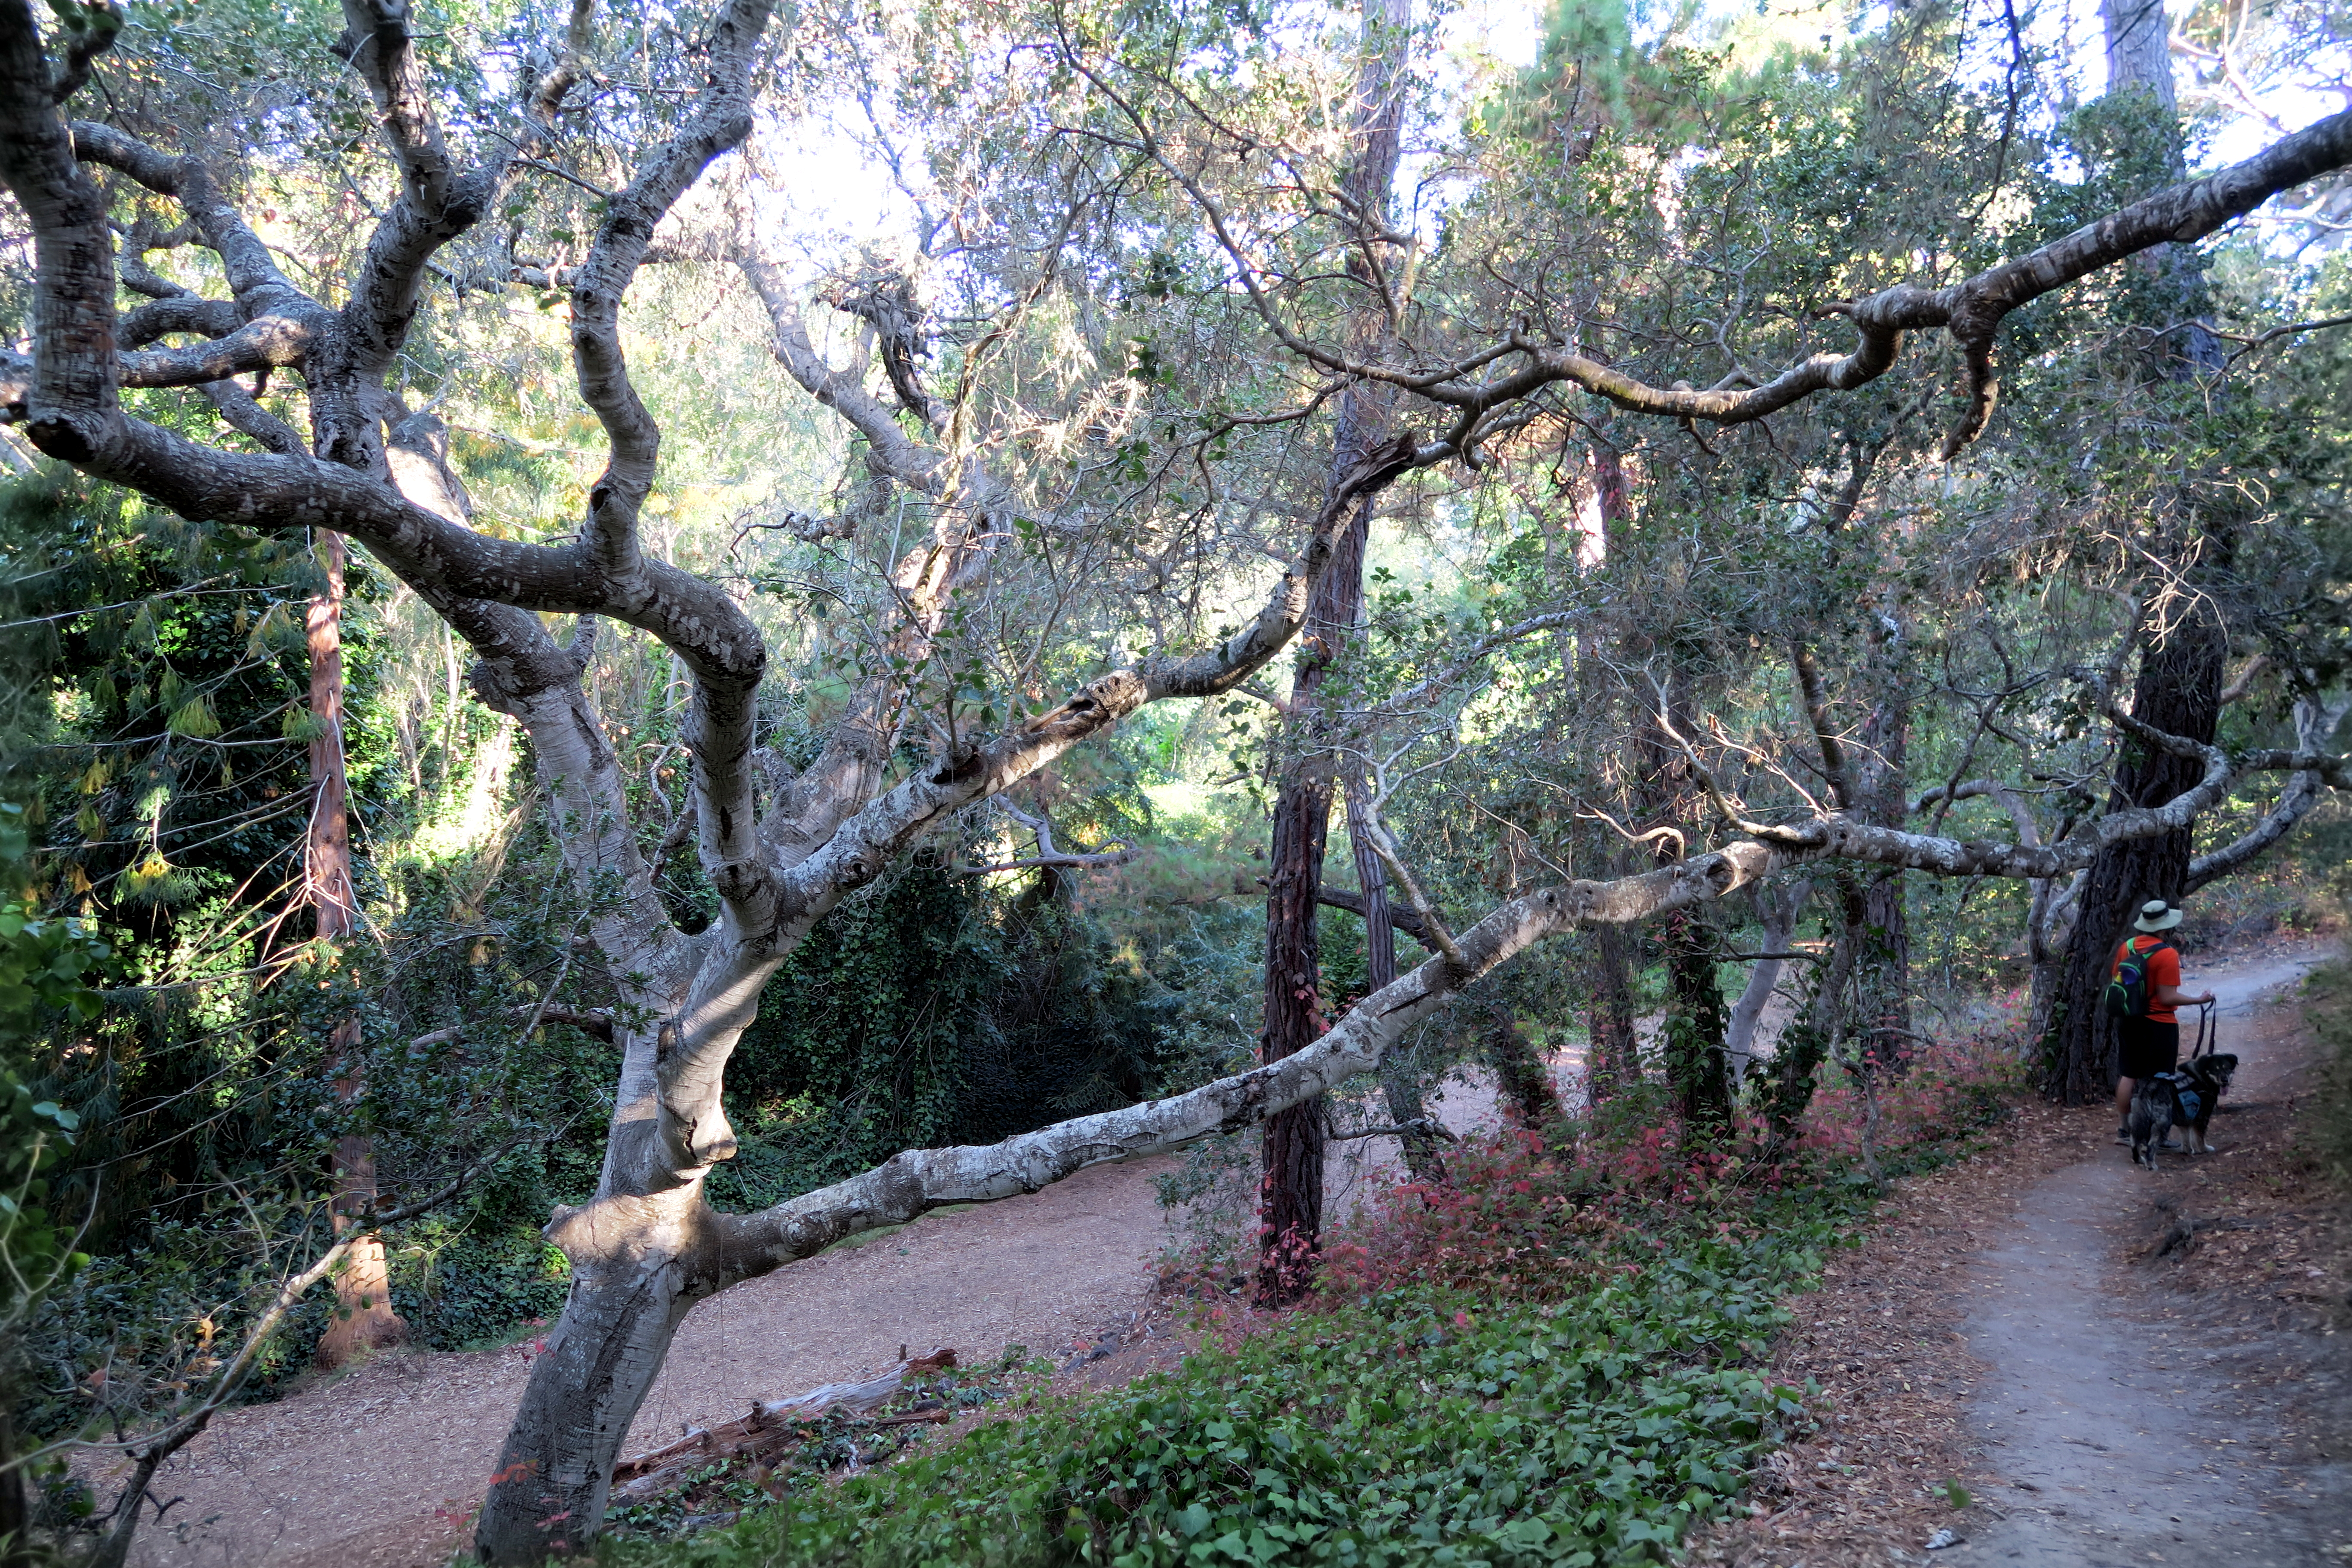
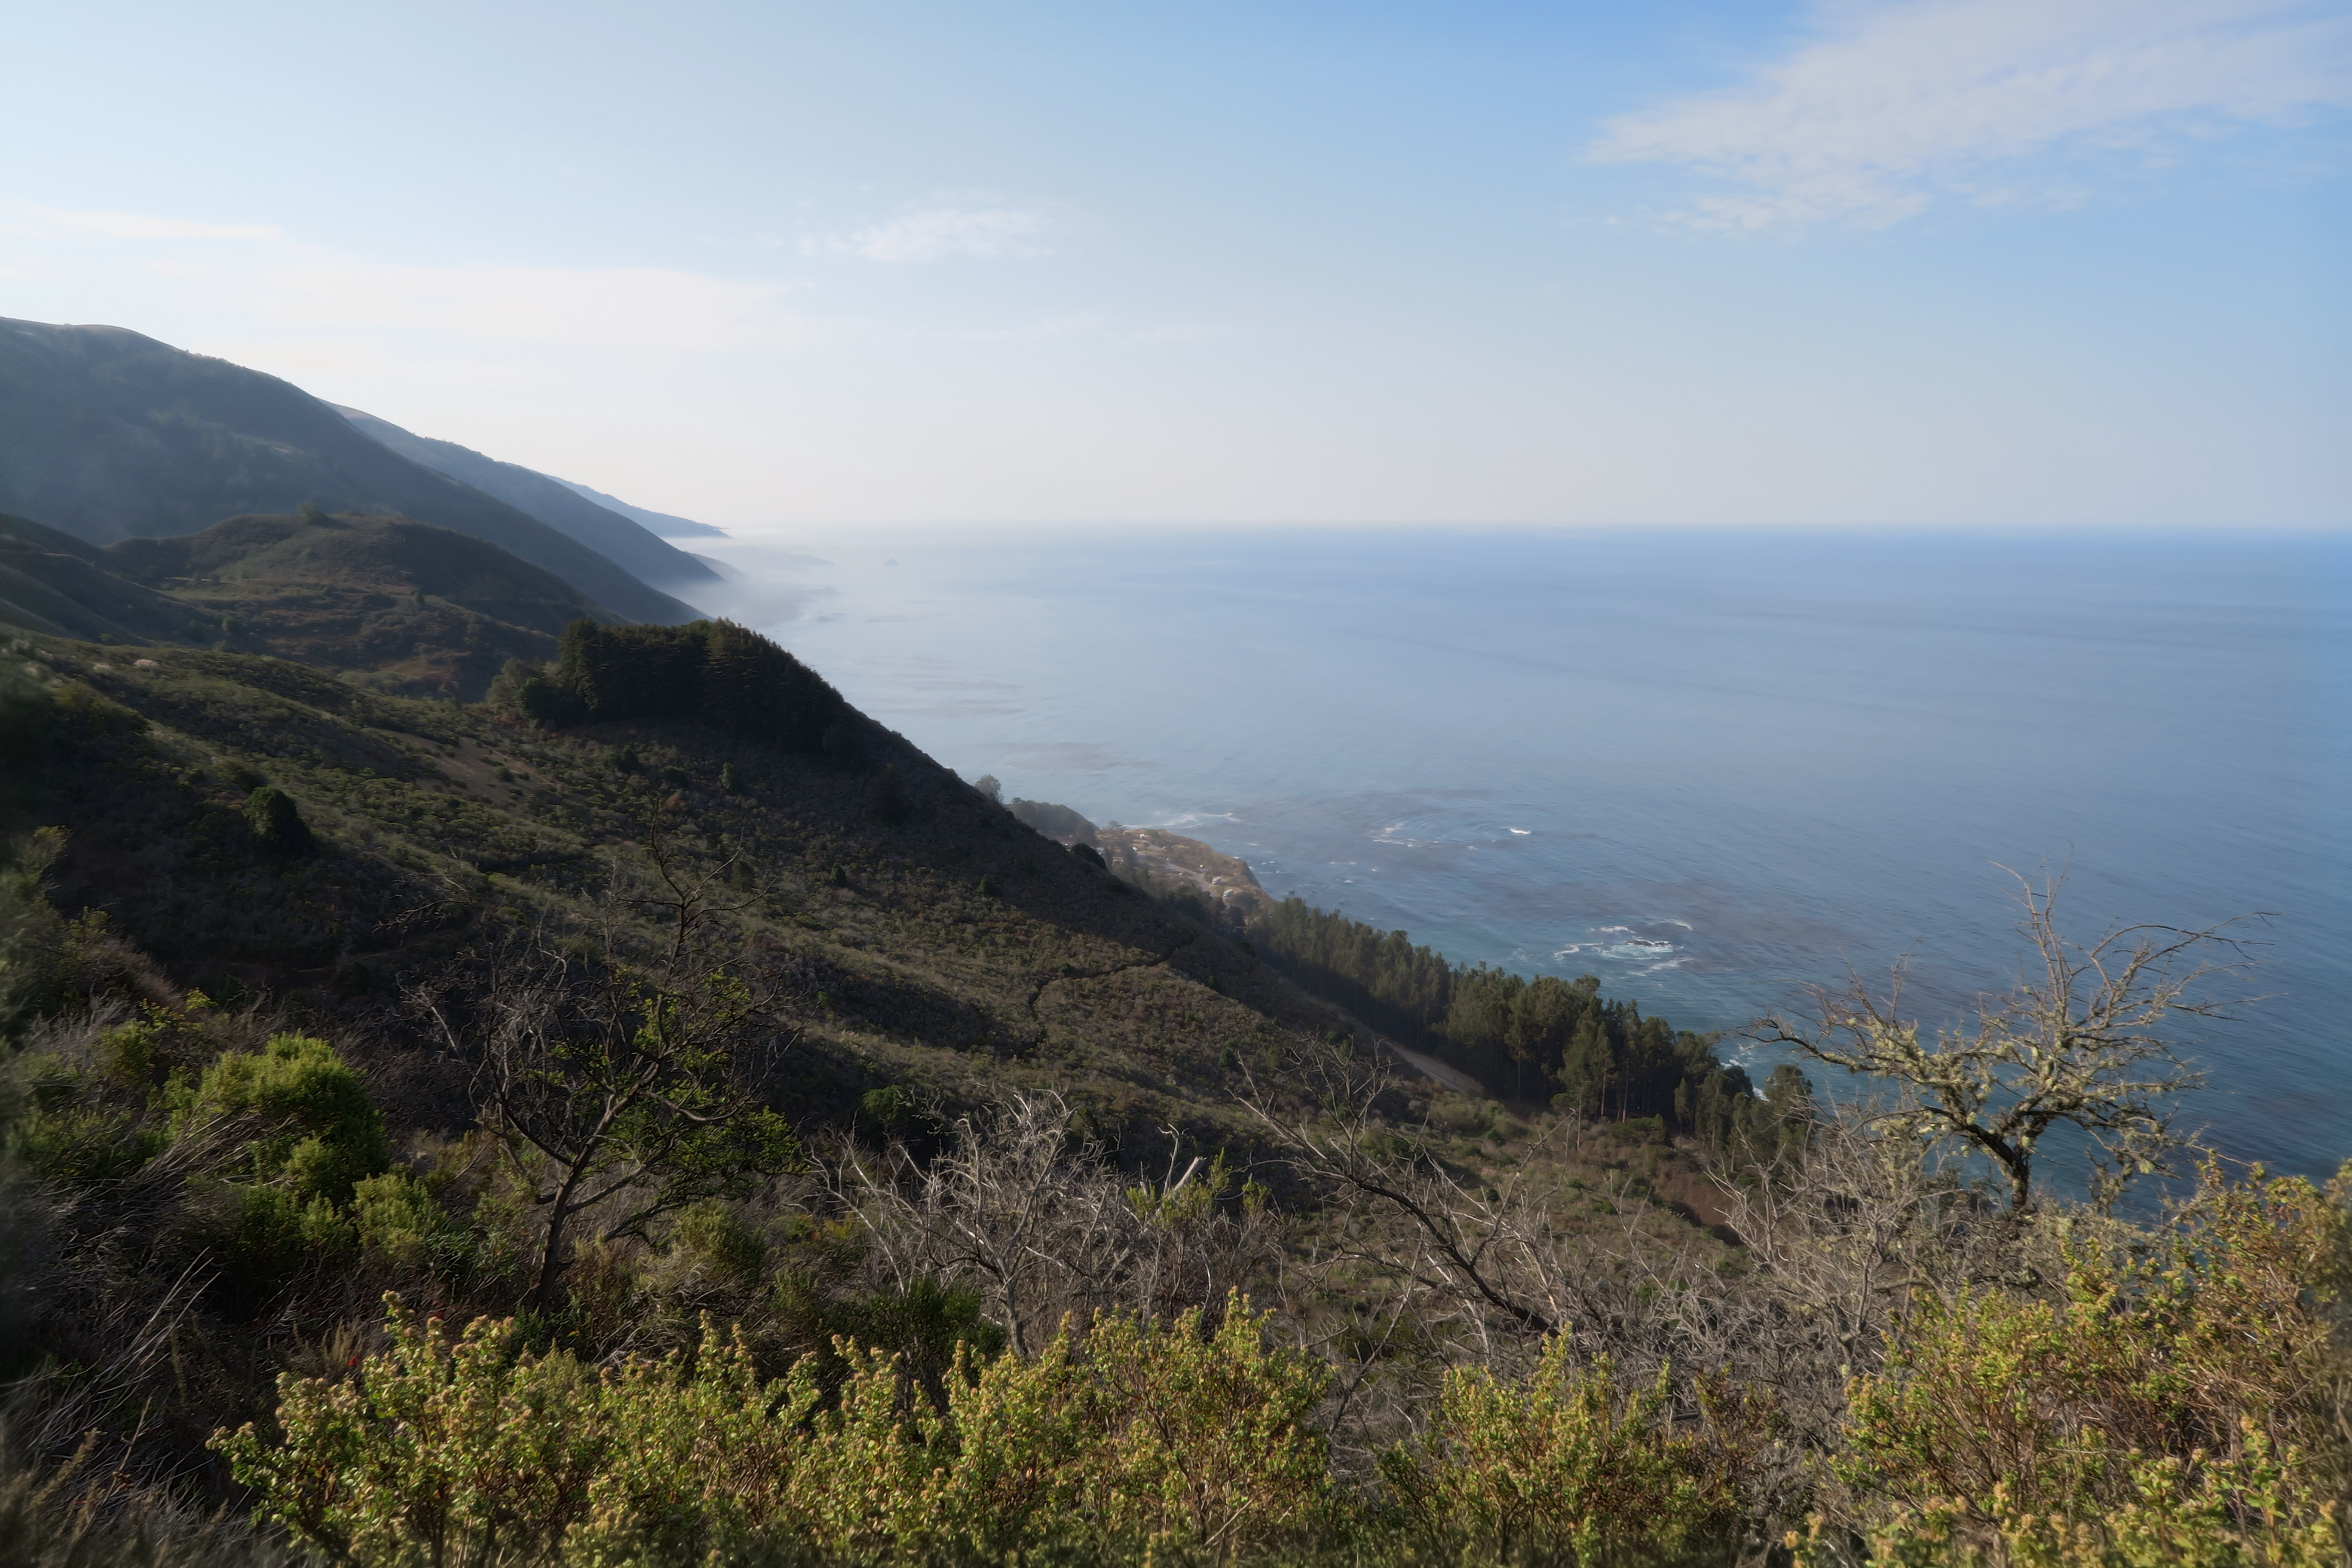
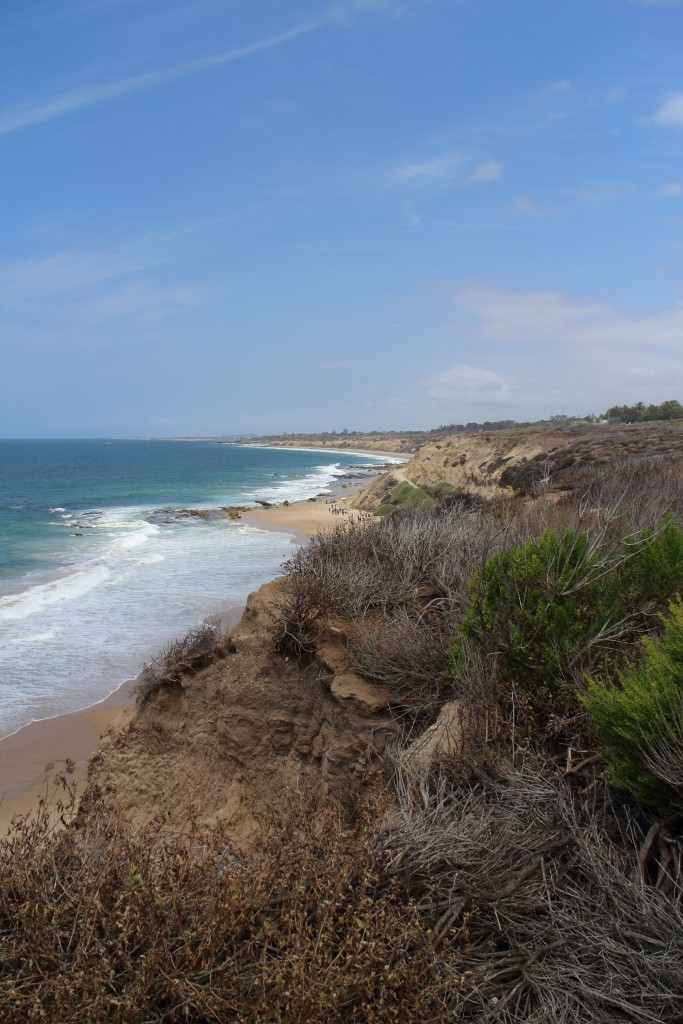
On our way up PCH towards Big Sur, we passed the Salmon Creek trailhead and decided to make this the first of our tougher hikes. We slowly worked past many technical sections to the falls but neither of us went all the way up to them because the last 20 feet or so requires either scrambling up a sheer rock face or crossing the creek on a wobbly piece of metal set up for that purpose. We turned around and started up the steep trail. It is a mixture of wooded and full sun on the trail and we made it about 1 mile in before we turned around. The views of the valley even from 1 mile in are amazing and I’m sure it just gets better from there.
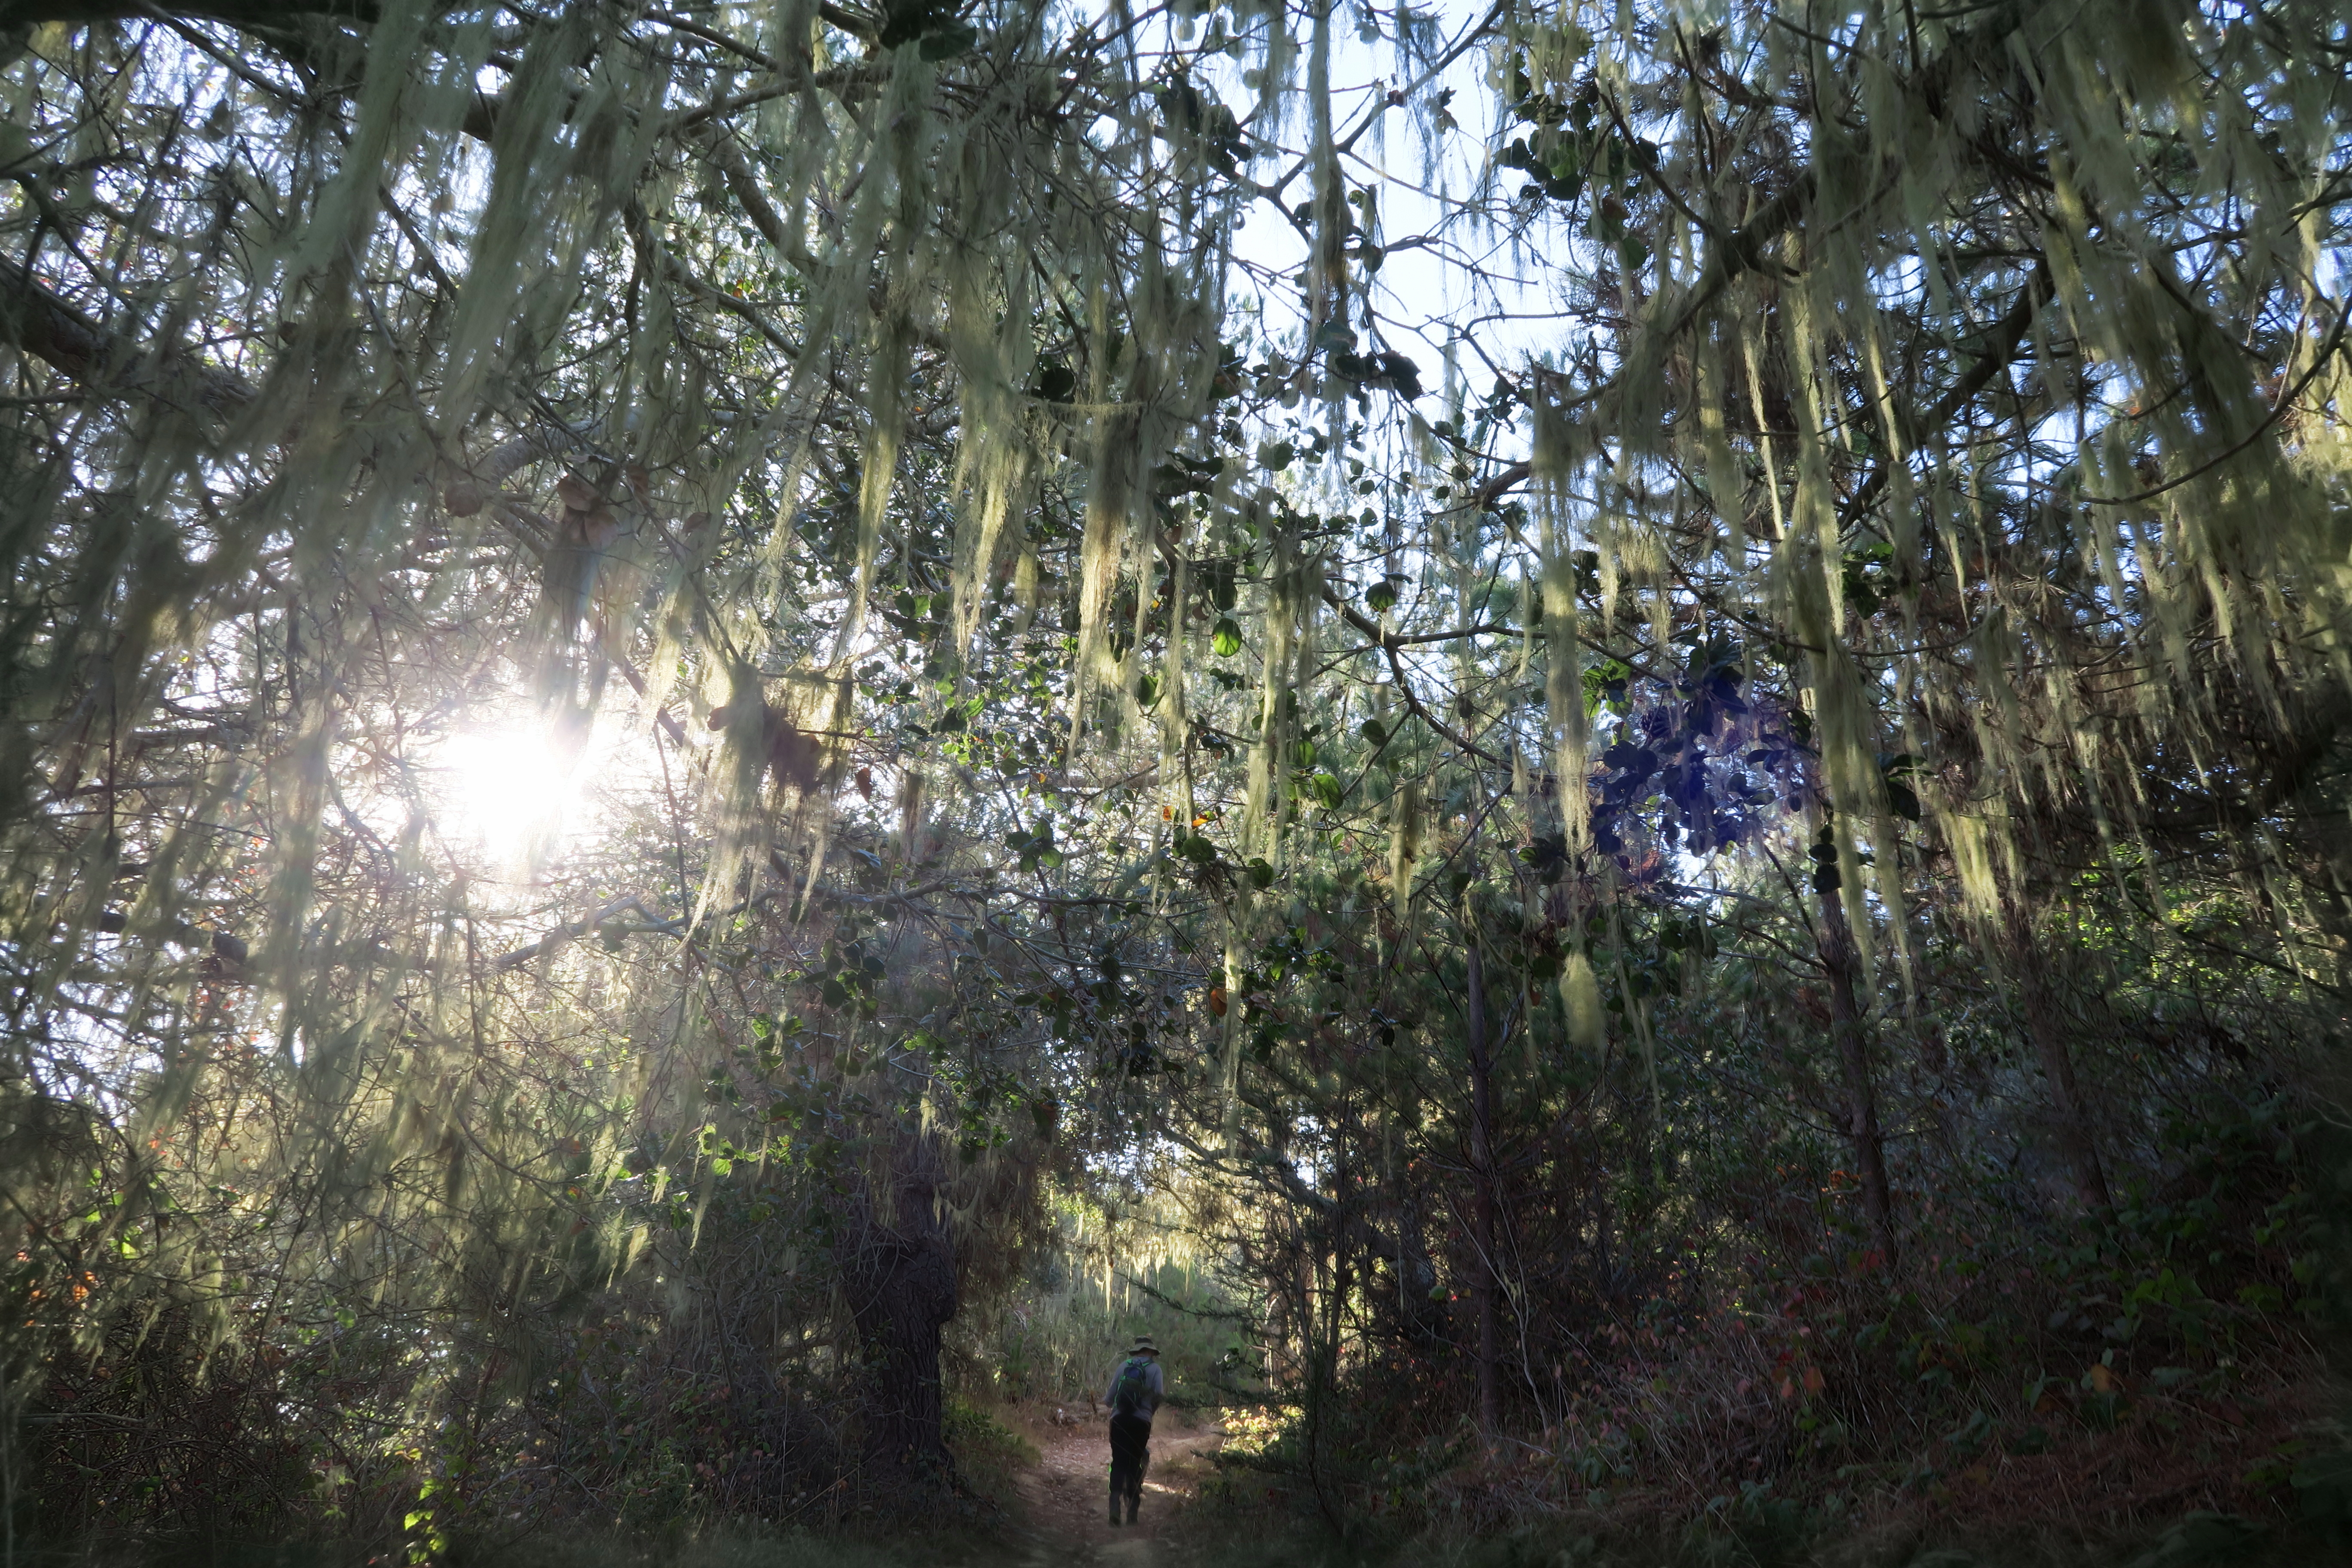
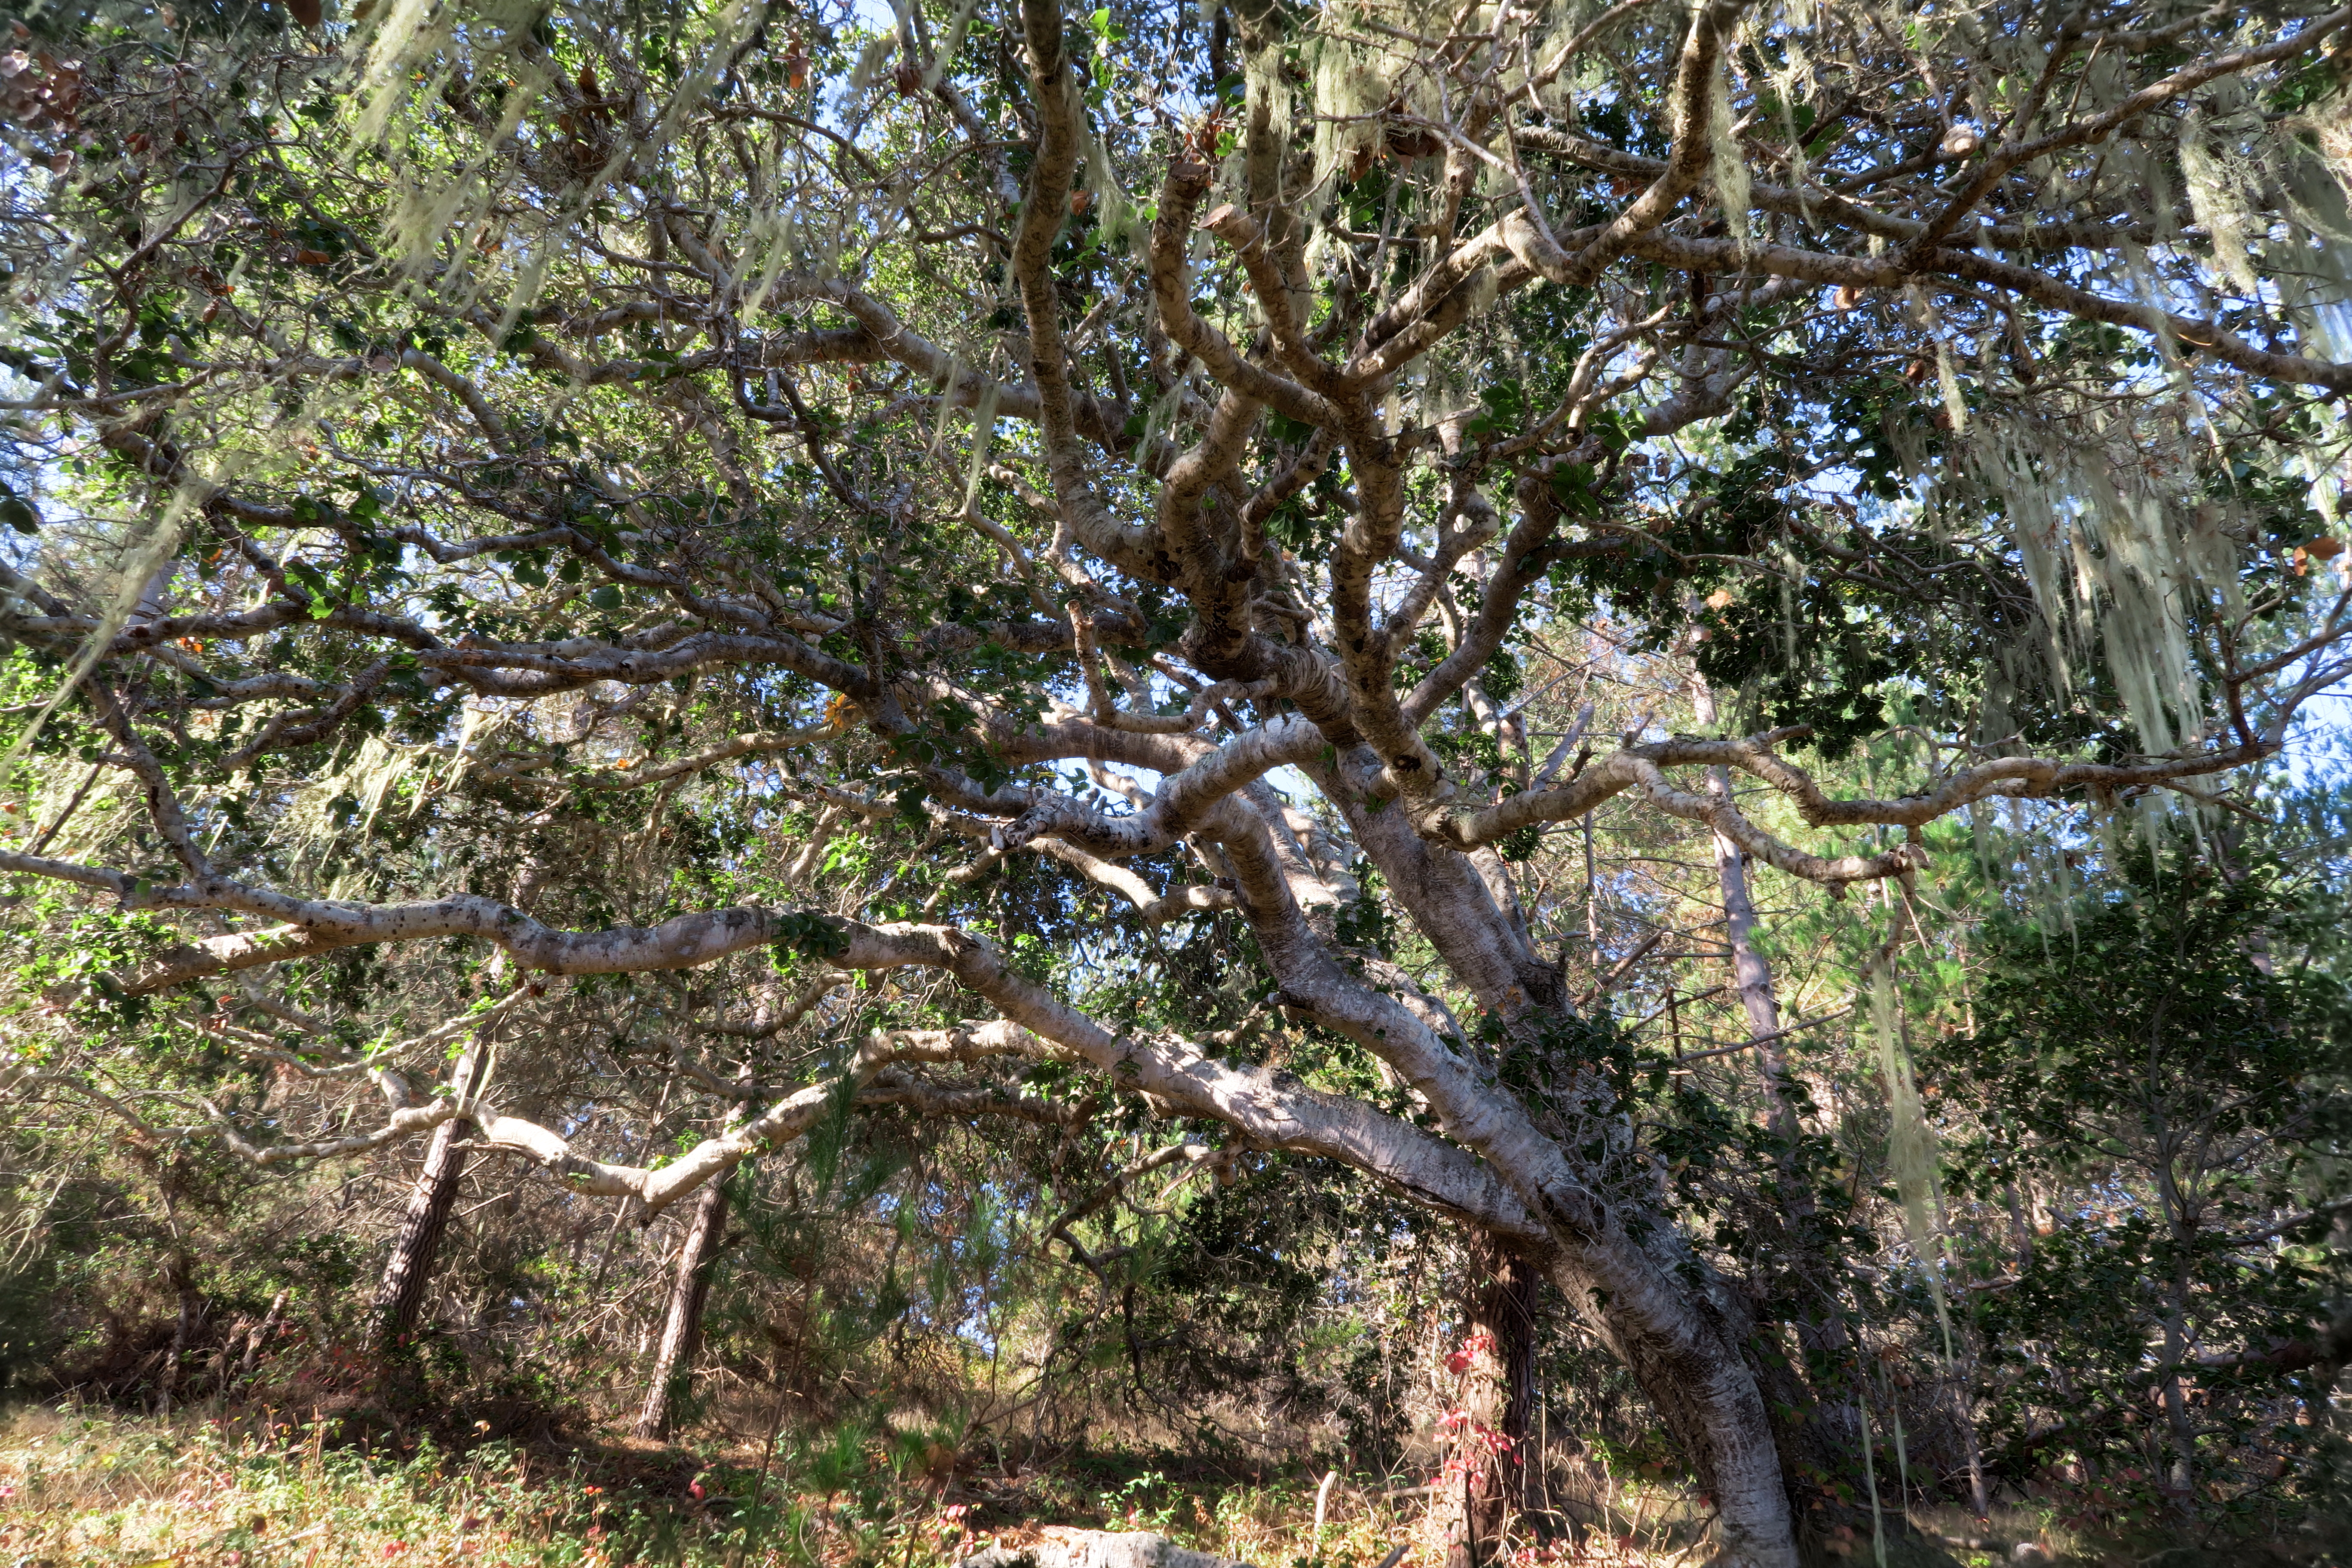
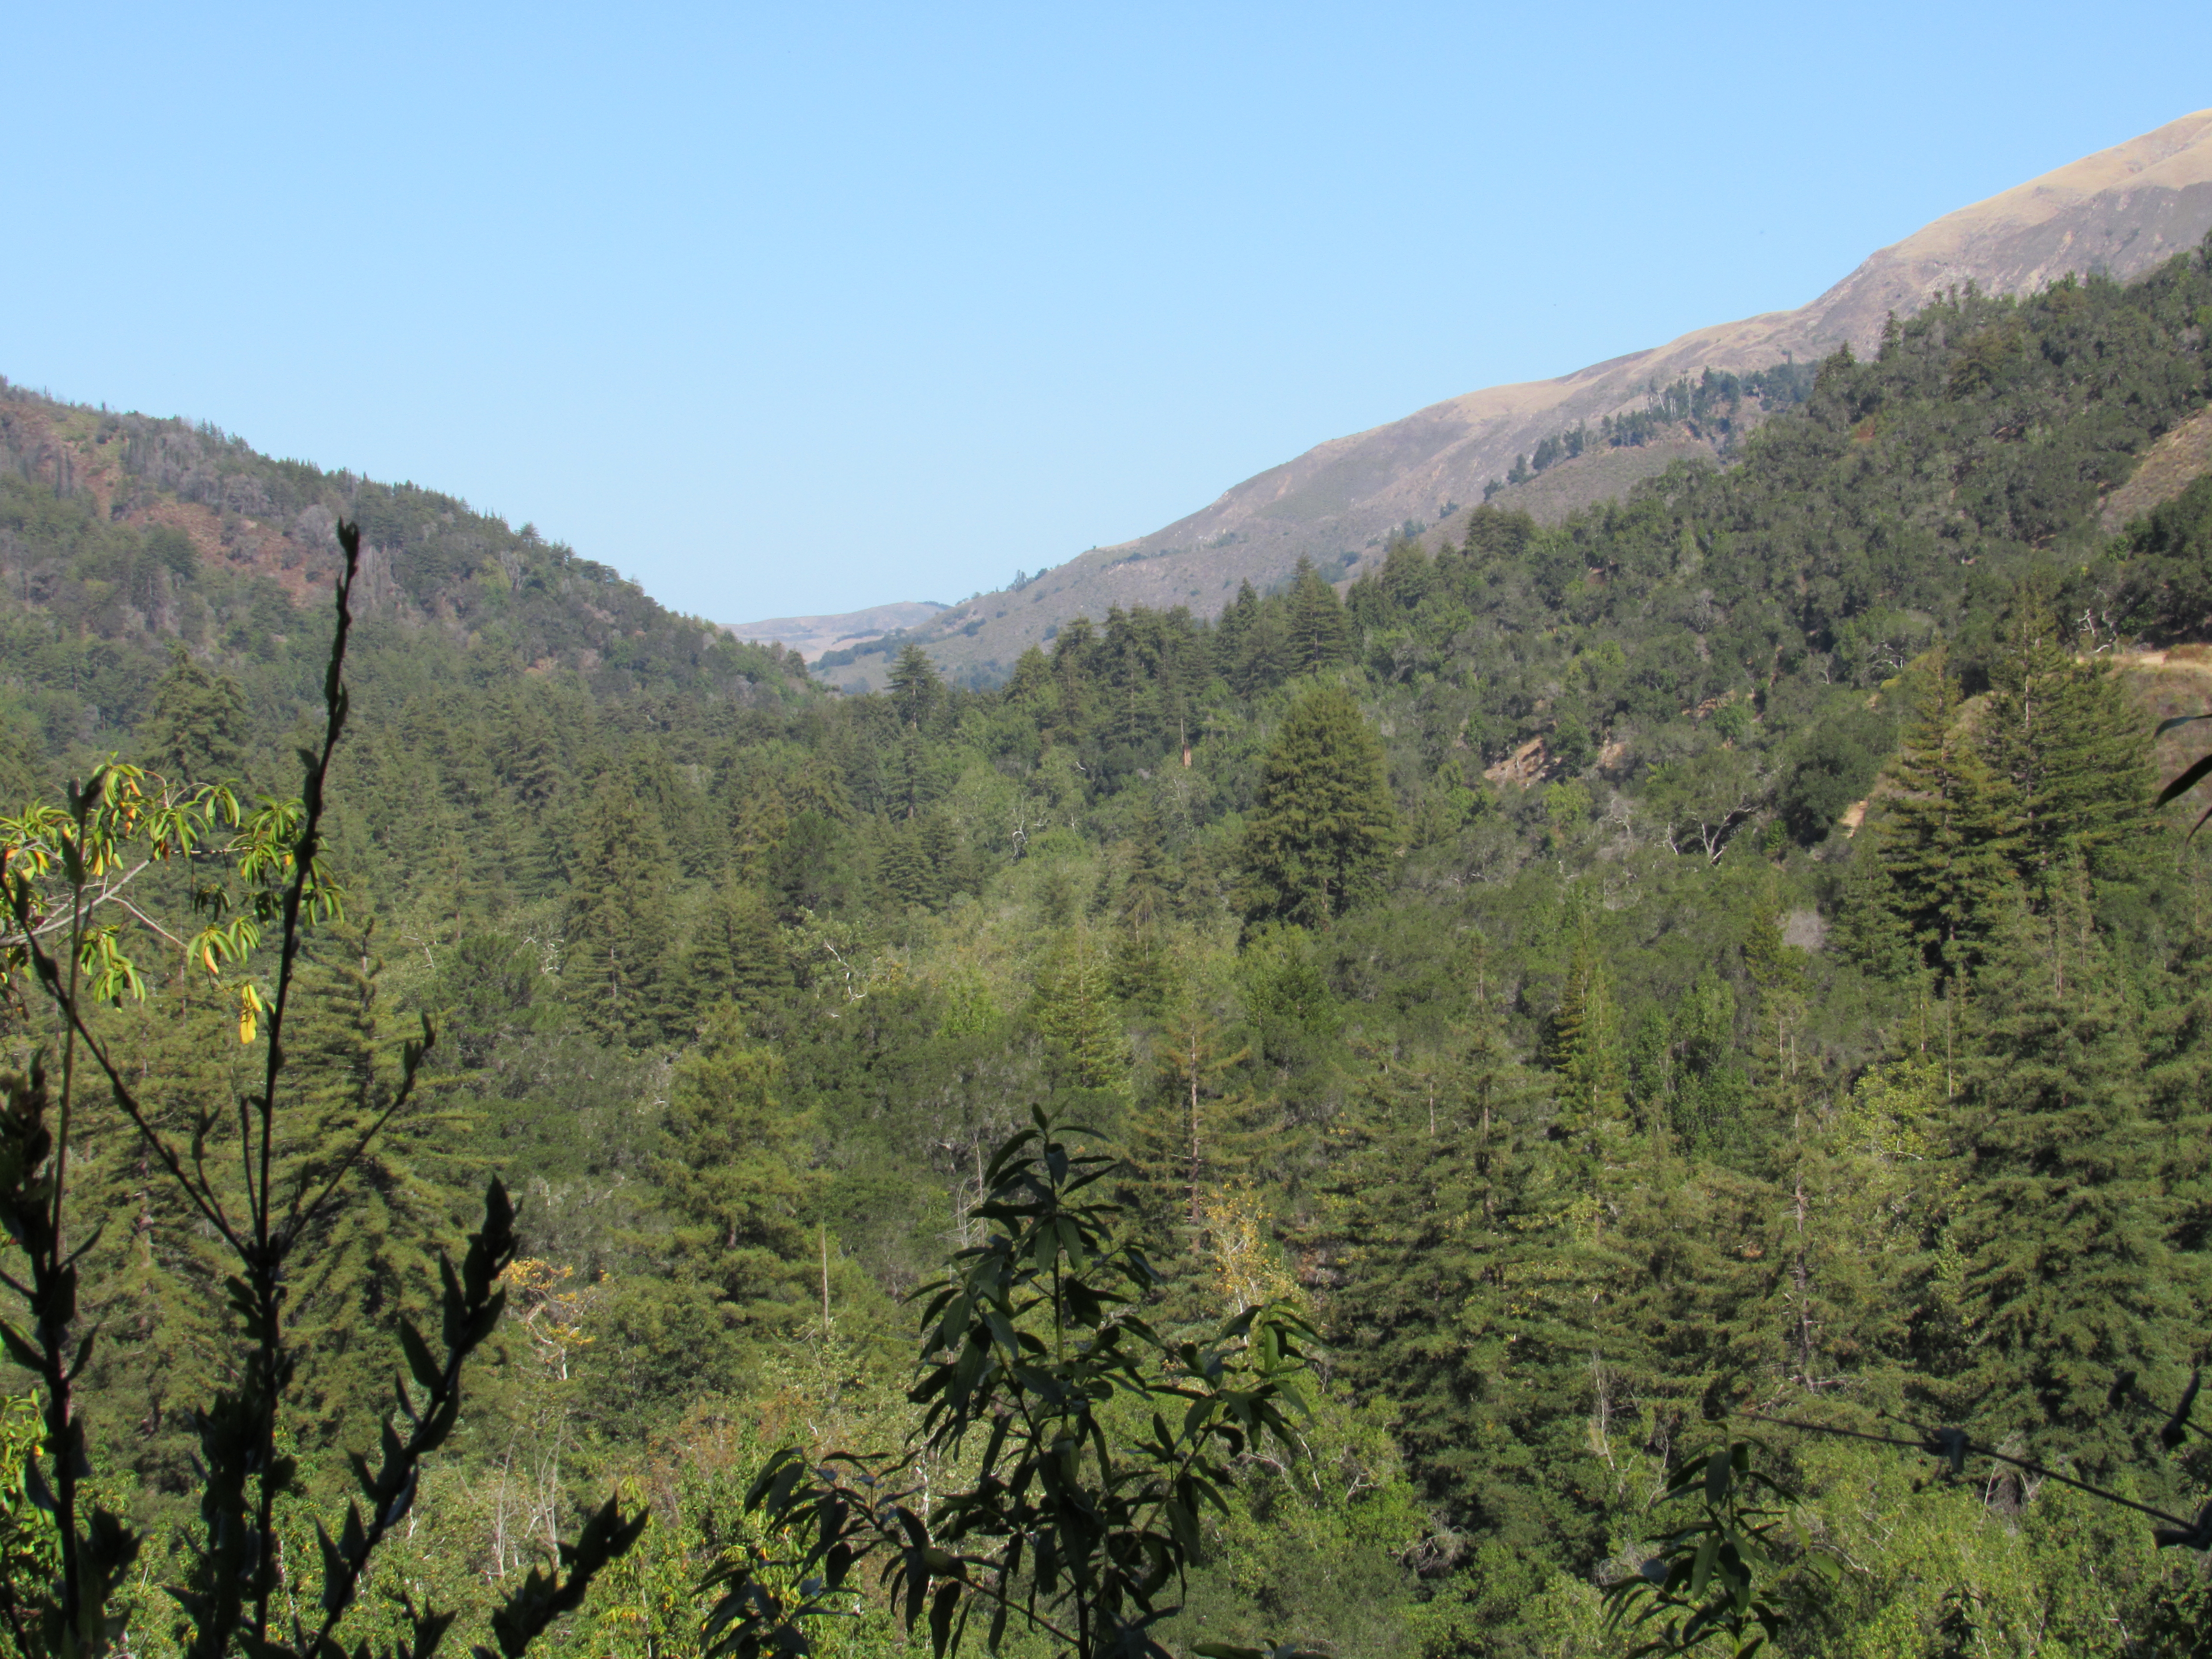
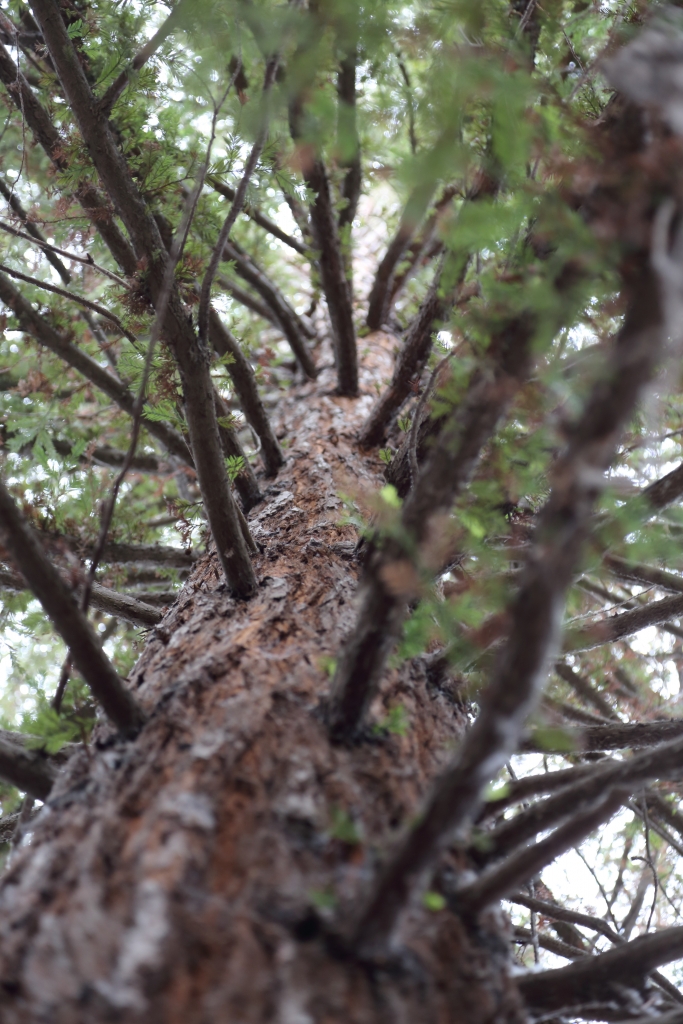
This trail is the almost entirely forest including many redwood trees. The parking for this trailhead is in a fee area. You fill out the envelope and stuff the money in the box yourself. Jamie did this and then we set out. The trail starts very adjacent to the campground for Pfeiffer State Park although on the other side of a small creek. We eventually crossed the creek and started the ascent. The trail narrows and becomes slightly technical as it ascends. Once past a certain point, the trail is almost entirely washed out. We decided to turn around here. I might have been able to get by but not with a dog and not with a pregnant hiker. The drop off next to the trail is extremely steep. Hopefully the trail is repaired soon because as it stands now it is impassable at this point. Even though we were forced to turn around, the trail is worth it even for the part that is hikeable. There are many interesting plants and trees on this trail and even a few locations where the breeze comes down in small draws in the hillside and provides cooling if you stand in just the right spot. We found one of these locations and took the opportunity to have snacks and give Maxx water. You can see the ocean from this trail through two different valleys.
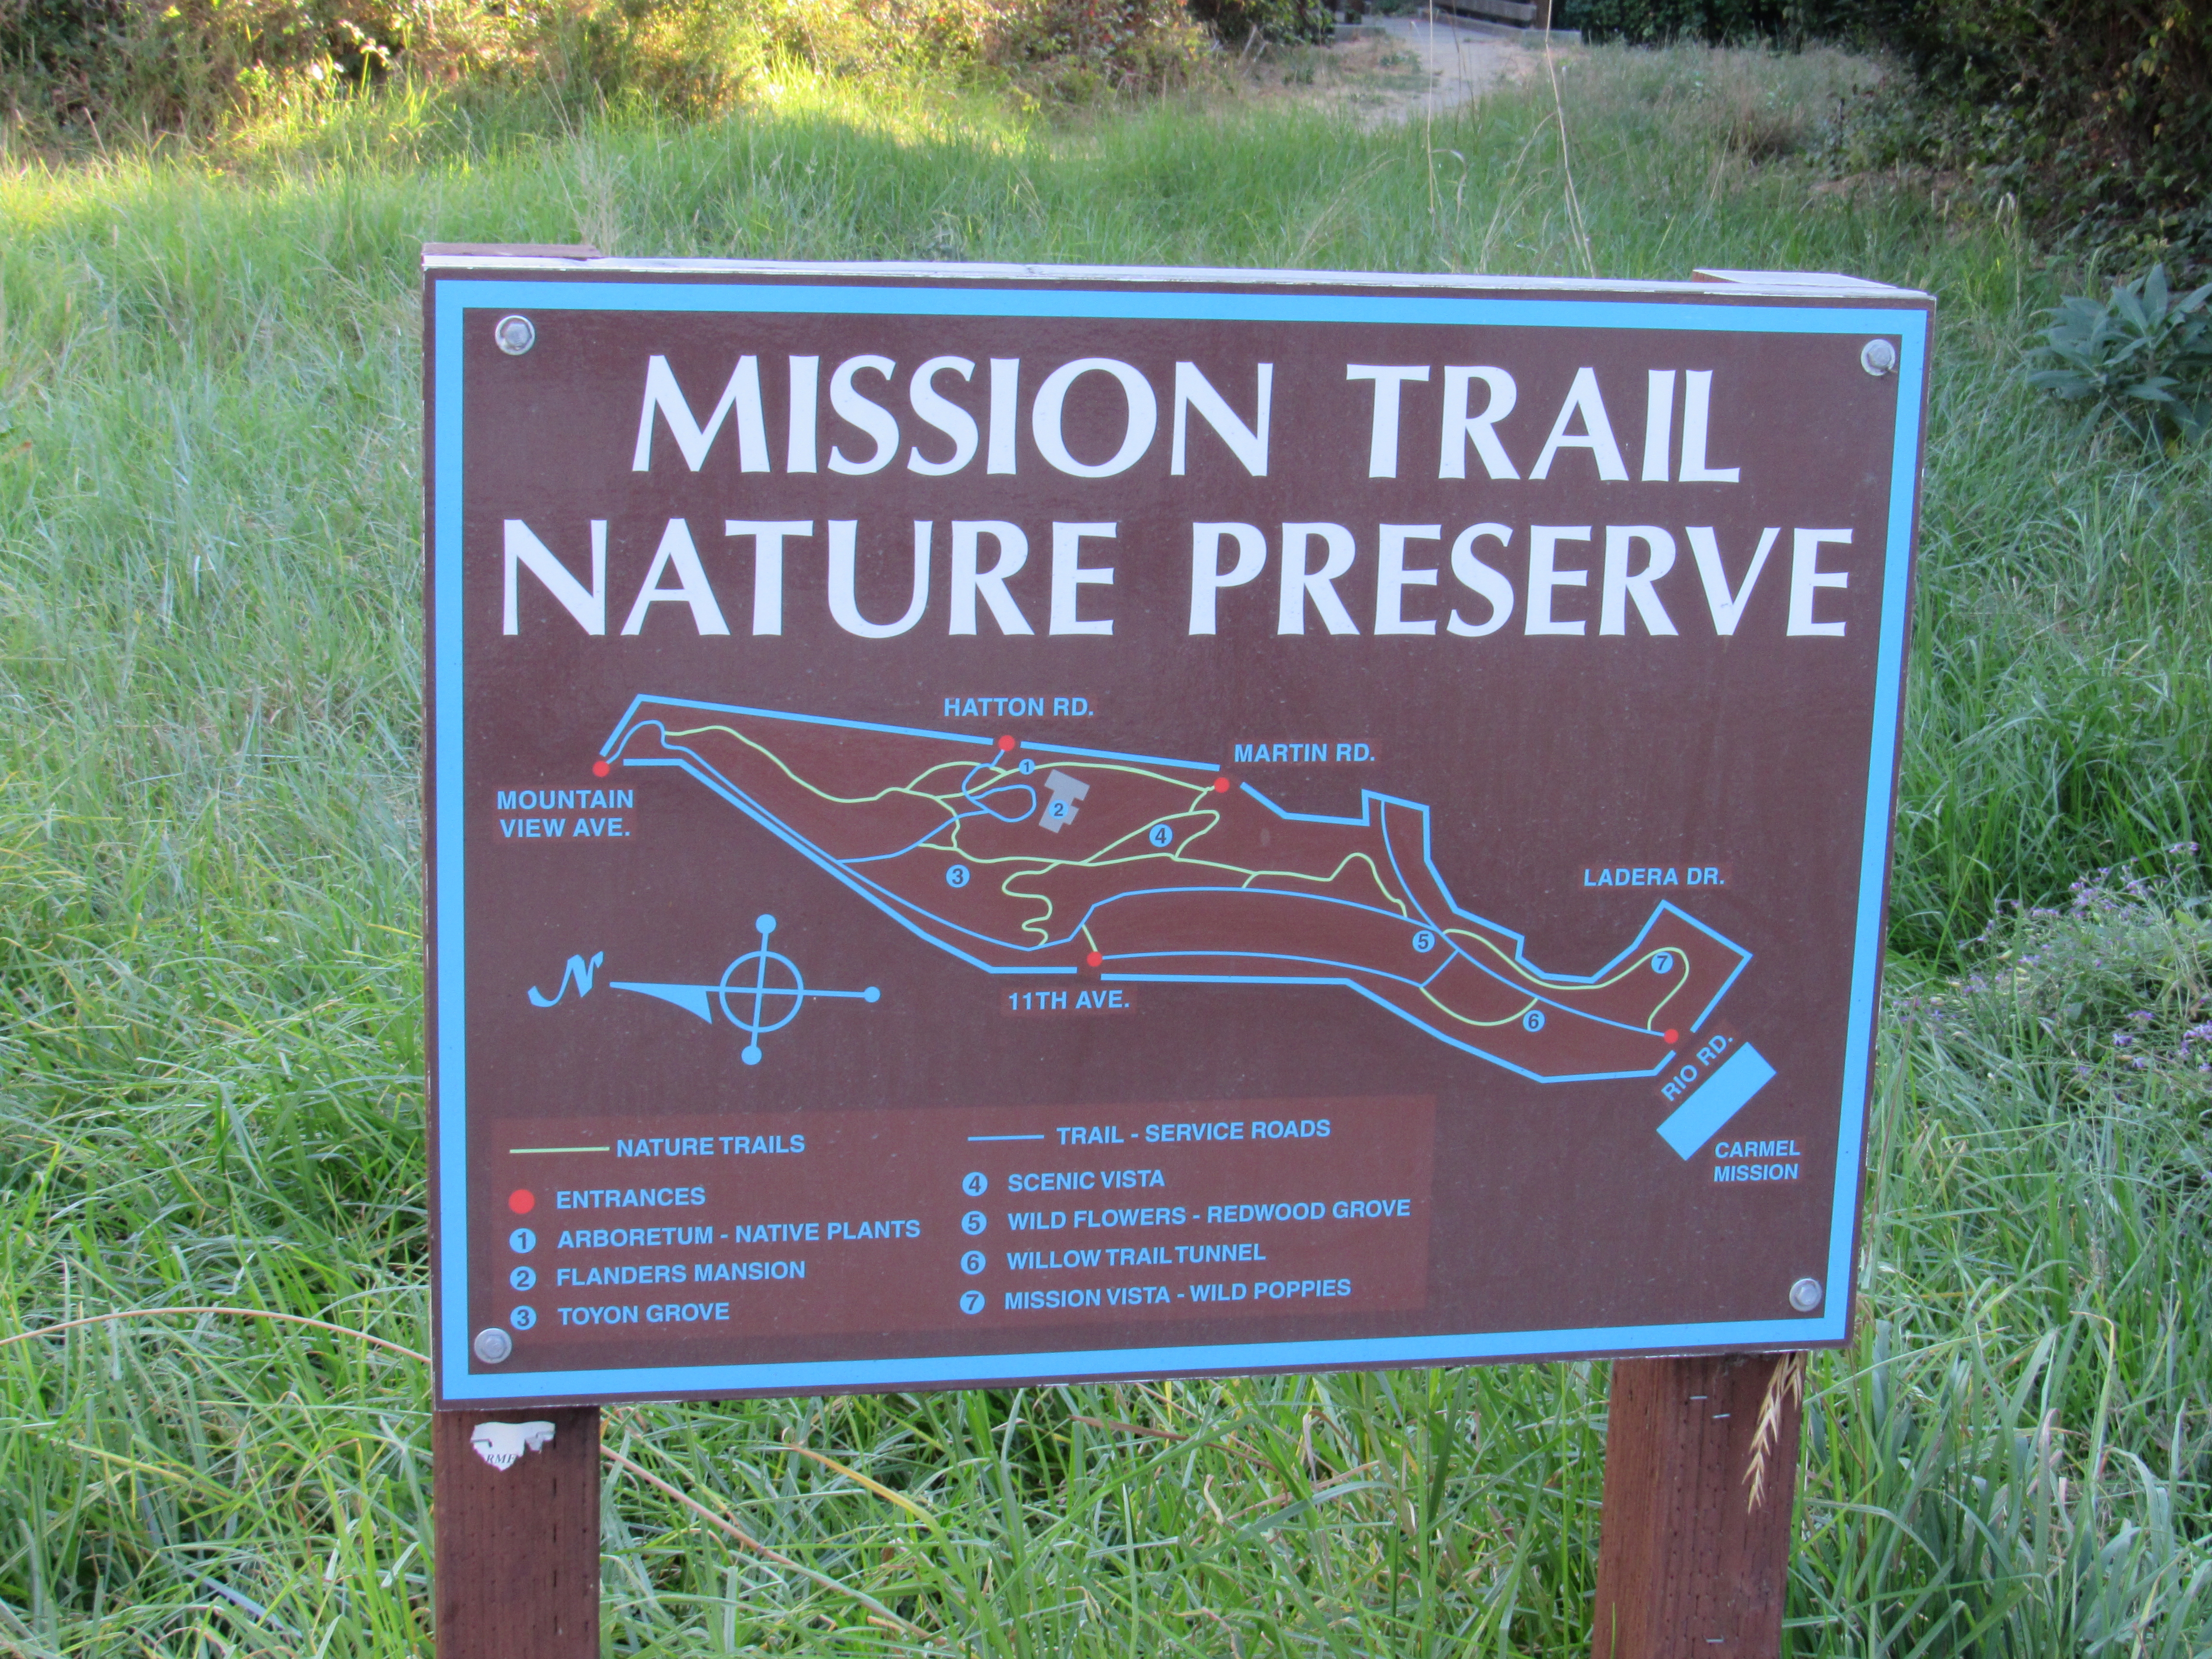
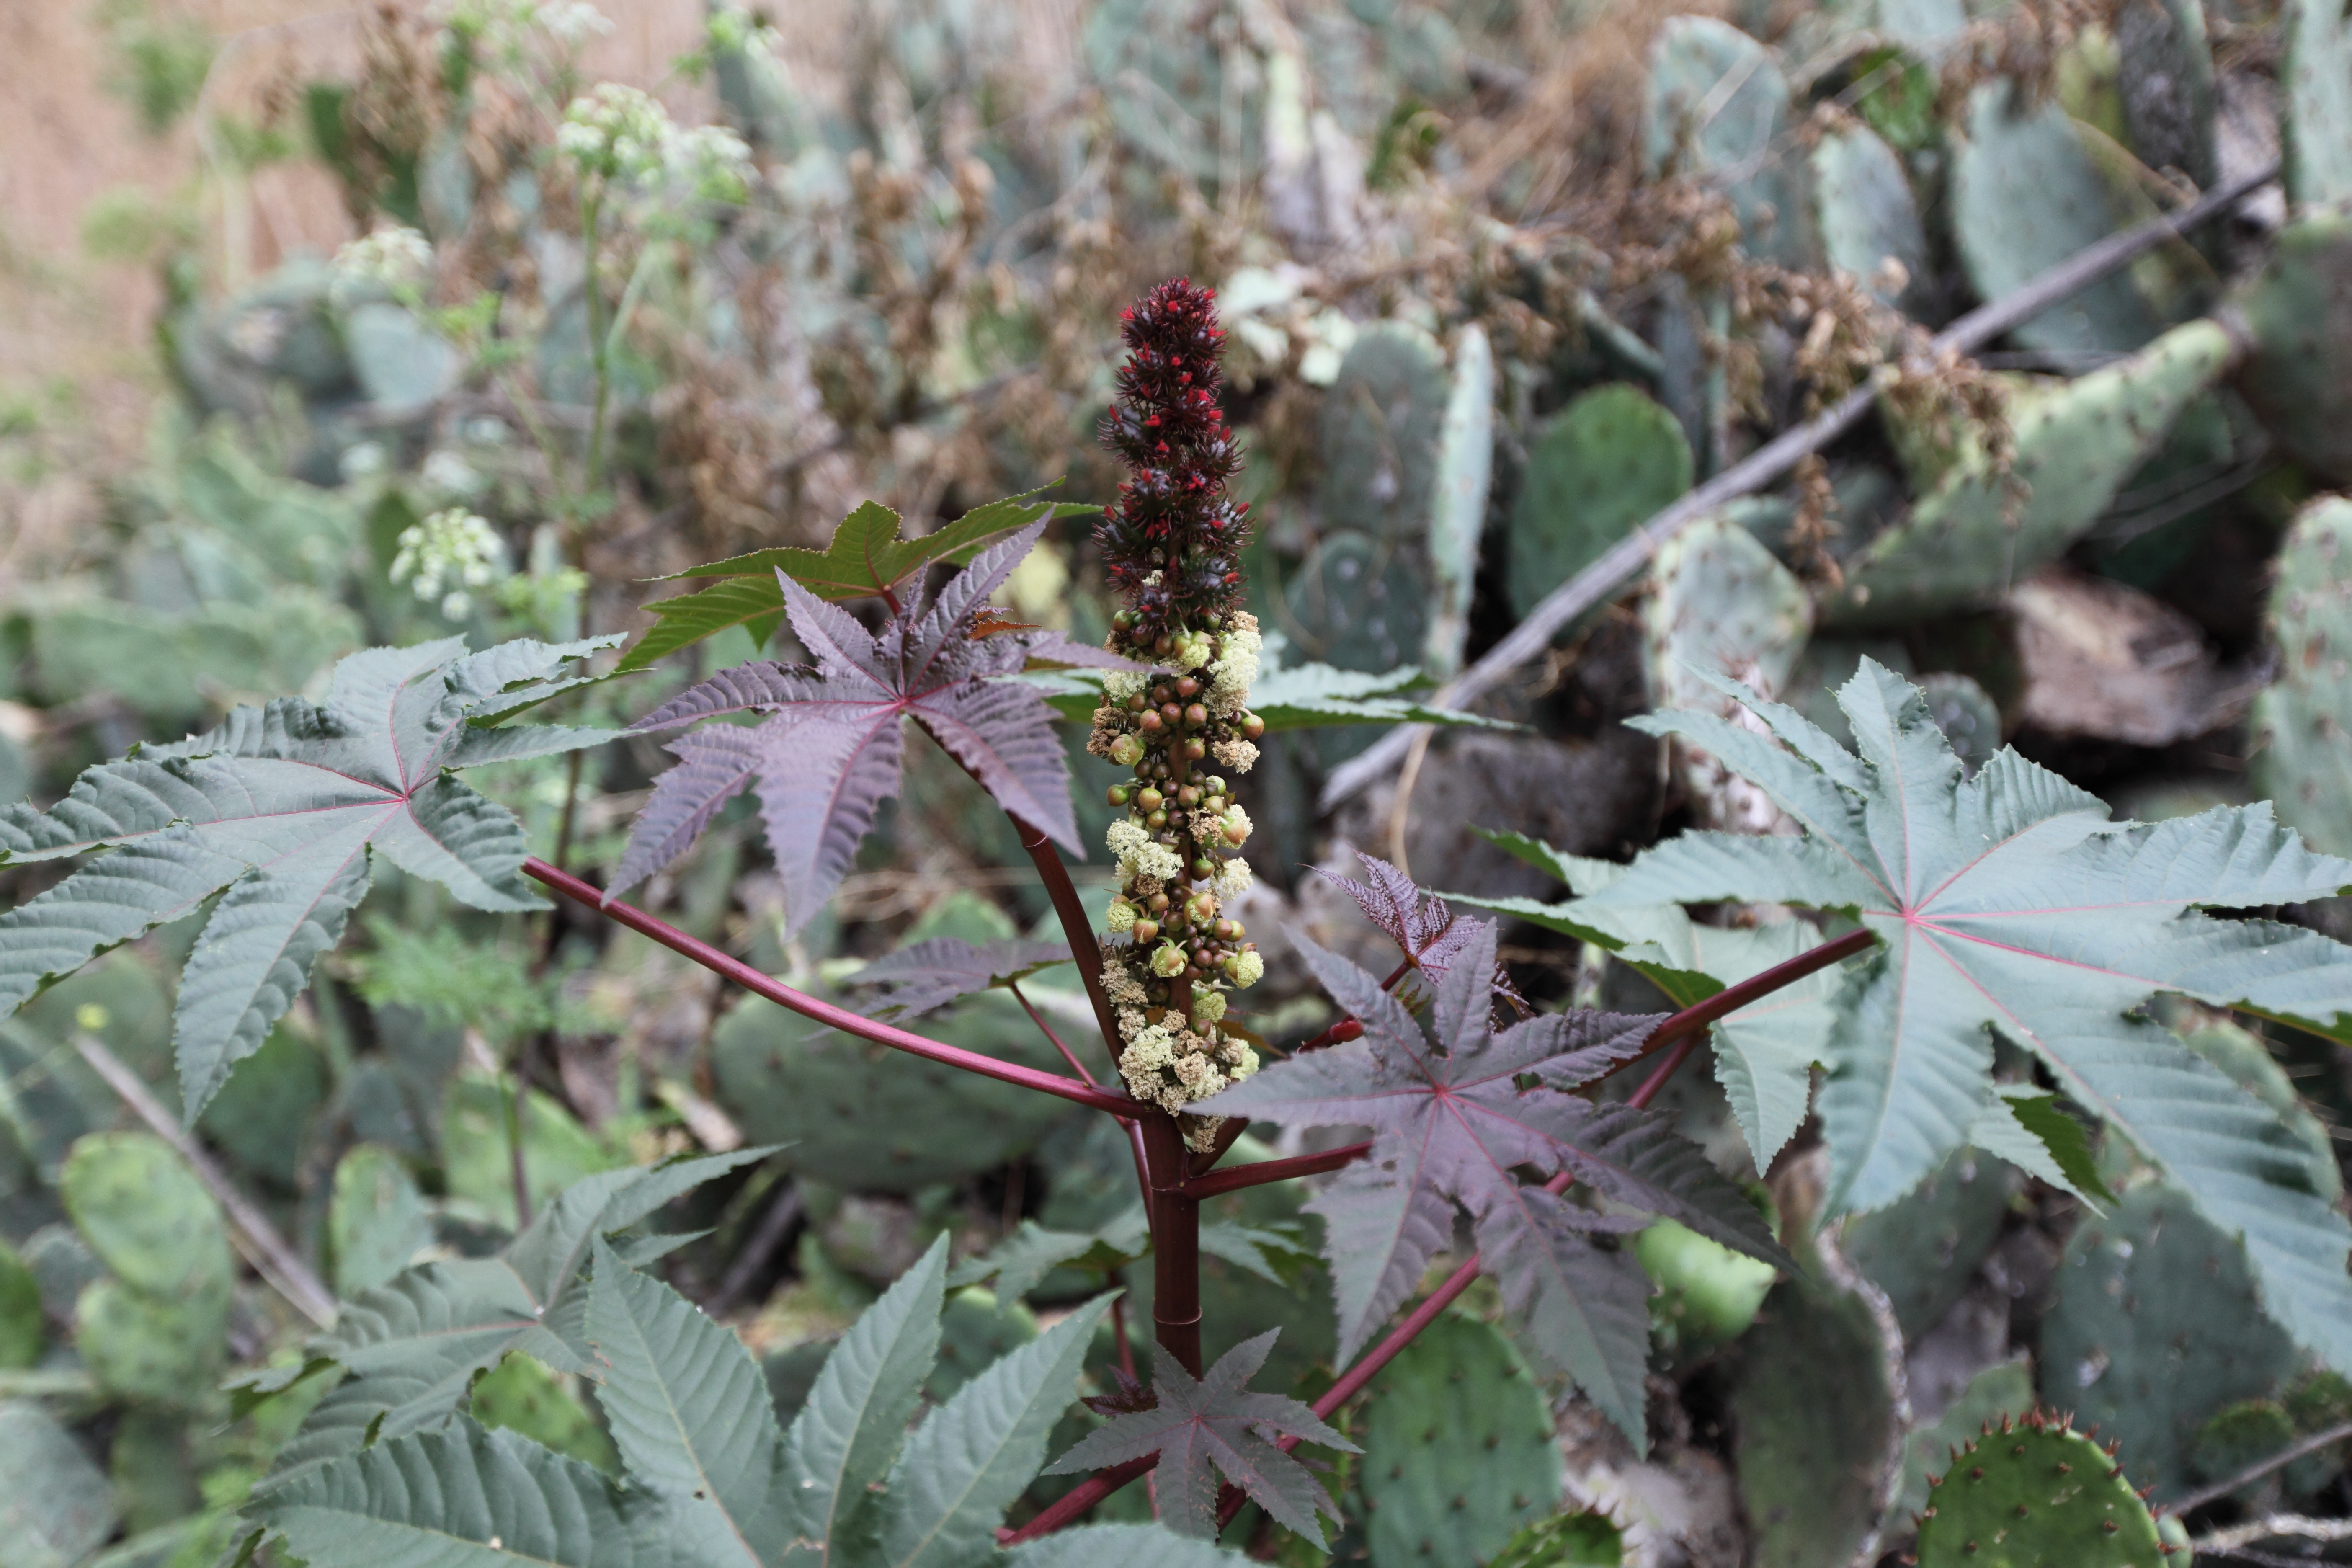
Located off Rio Road across from the Carmel Mission Basilica Museum, this park was a small yet worthwhile detour on the way to Carmel-by-the-Sea. It is dense with a myriad of plant life and includes a maze of trails that can be as steep or as flat as you choose. Of course, I turned onto every uphill I could find. Dogs are allowed on leash and the environment is perfect for them because of the ample shade. I mostly photographed plants and berries at this park.

Carmel Beach City Park and Carmel Meadows
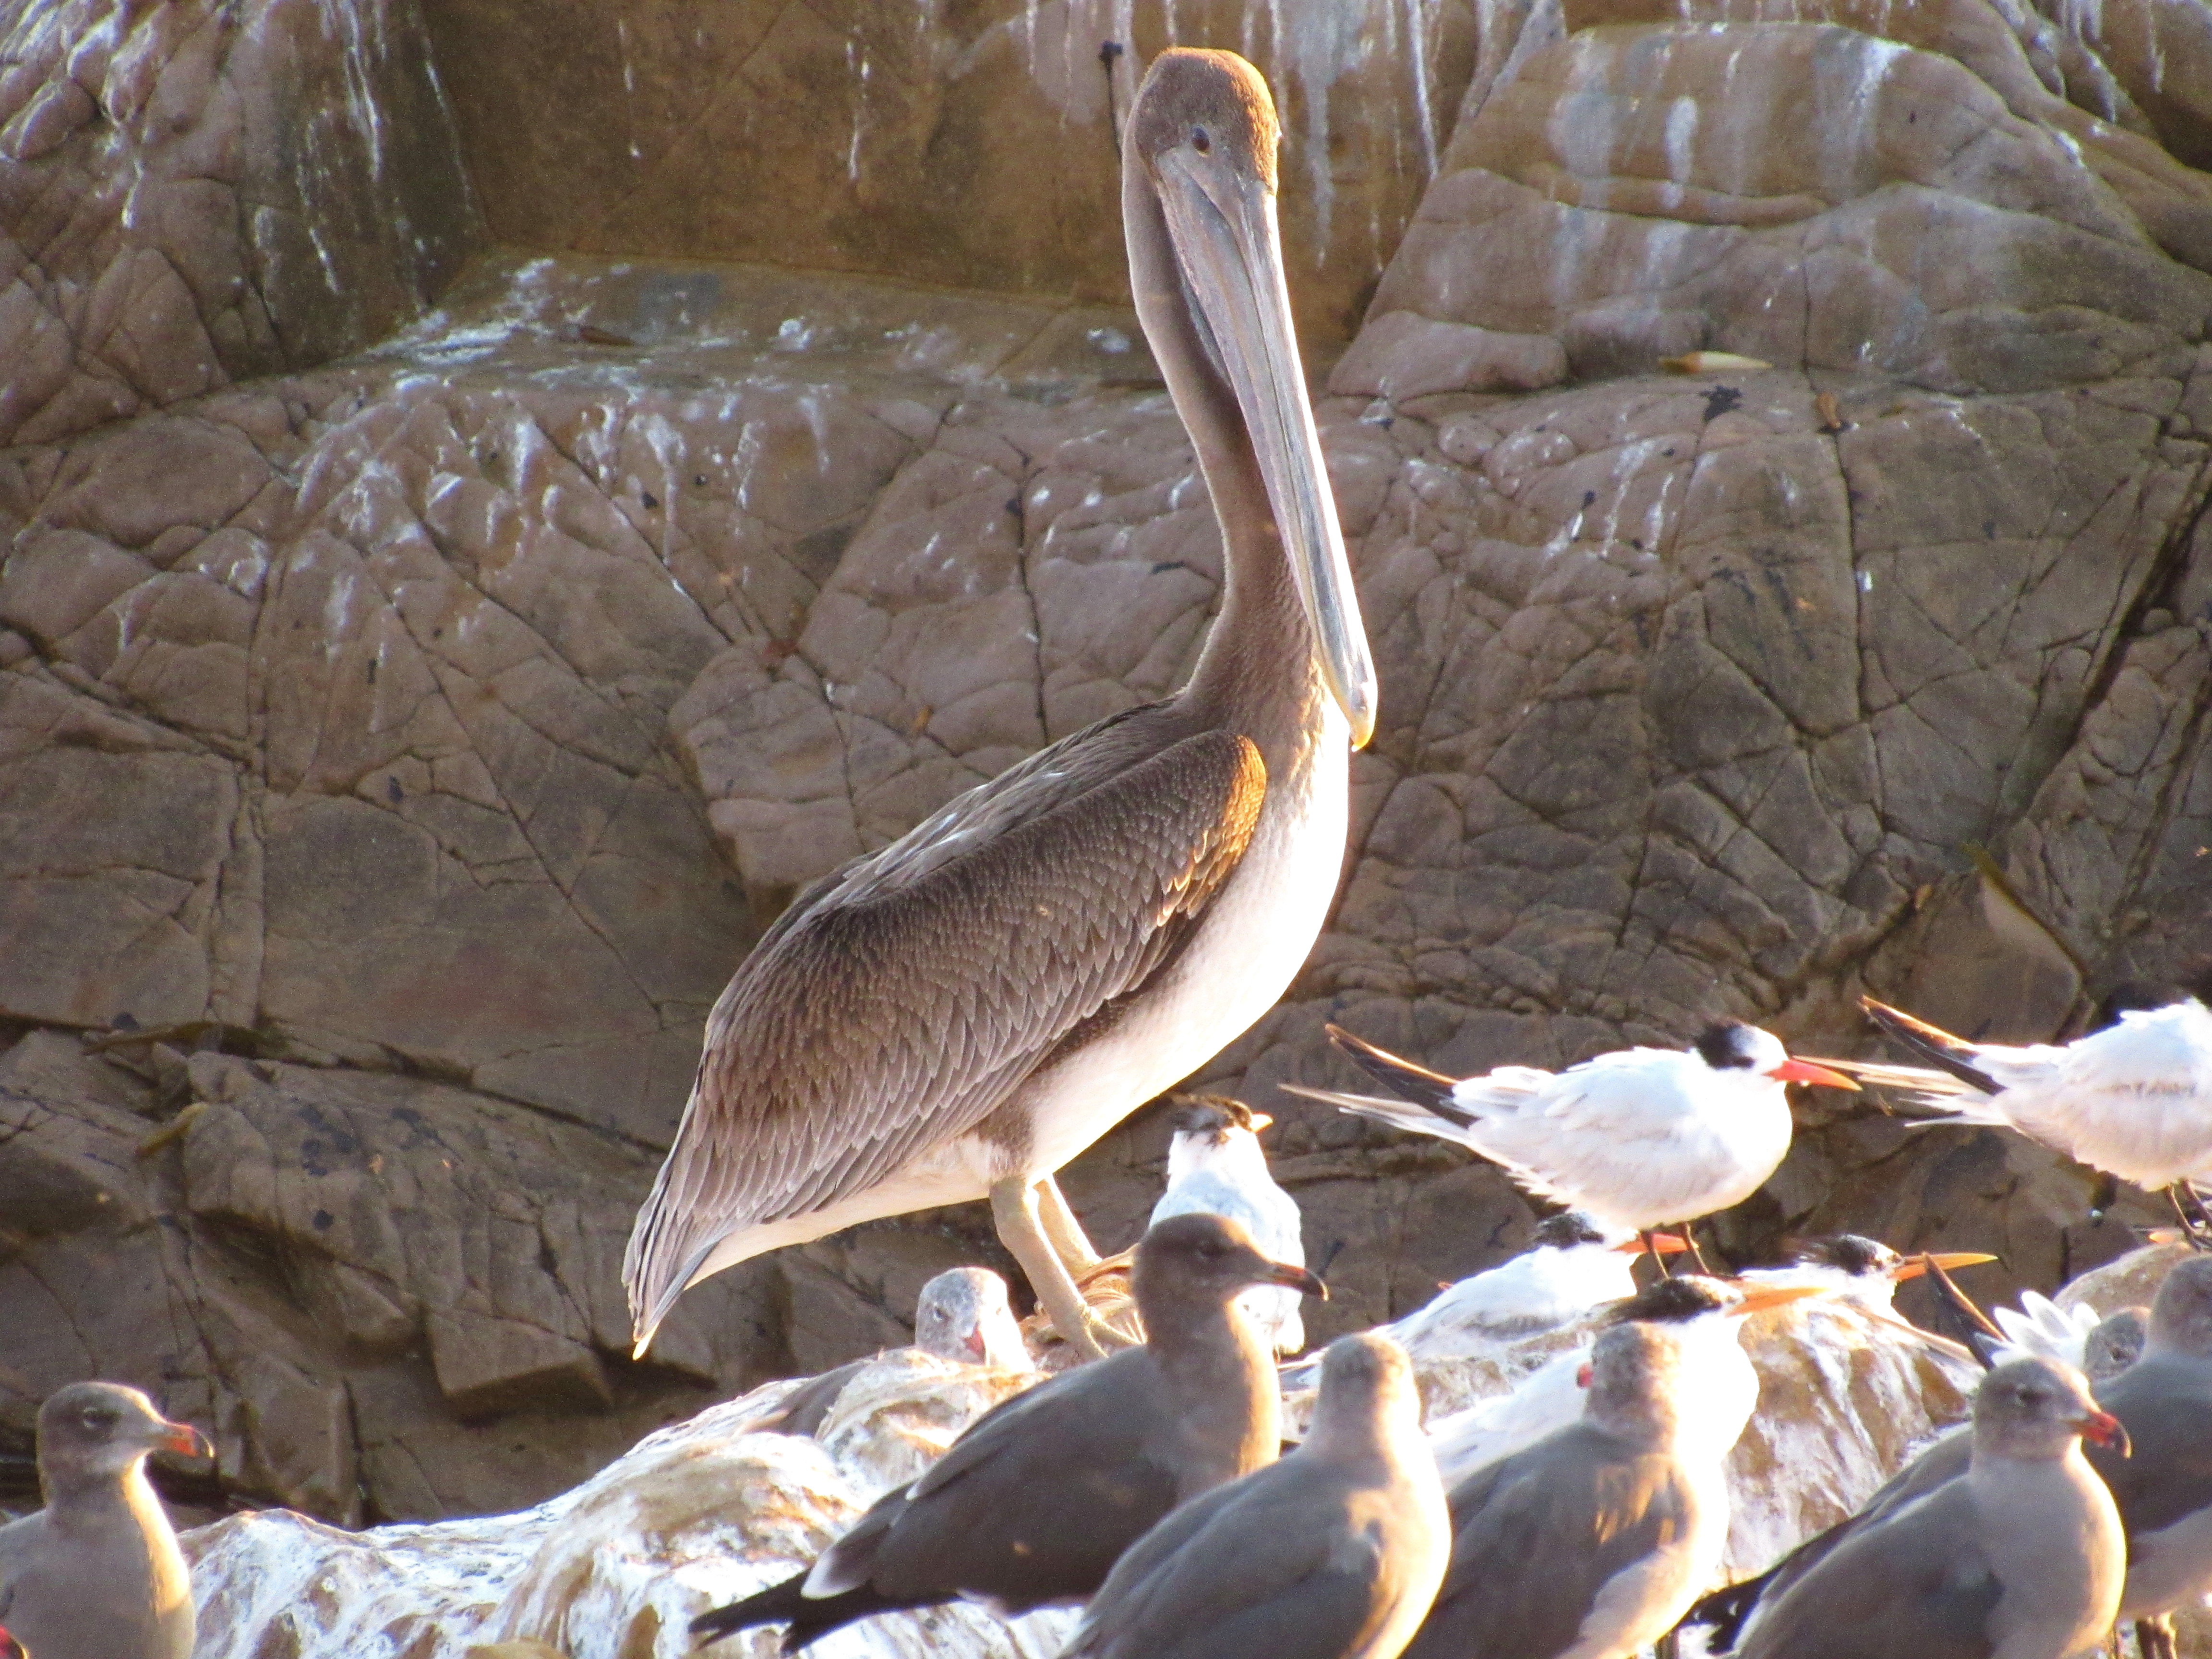
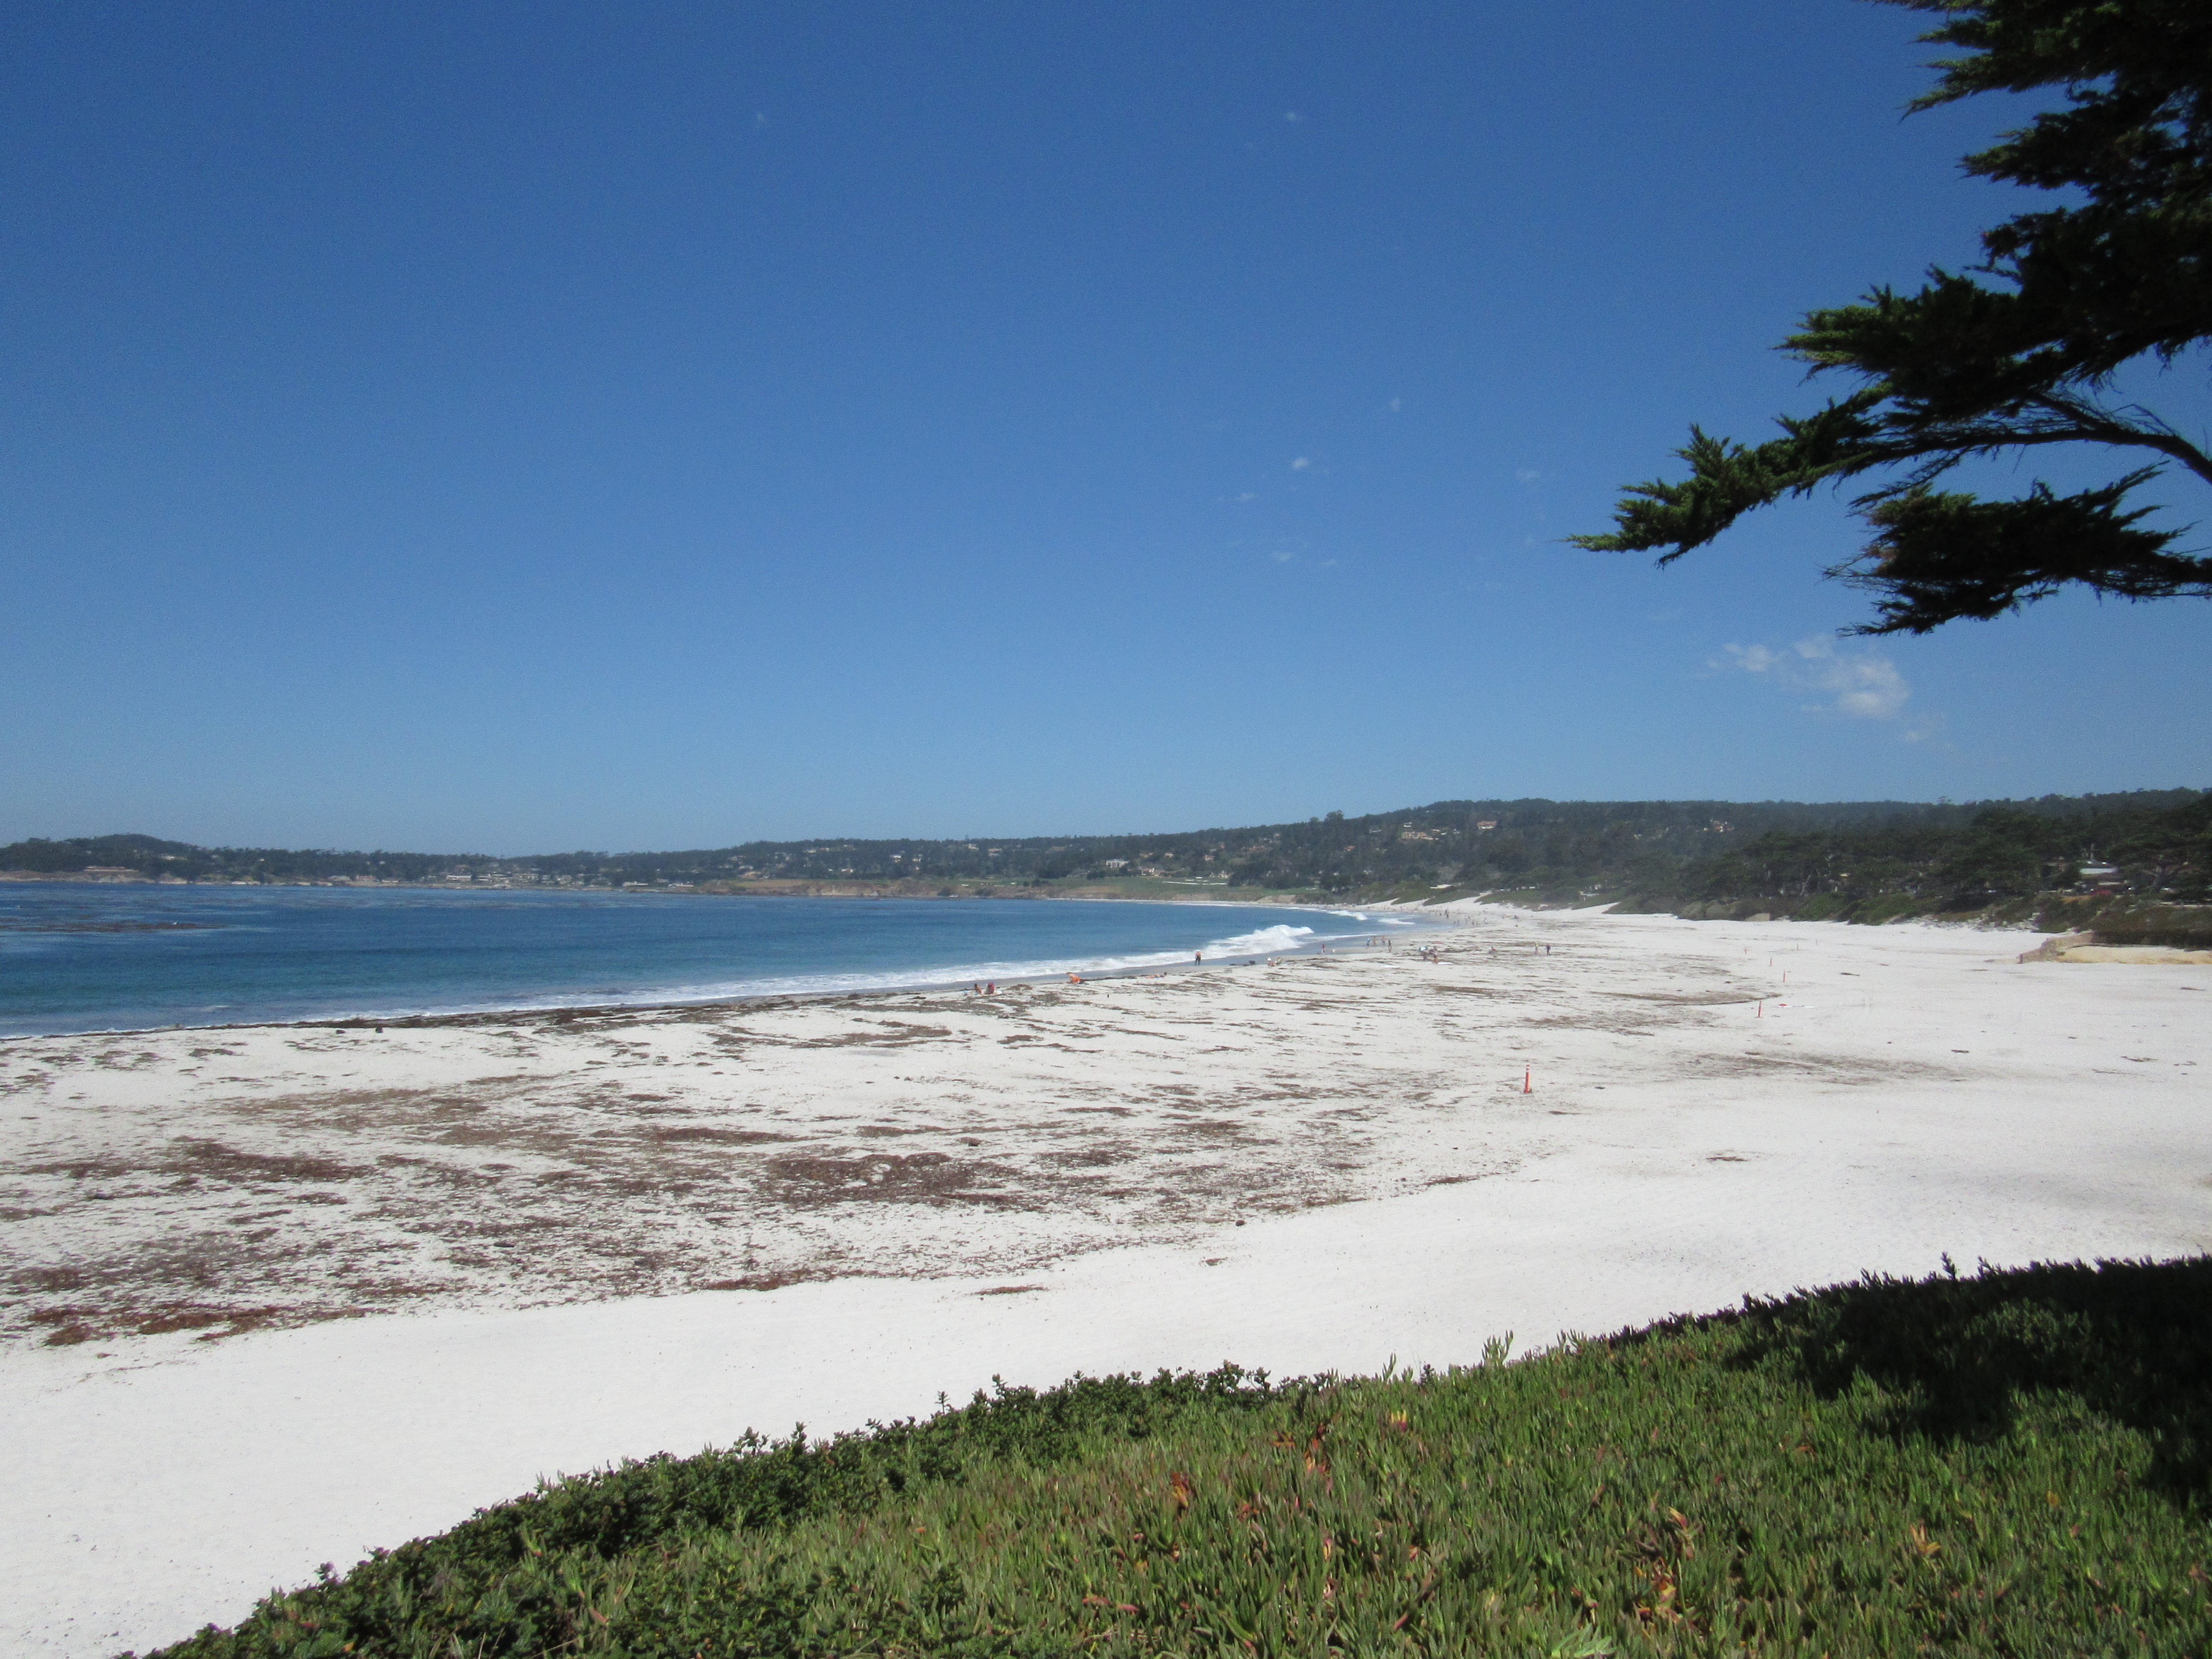
We parked near the Beach on Ocean Avenue. From there we traversed the whole dog friendly beach near the sand. There is a golf course right on the shore here and the start of the famous 17 mile drive is blocks away. This was probably one of the hottest treks we made on the trip as we made our way over to Carmel Meadows. By the time we made it, Jamie and Maxx were beat so they took refuge in the shade while I ran back across the beach again to the car to pick them up. Then I really worked up a sweat. This area is dominated by Pelicans and many of them spent a lot of their time resting in the lagoon that forms when the Carmel river does not have enough flow to make it all the way out to the sea. When they were not resting, they were hunting their next meal.
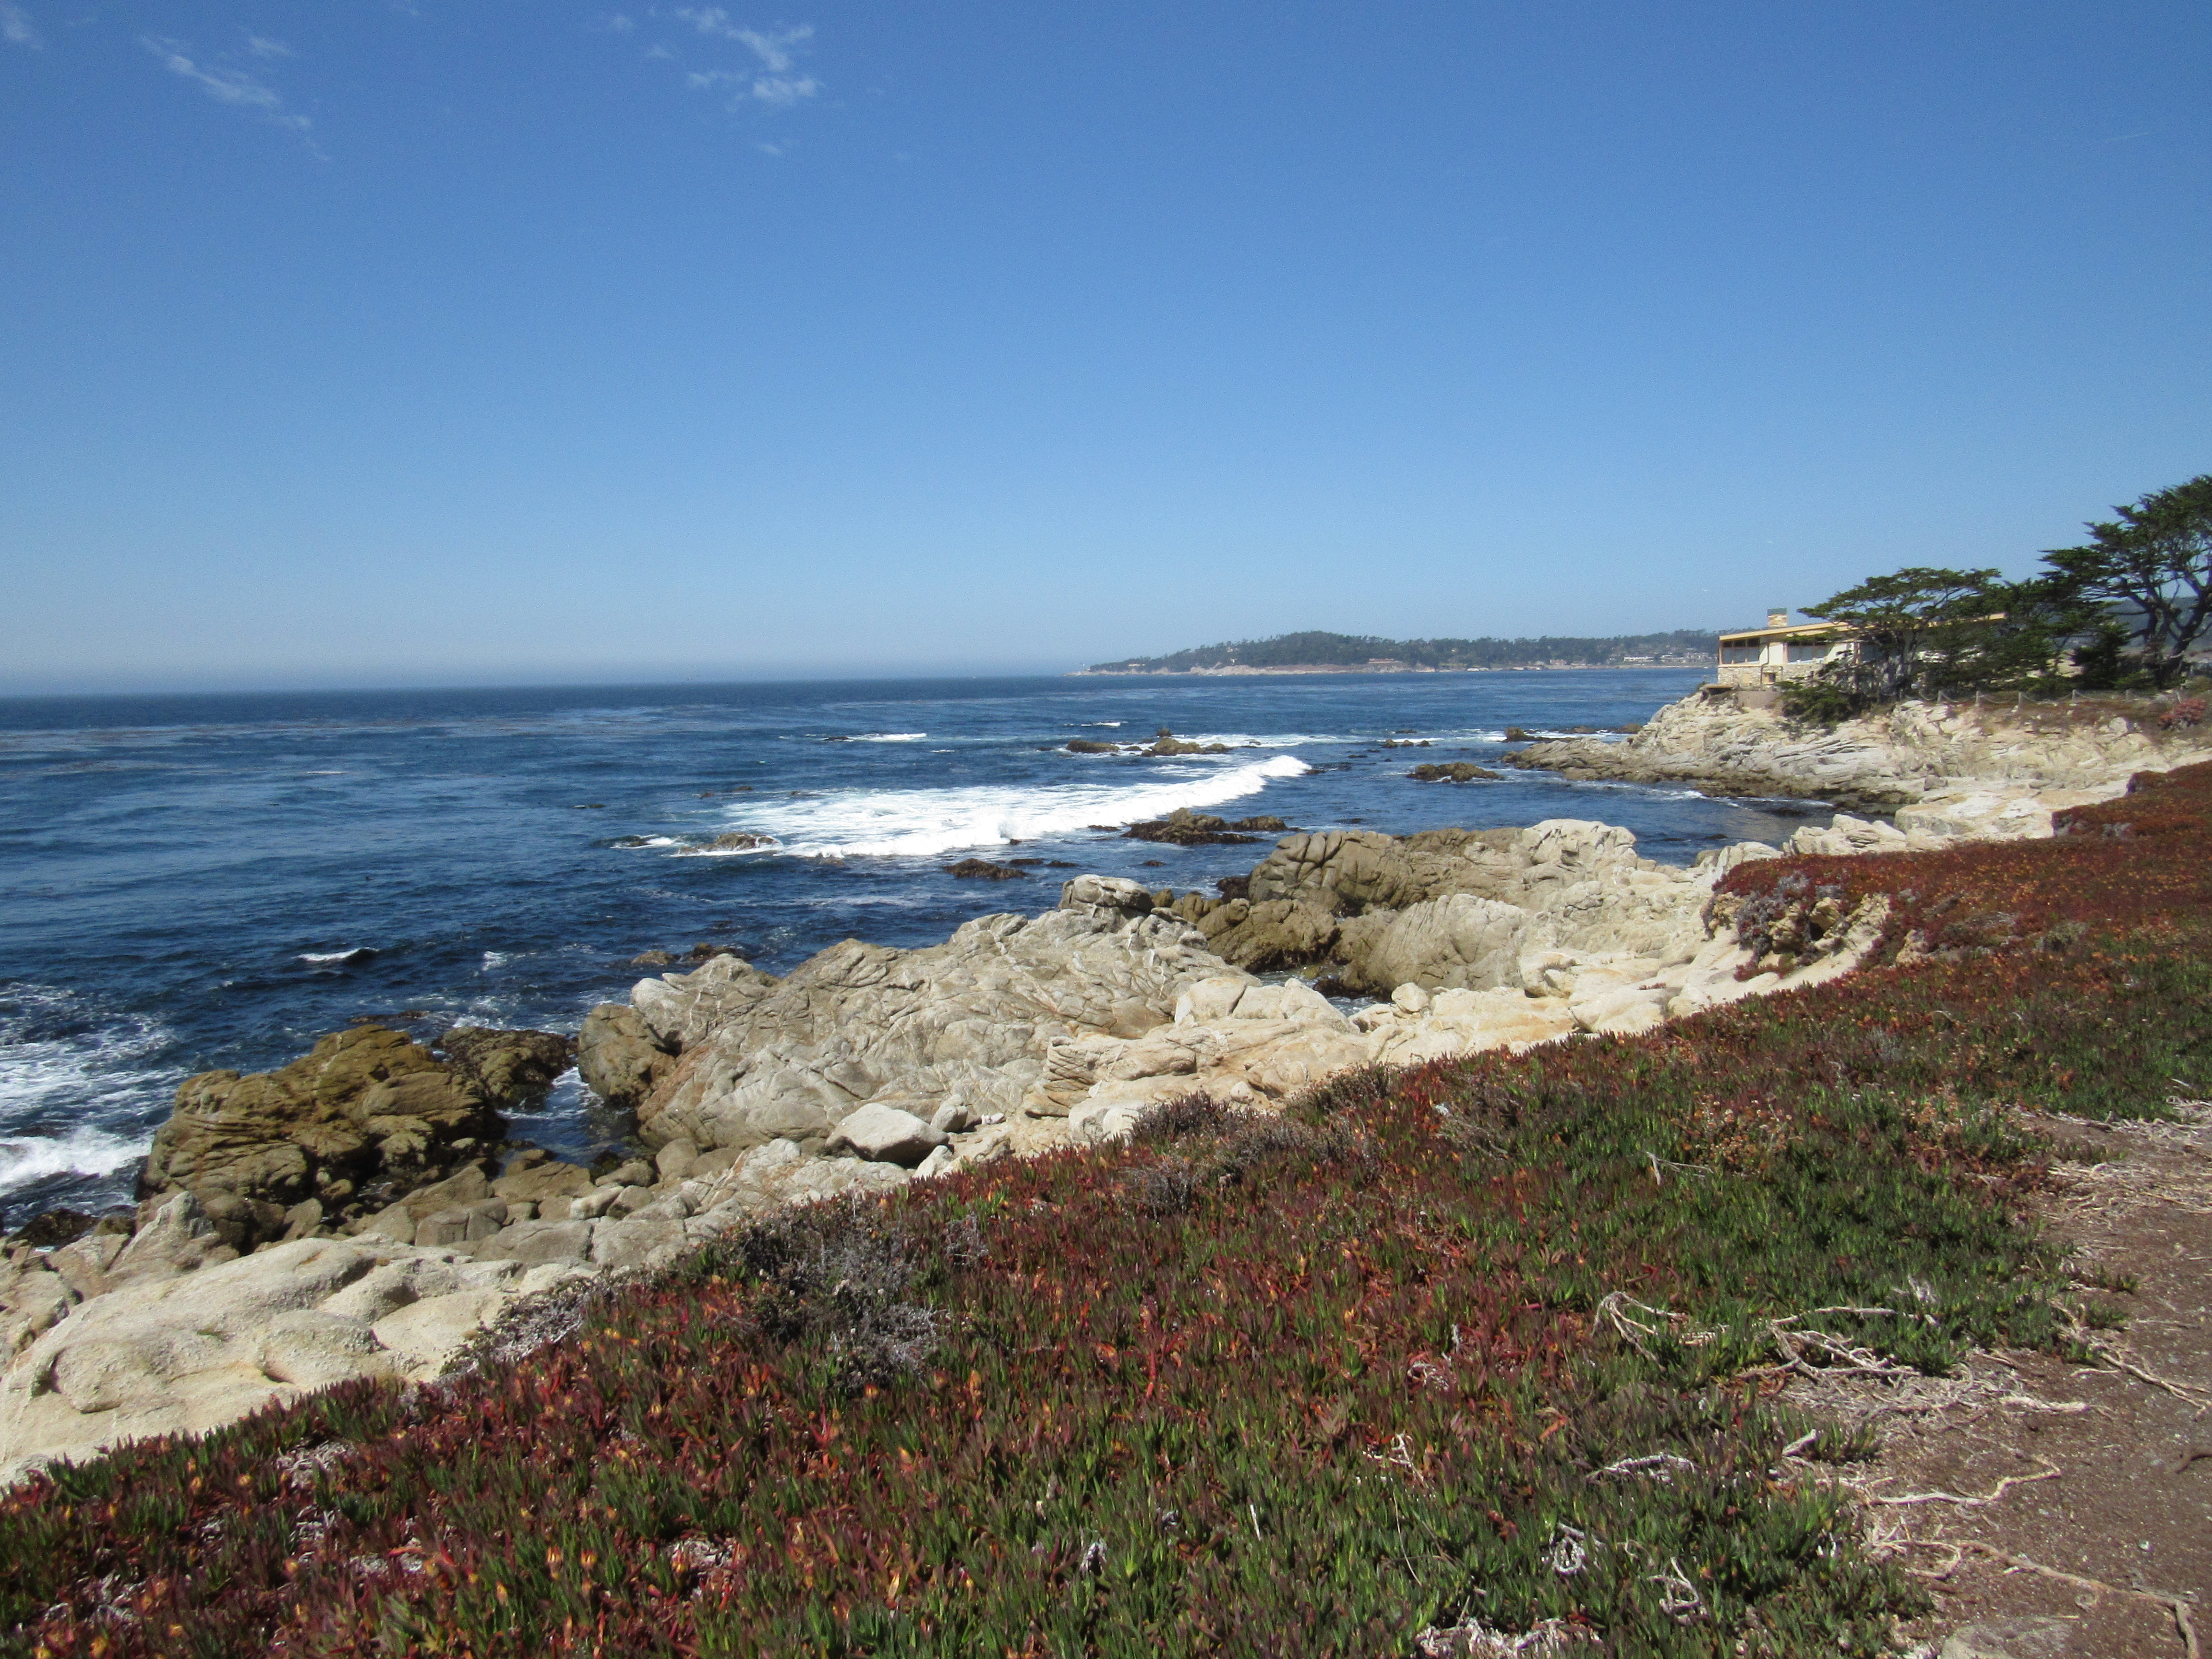
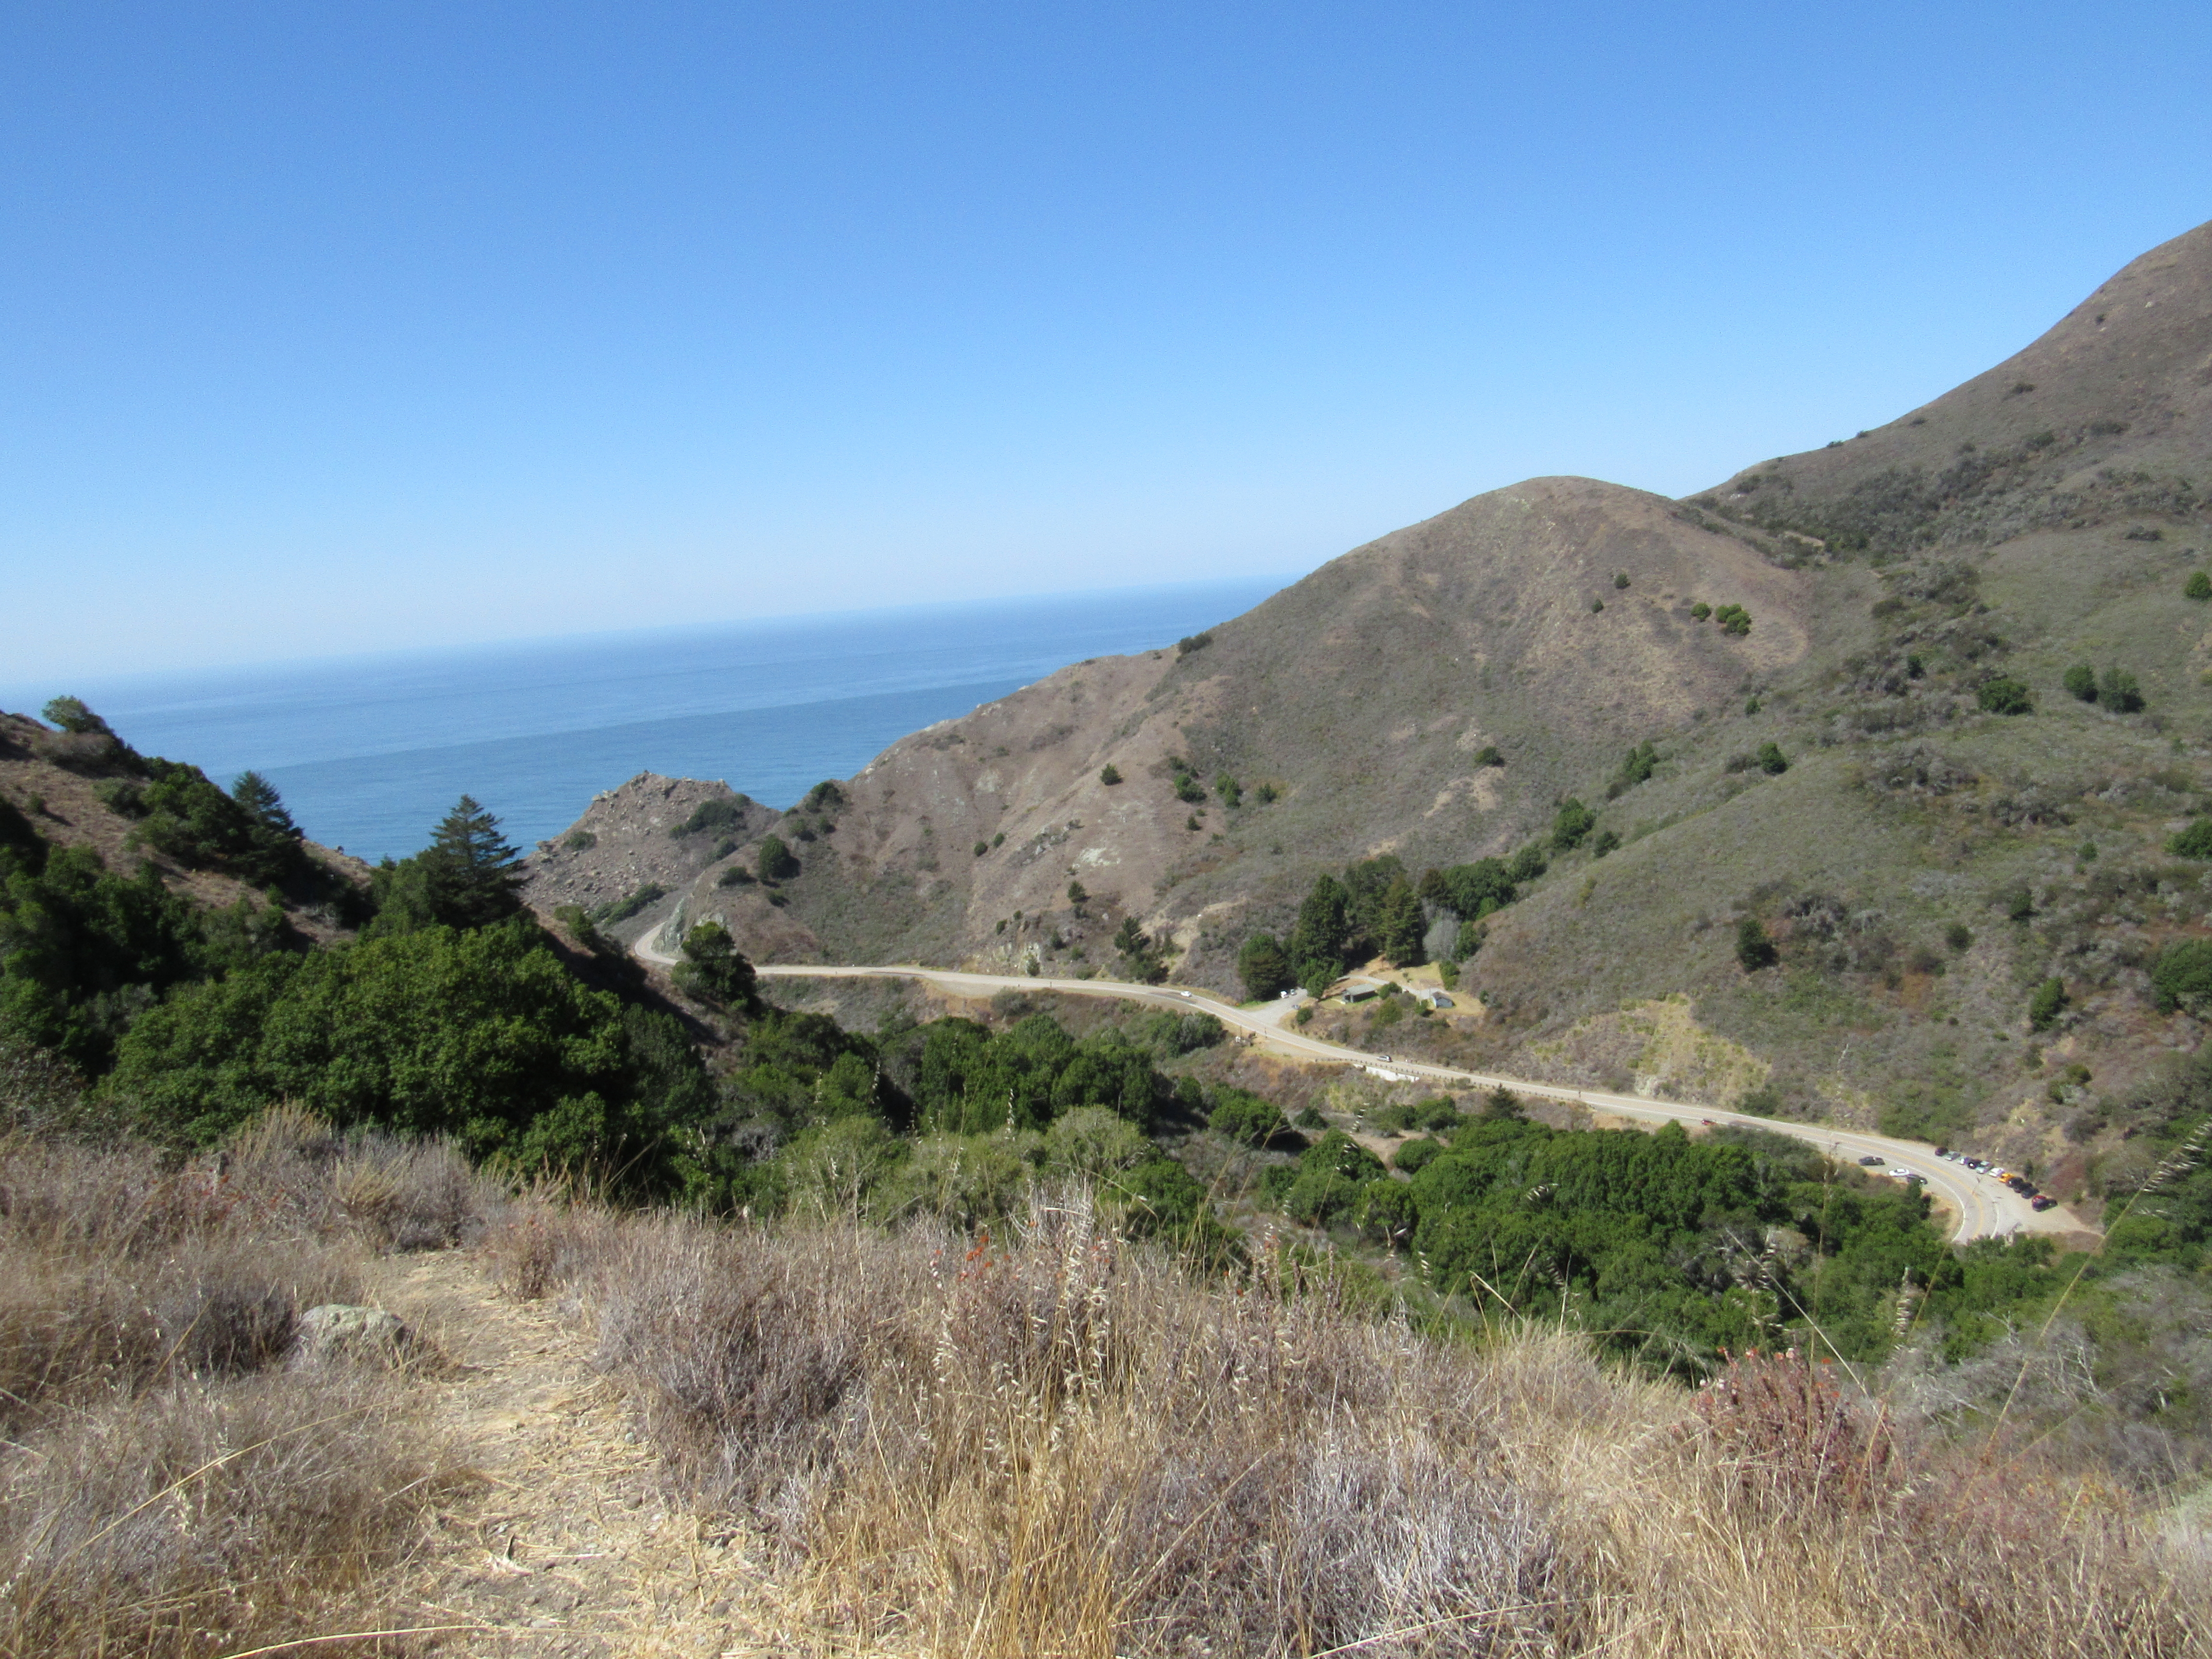
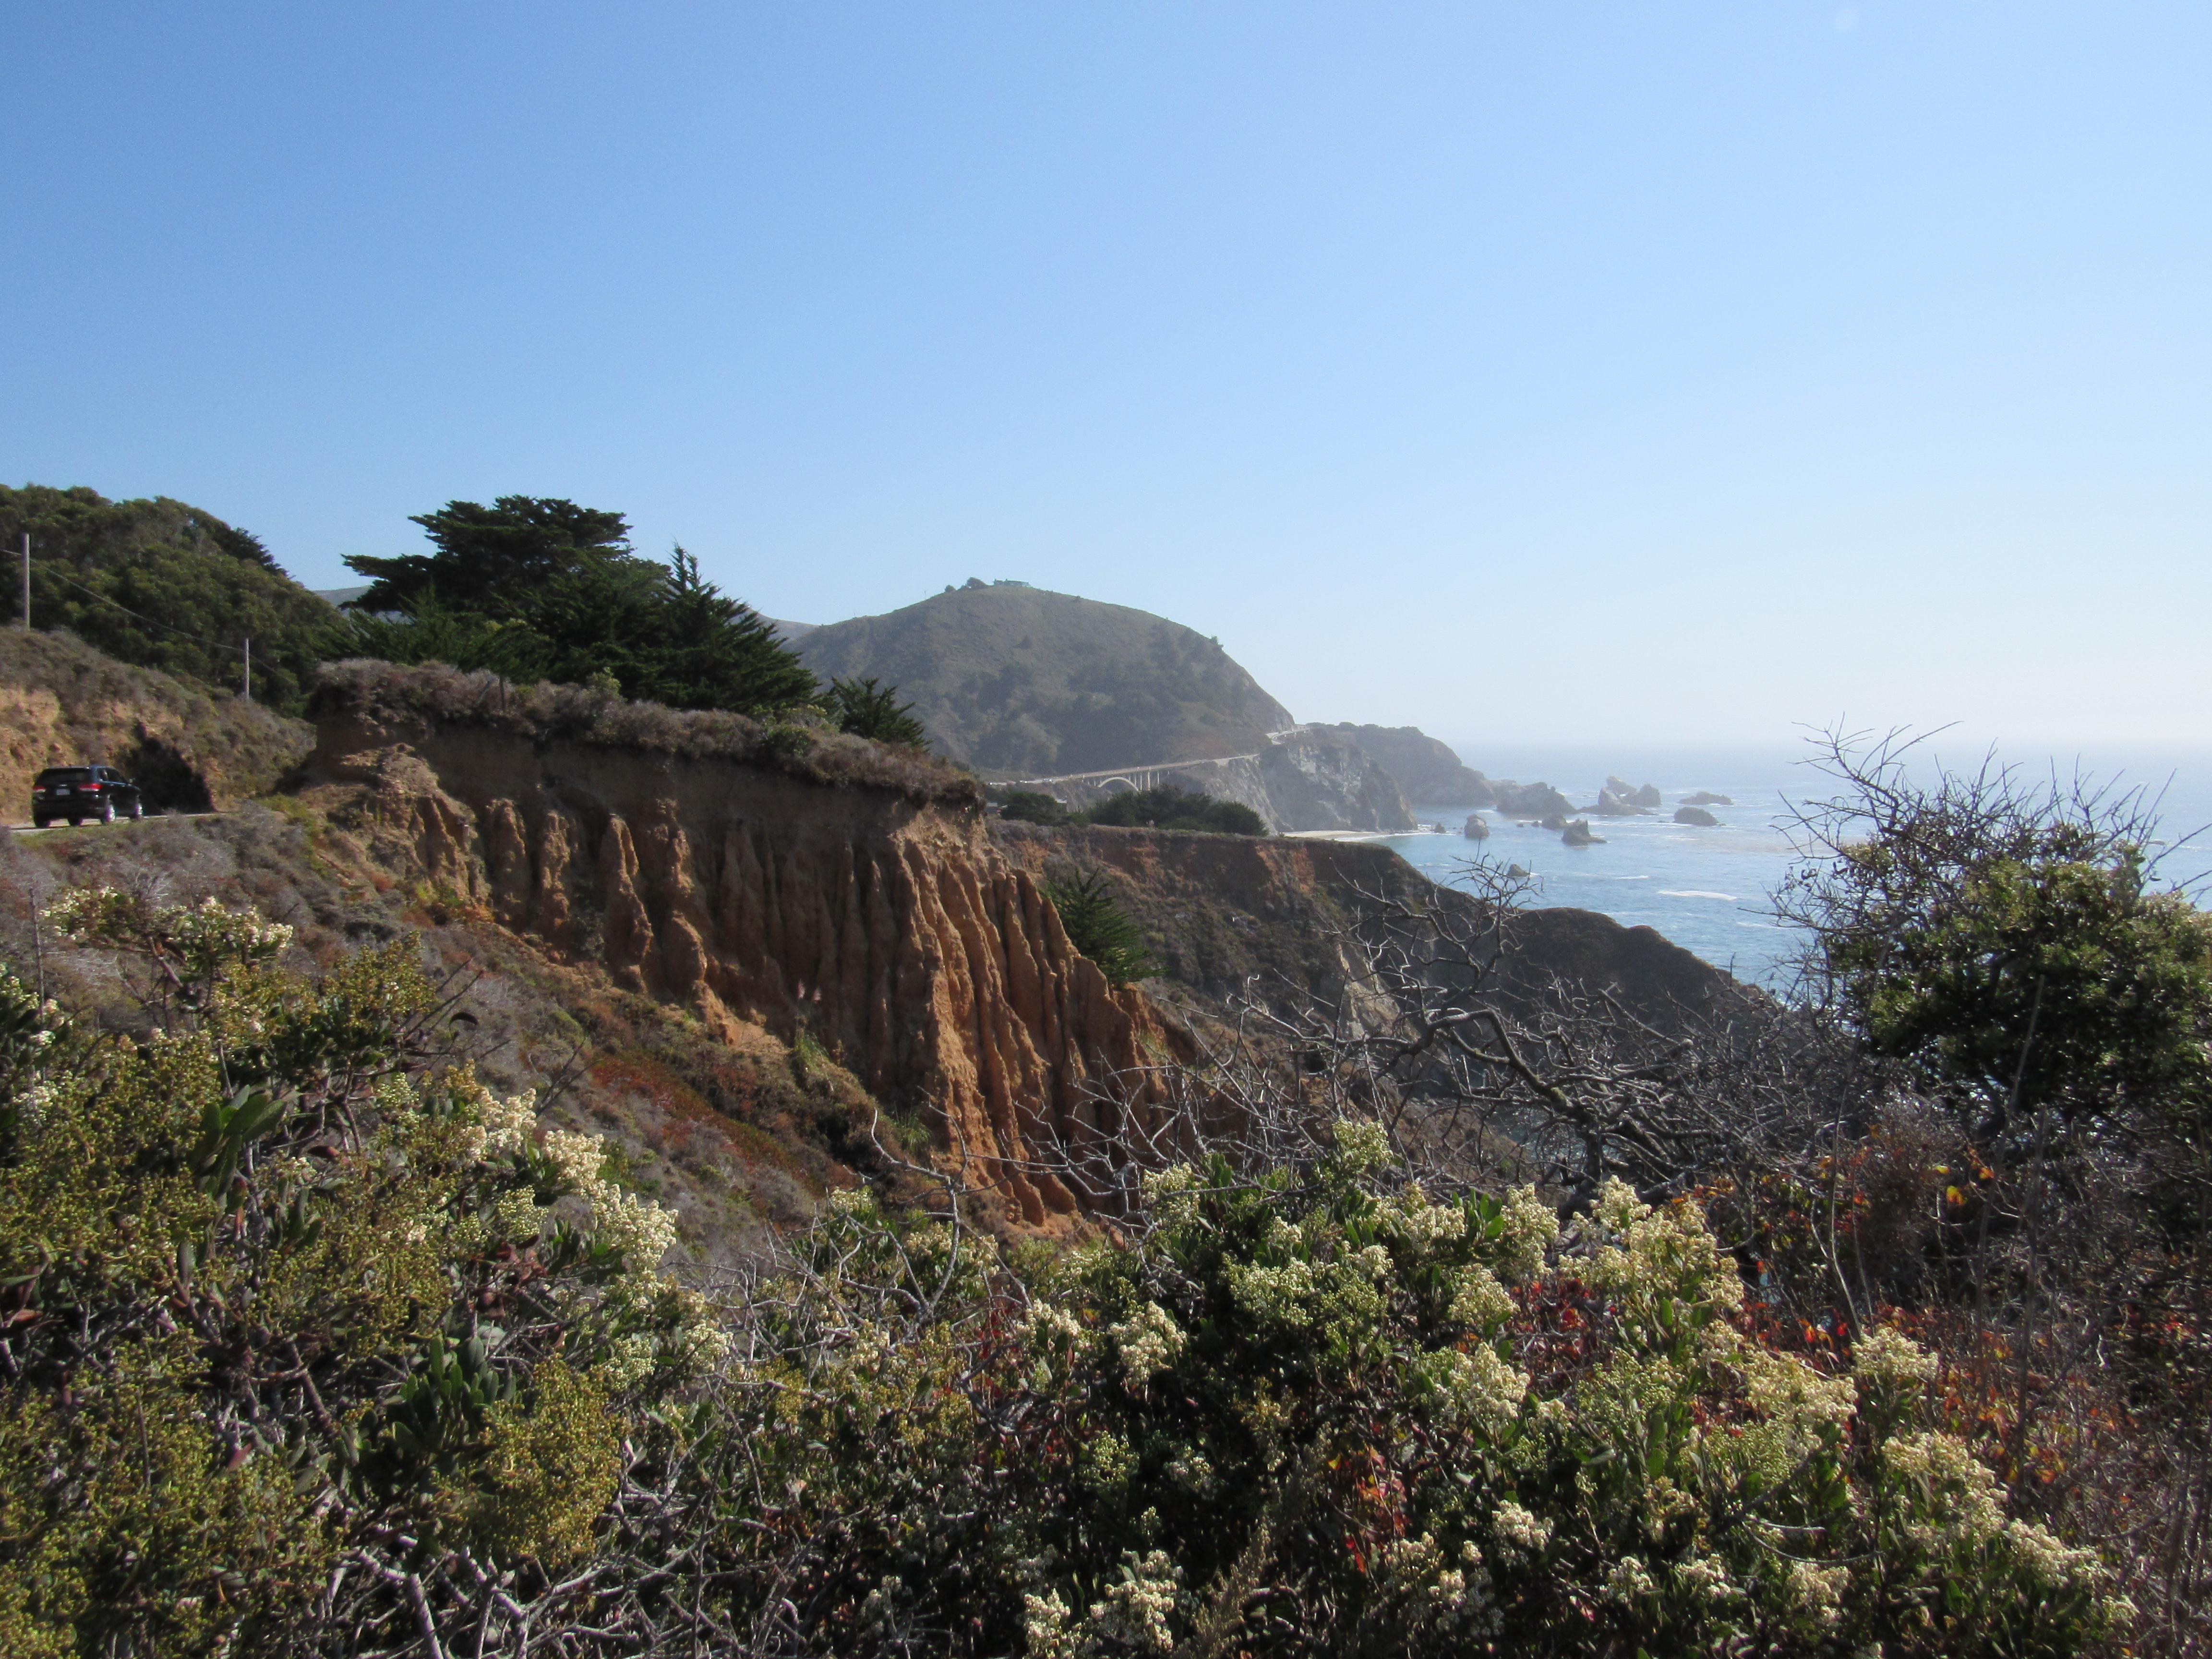
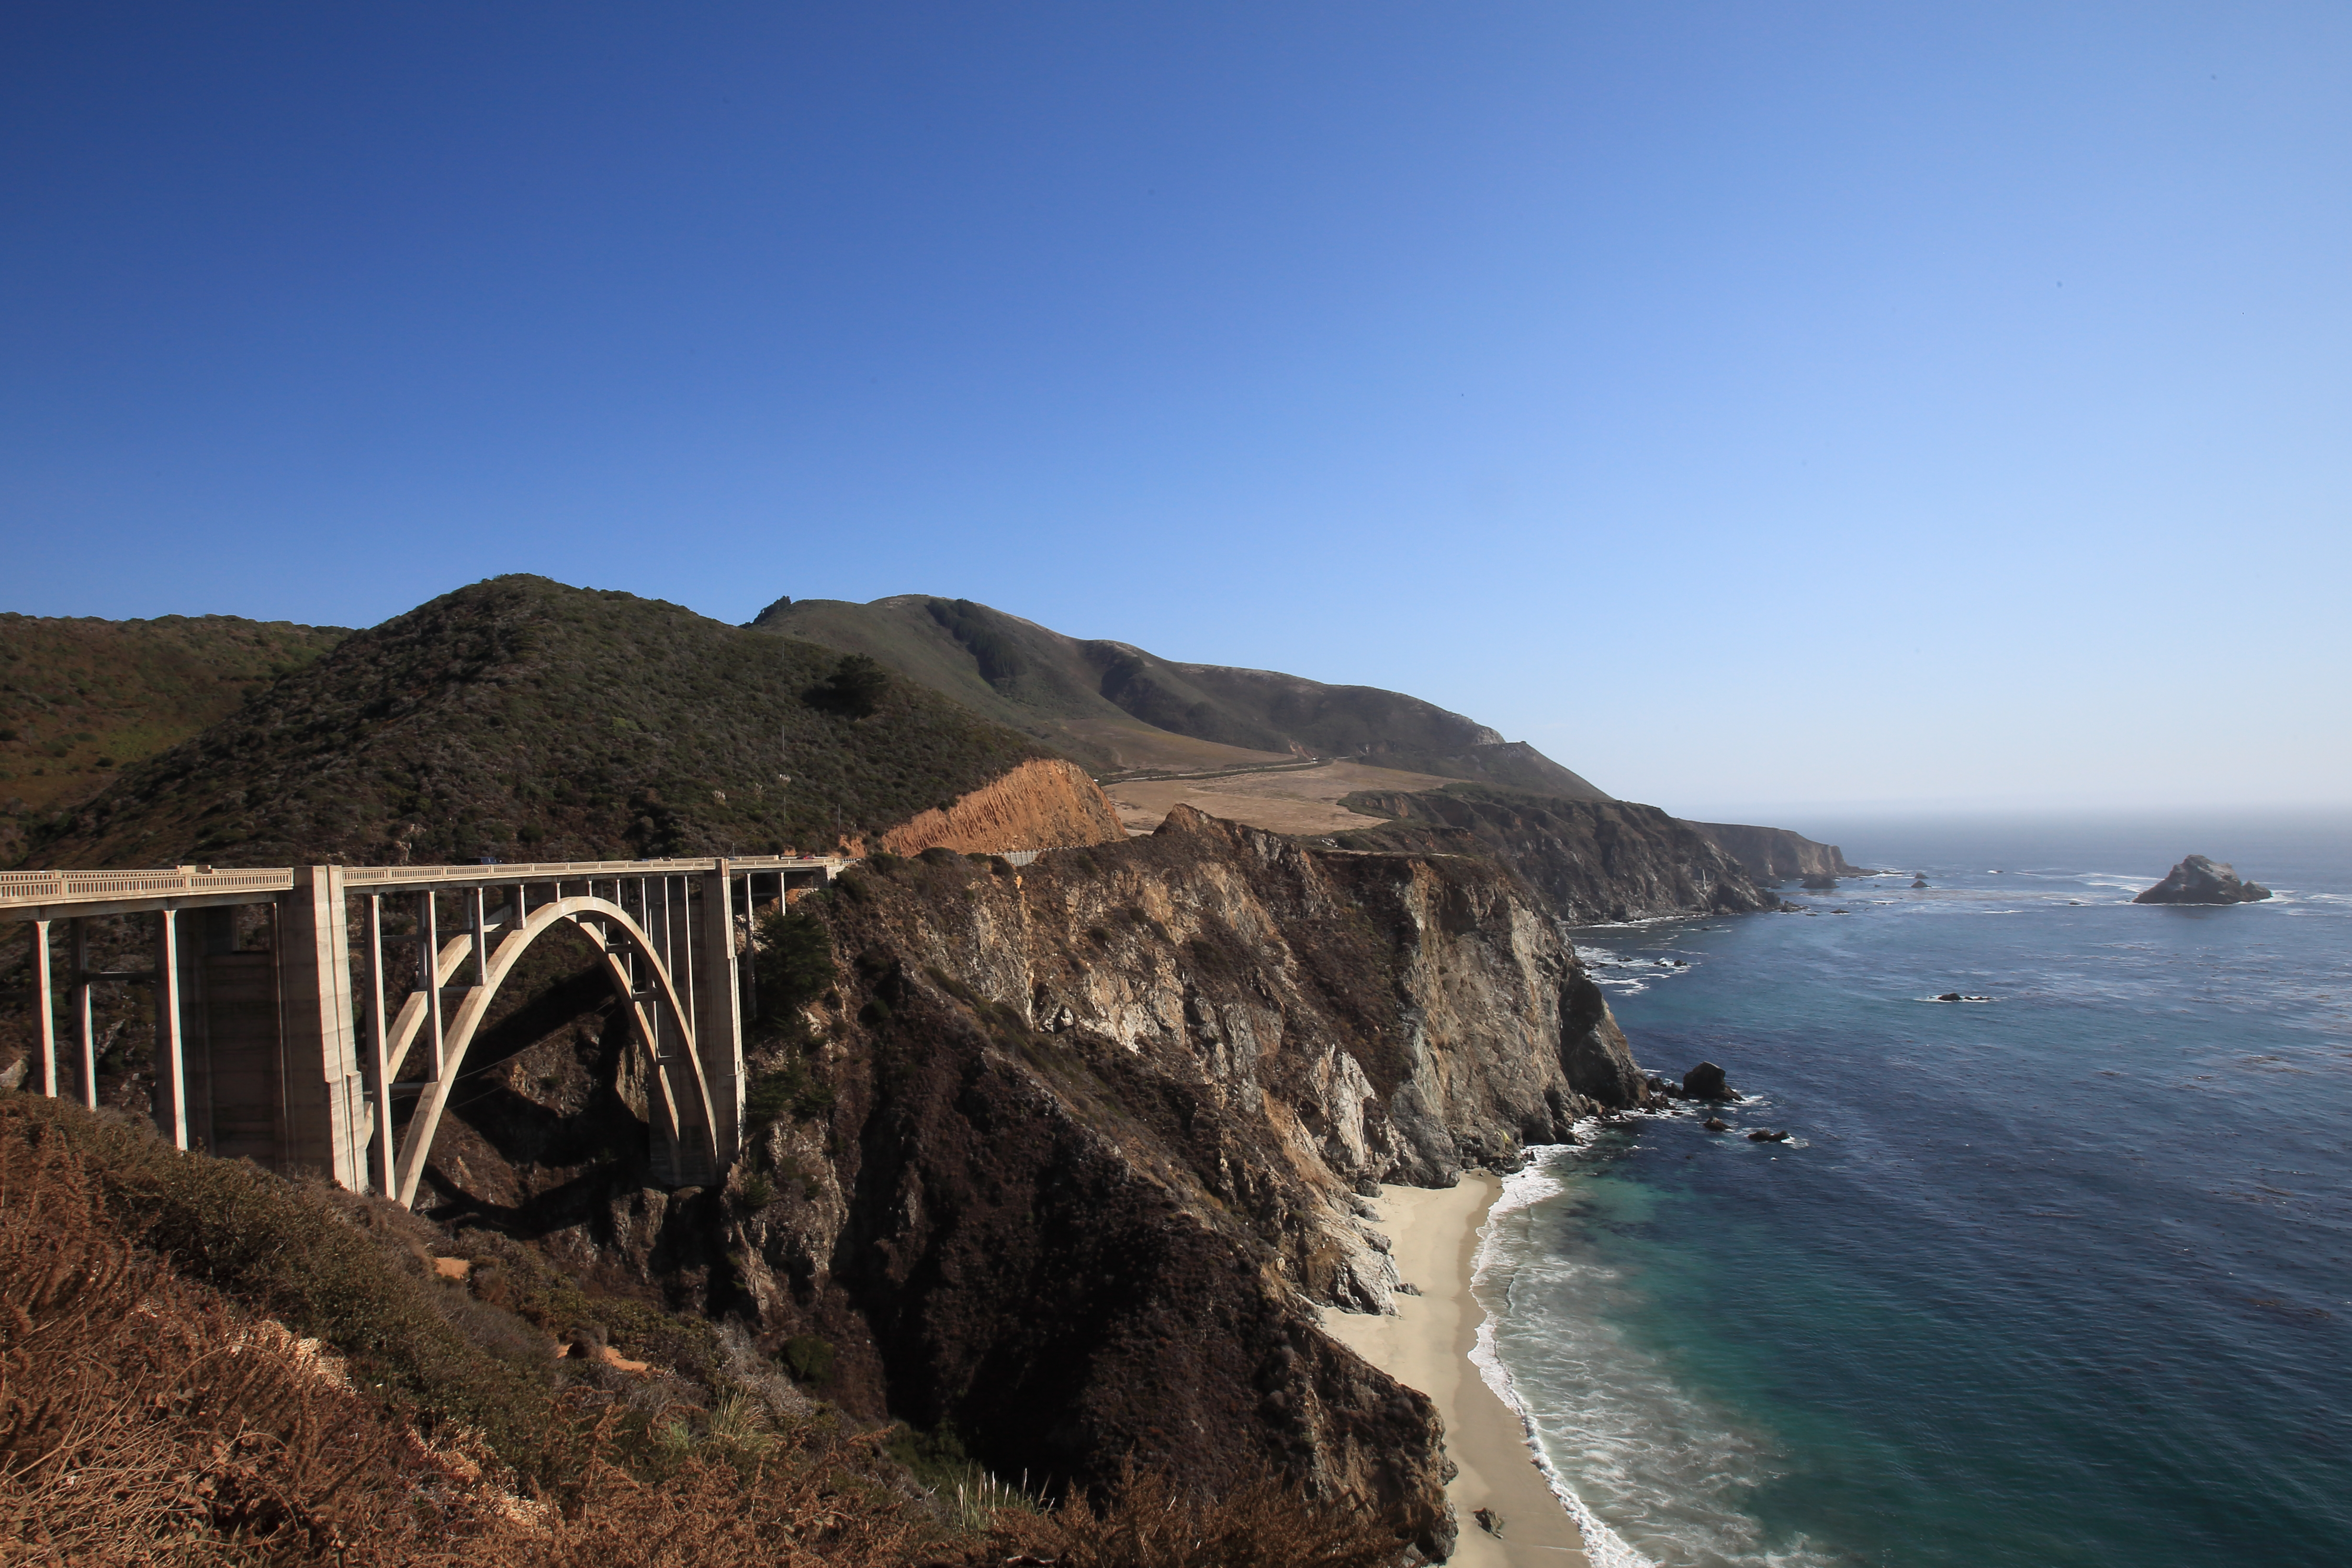
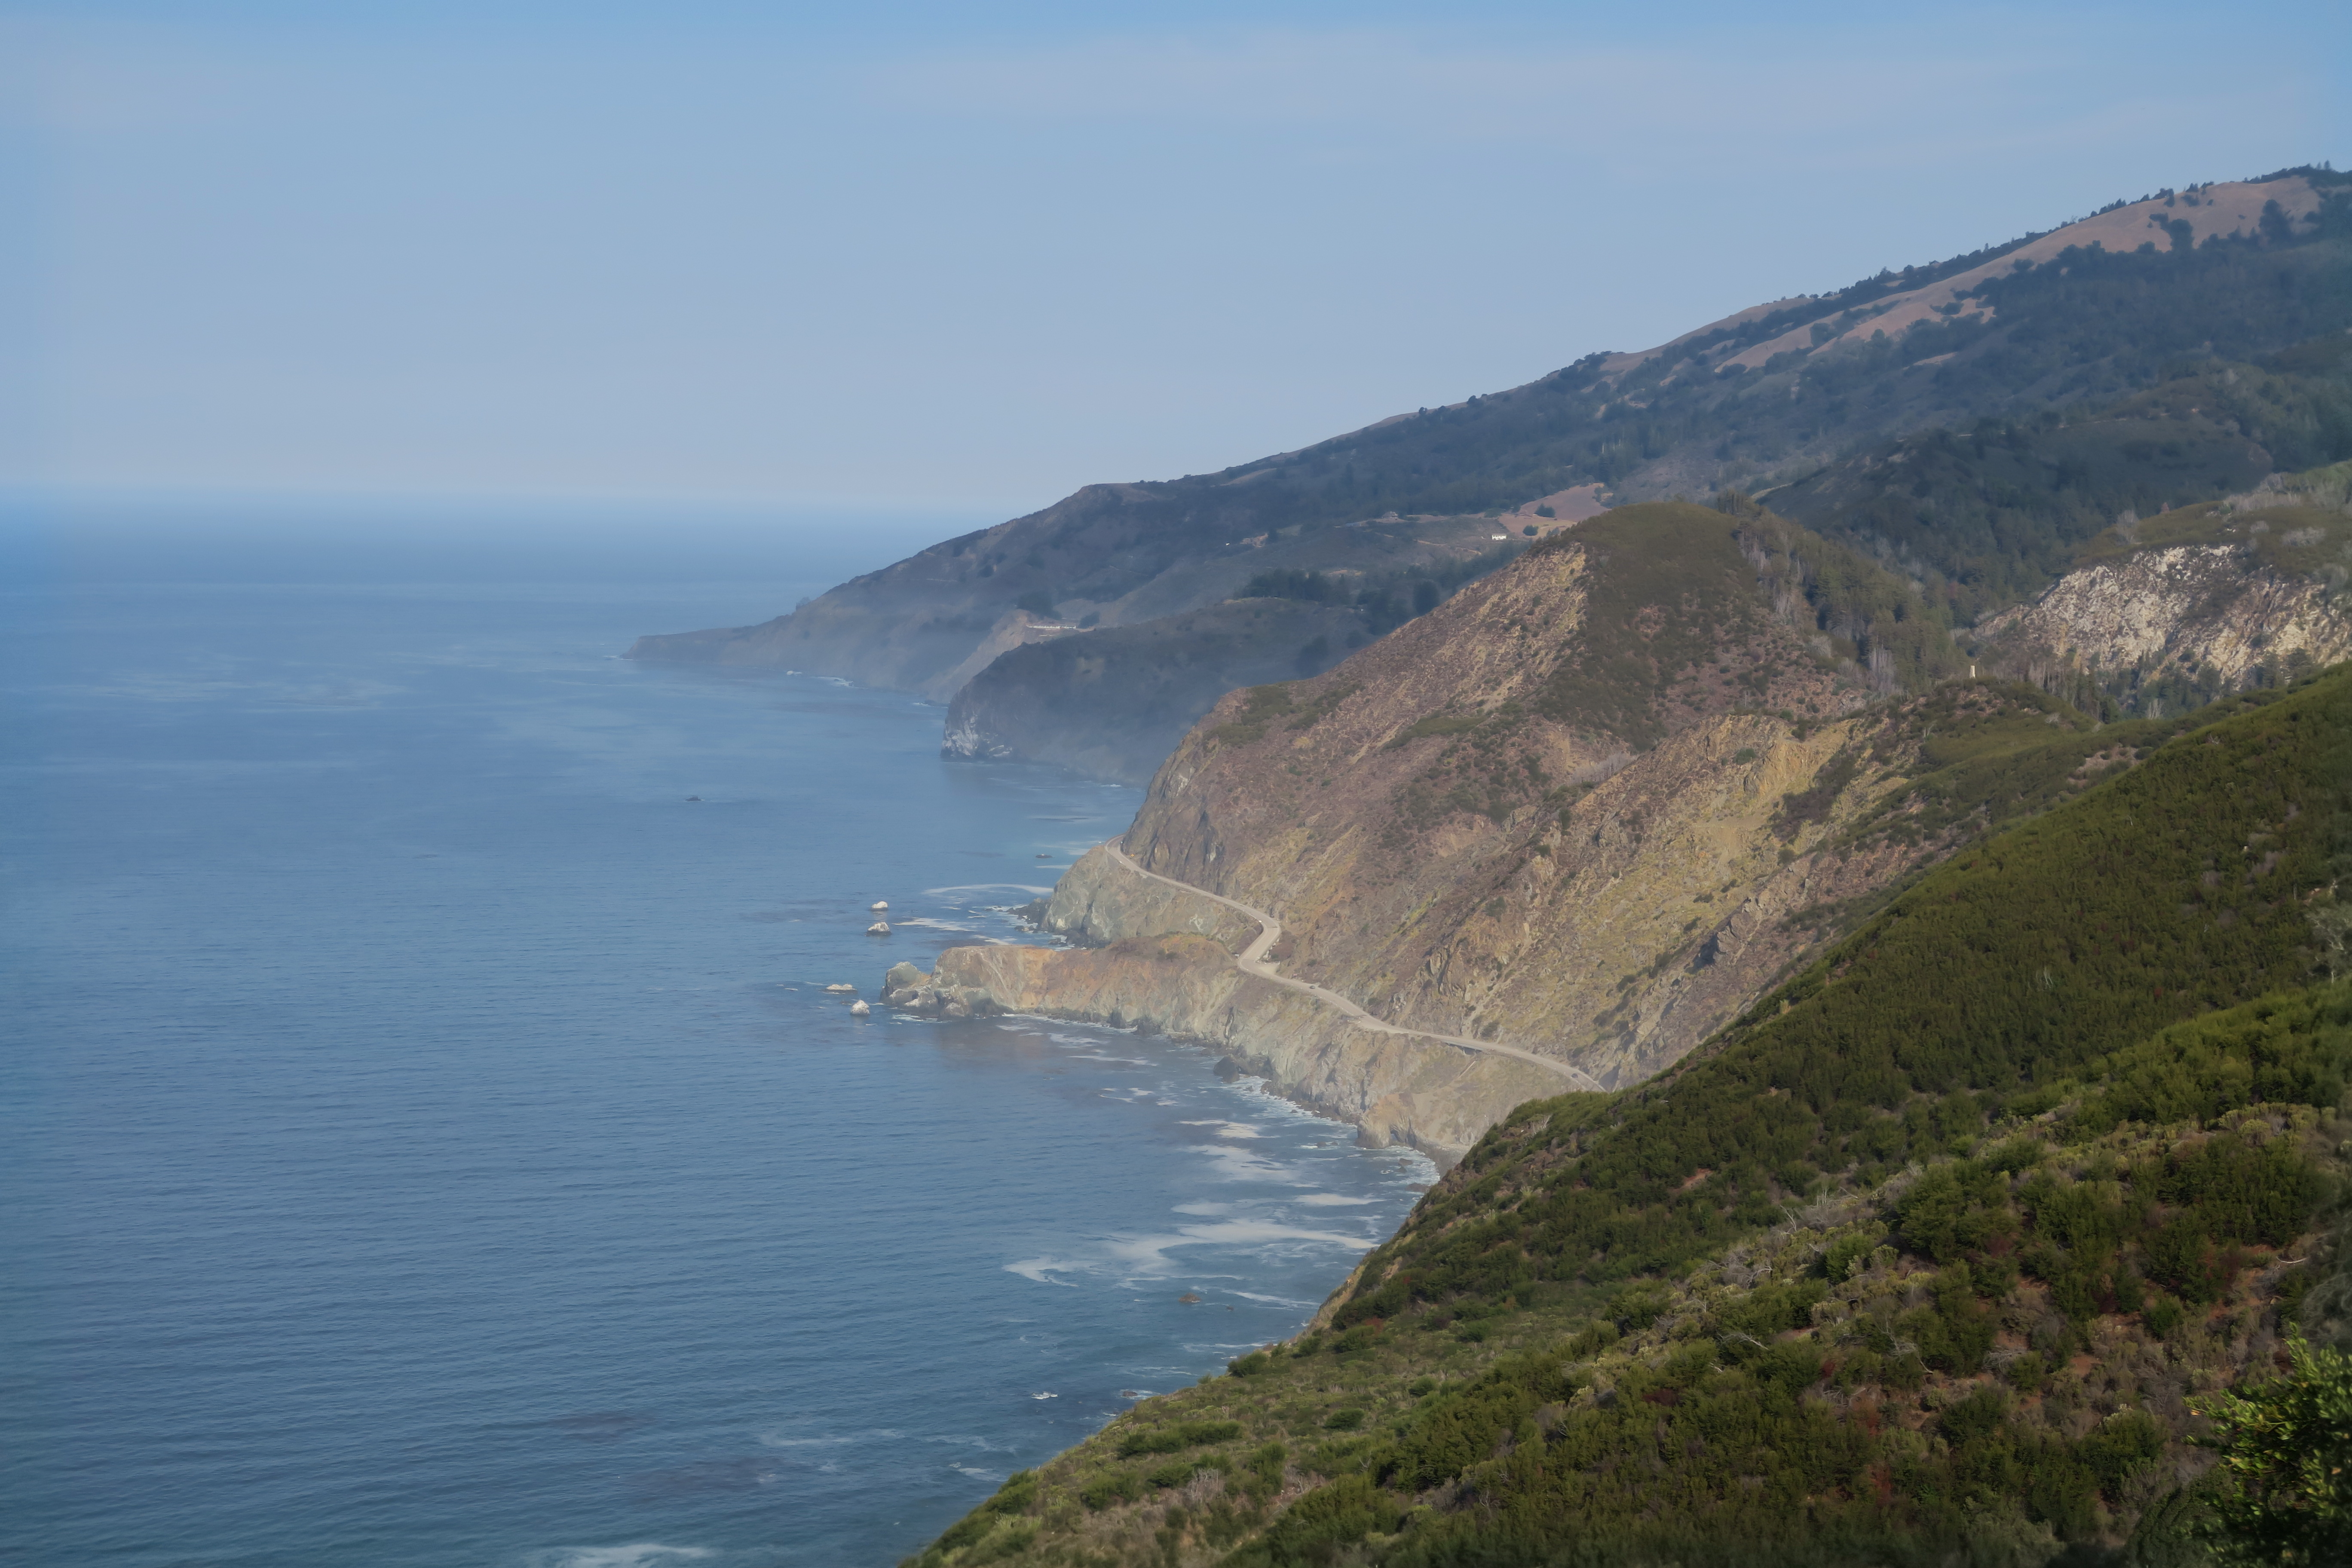
On the way back from Carmel-by-the-Sea we stopped at several vista points which overlook the Bixby Bridge. This bridge is very often used in every type of media you can think of. This is because the smooth arches of this bridge fit in perfectly with the landscape of the coastline it nestles in next to. Jamie and I took turns exiting the car to photograph at this extremely popular spot. I think about 10 cars must have come and go just the short while we were there.
Vicente Flat Trail from the Kirk Creek campground
This trail was extremely difficult and yet rewarding in so many ways. The trail is well maintained but also very narrow in areas with steep drop offs. Dogs and people alike will have to deal with stretches of full sun with nice shady areas mixed in. The views however are amazing and worth the ordeal. This trail eventually leads to a campsite exactly 5 miles in. Jamie and I turned around before that since we were doing an out and back day hike. This still took us above 1,500 feet starting at about sea level. The elevation gain is mostly up front on this trail and you quickly see yourself above the trees that just recently towered over you. The trail is not very technical despite the steepness.
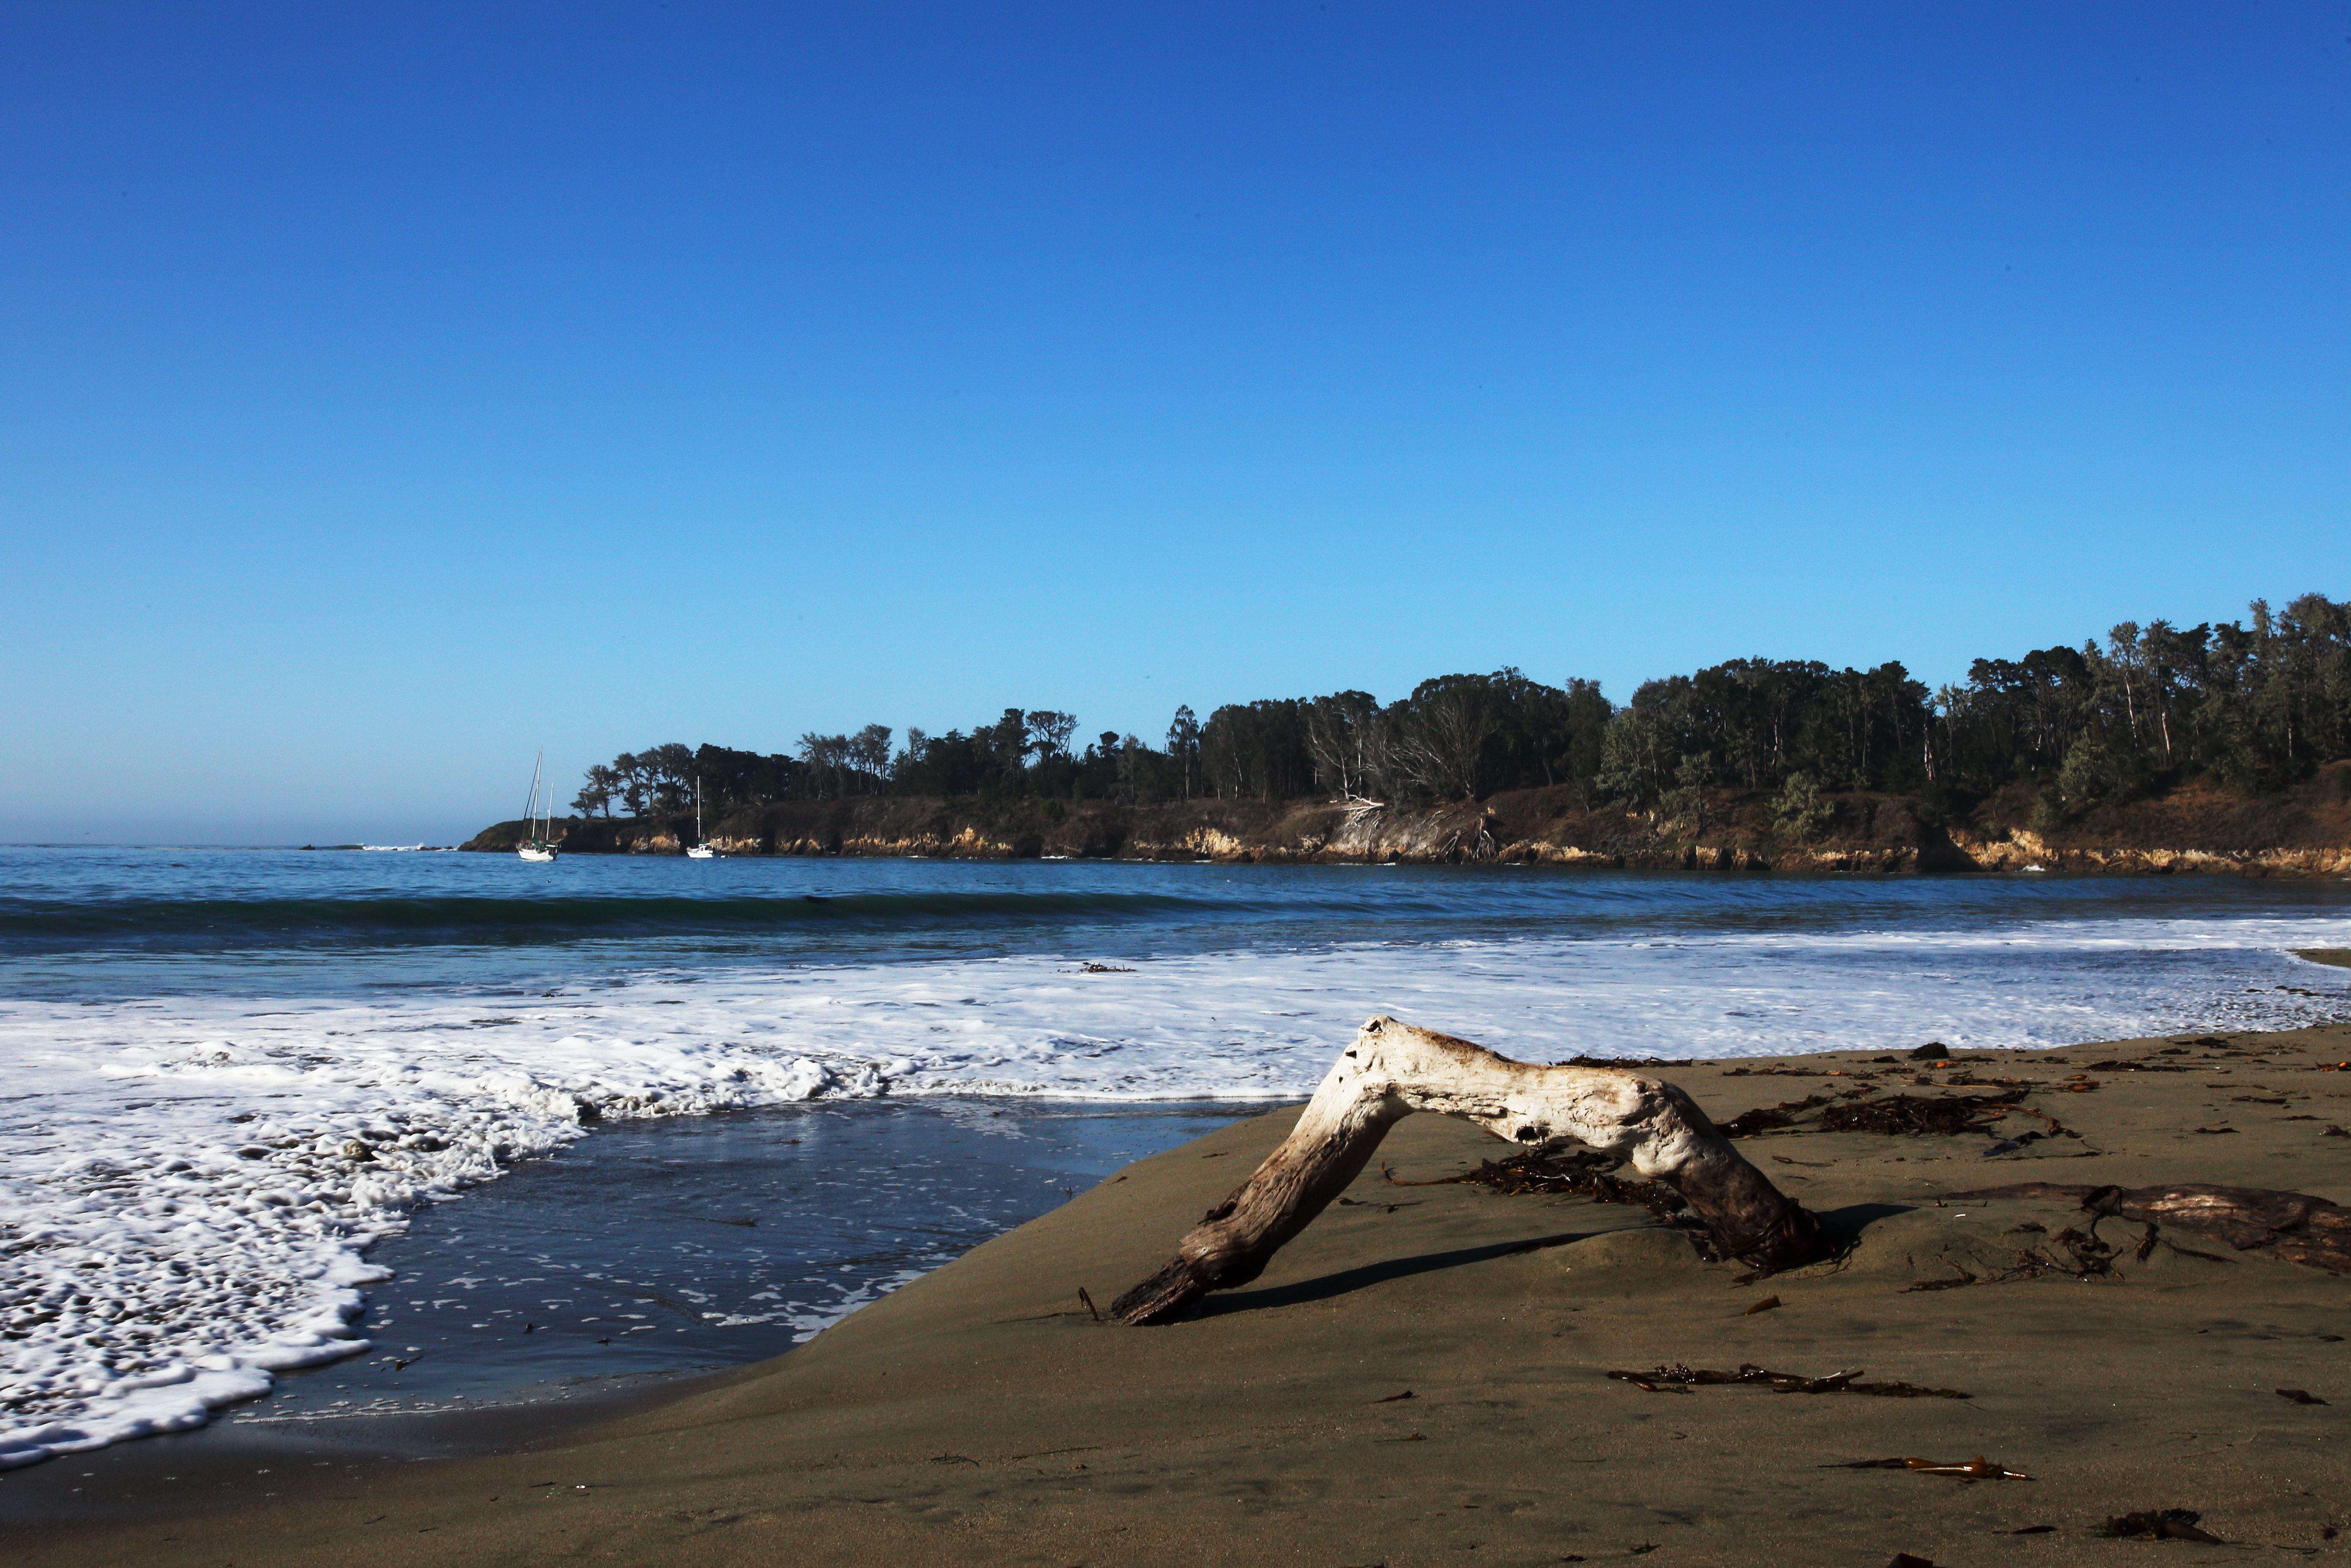
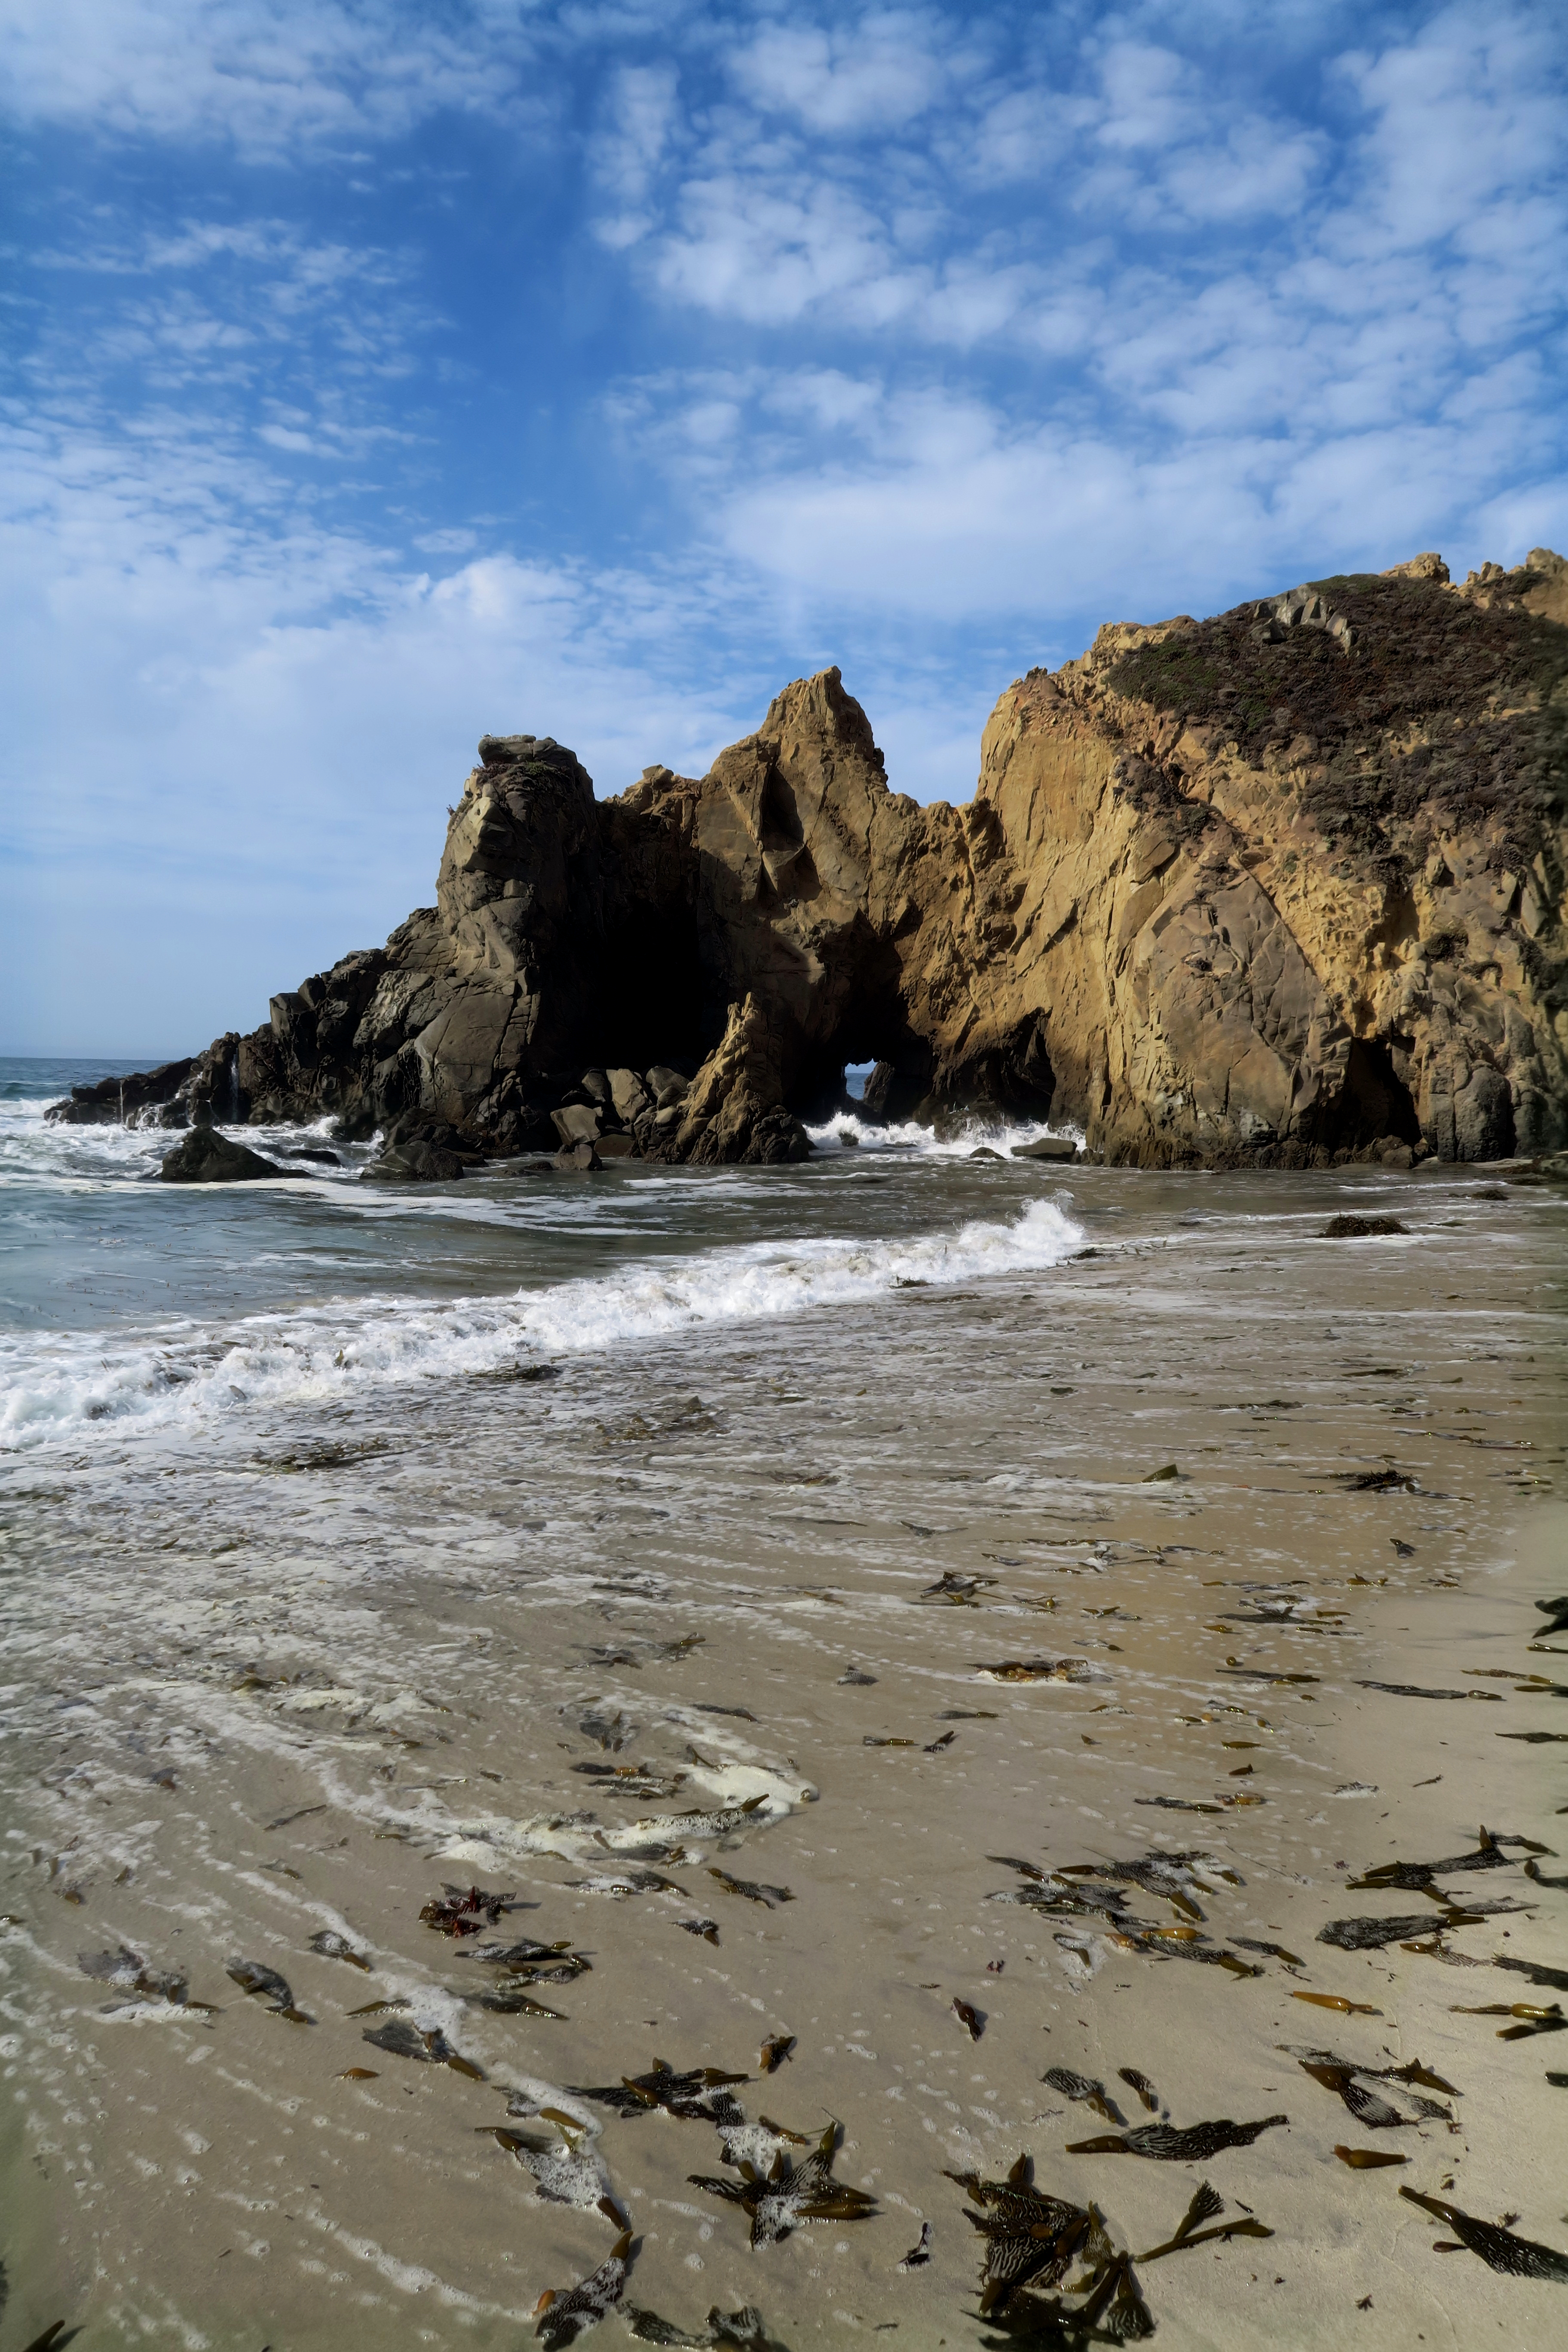
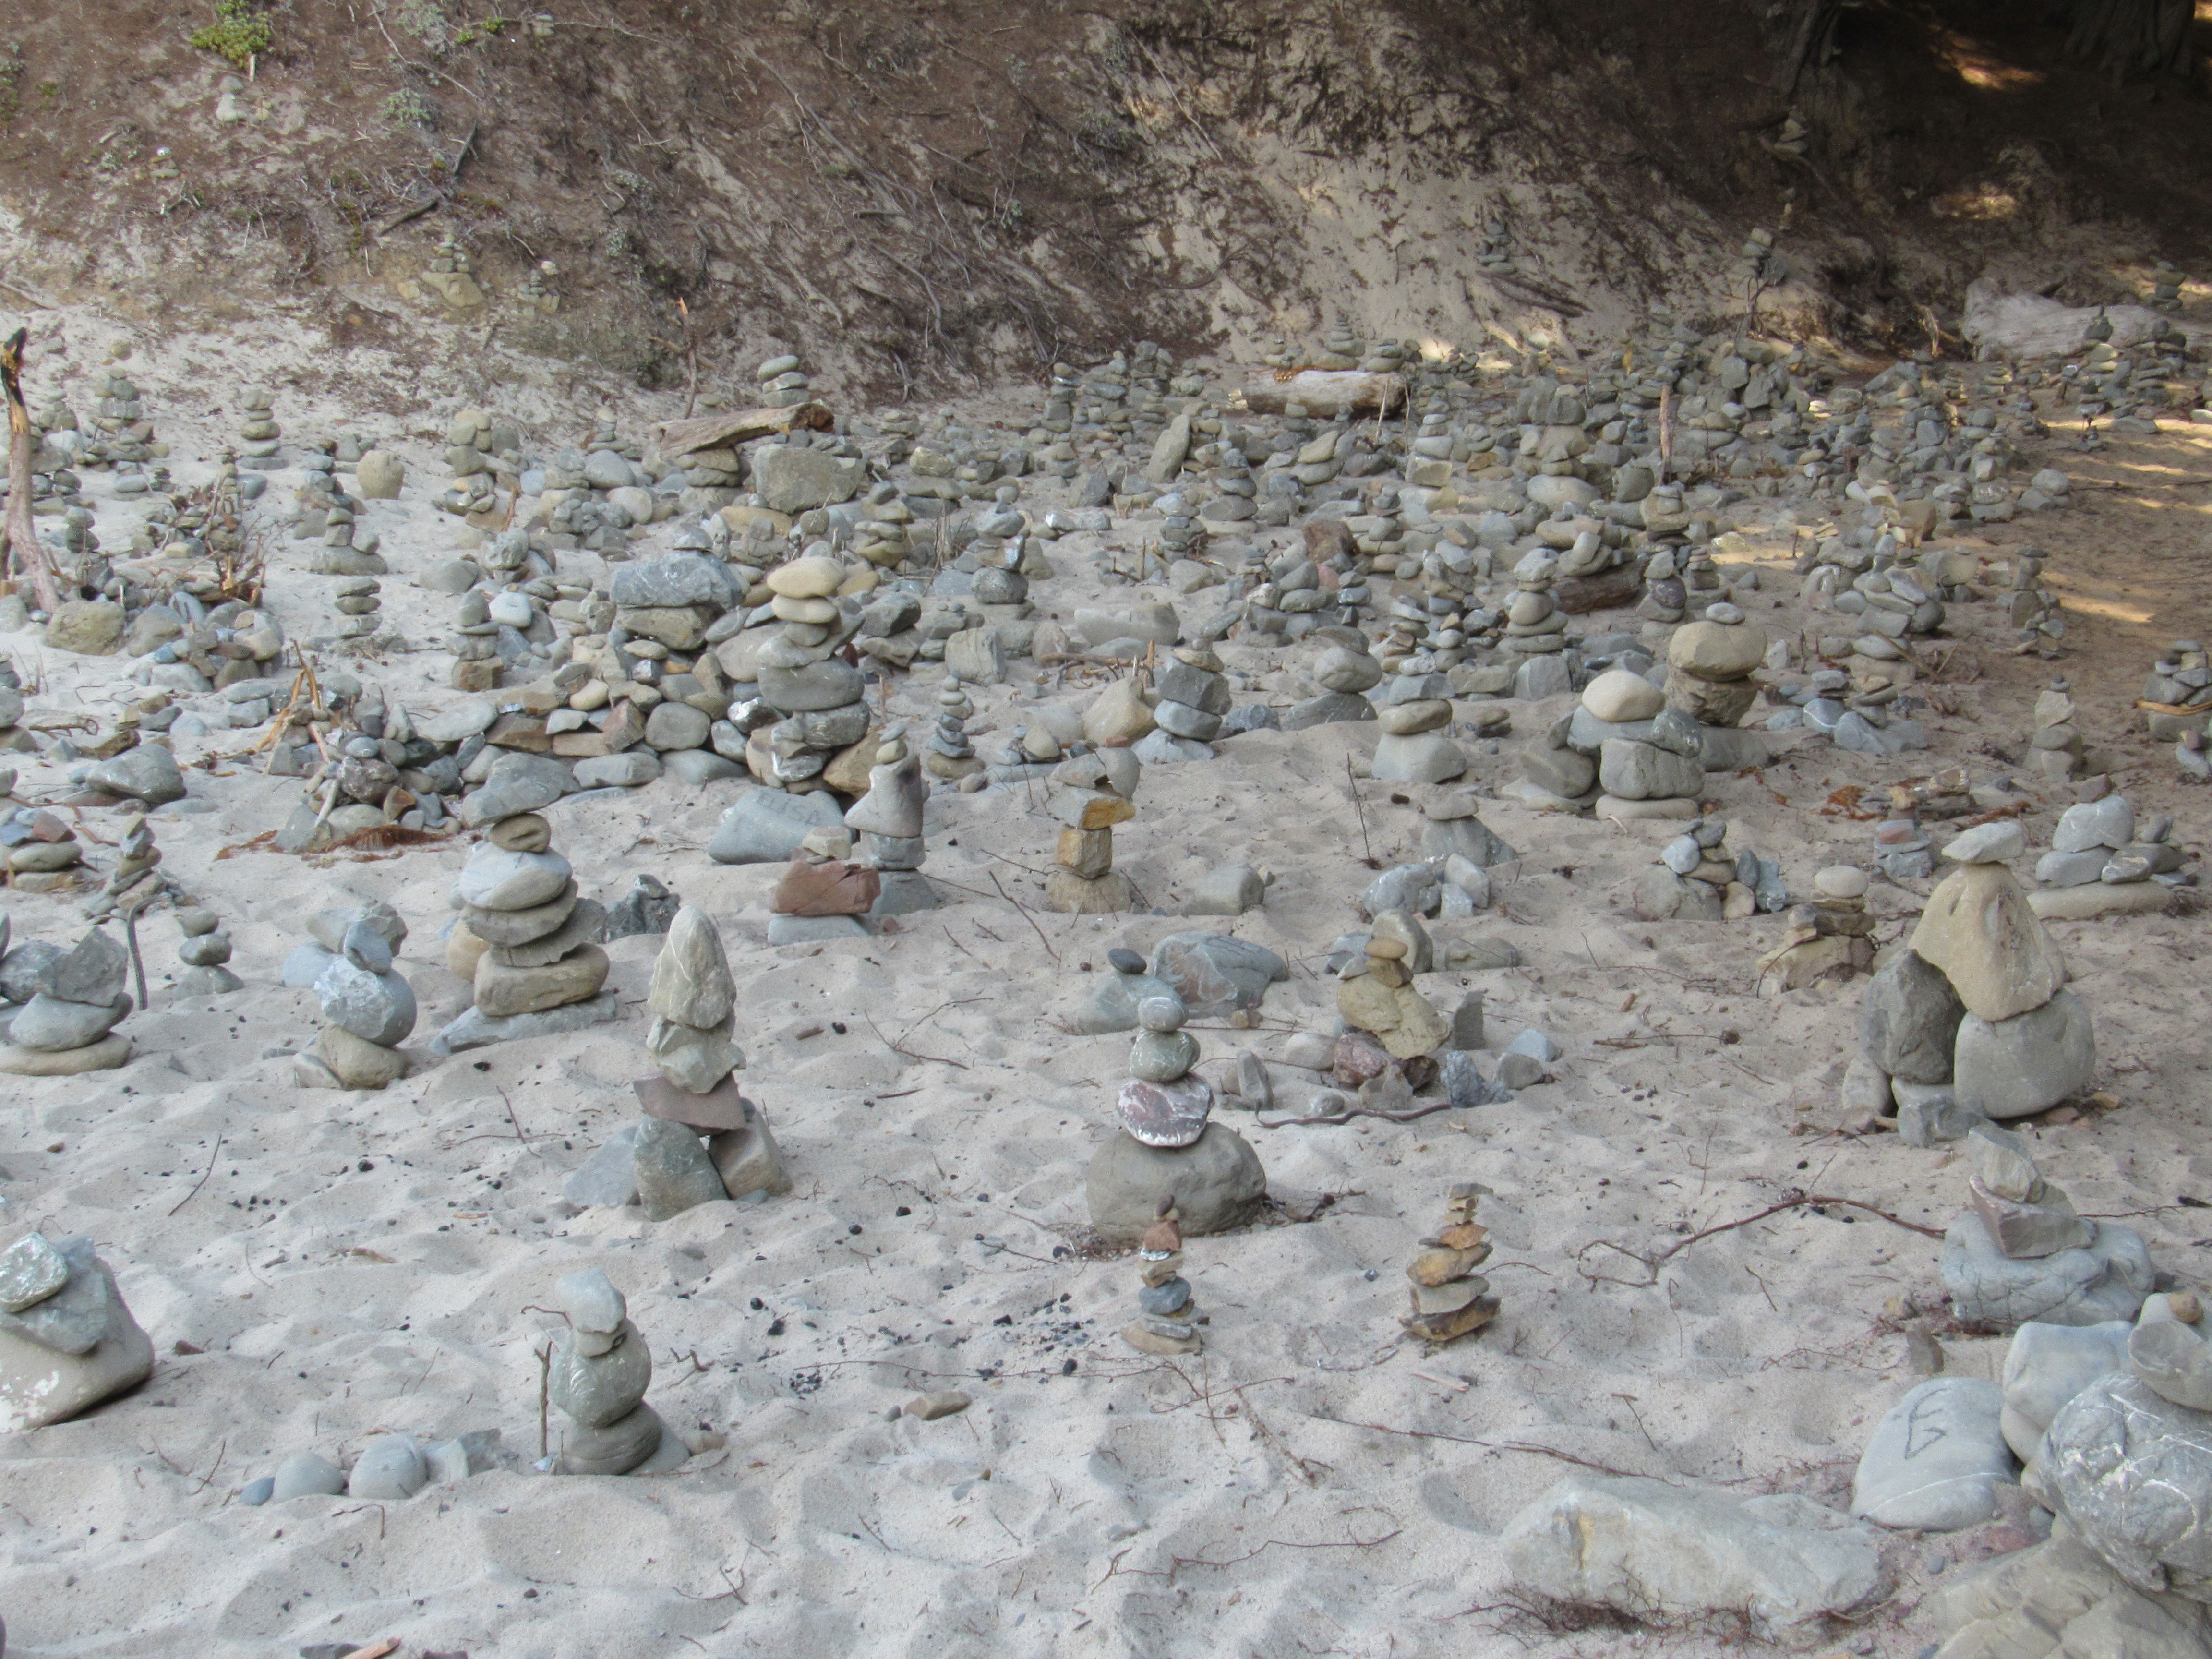
Locating this beach is hard but it is famous for the rock formations that are smack dab in the middle of the coastline. Sycamore Canyon Road is unmarked and currently just has a sign that says “narrow road”. It is the only ungated road on the west side of PCH in the area however. Once on the road it narrows to one lane with turnouts. The 10 minute drive down this road is worth it because the beach is amazingly picturesque. In fact it is so popular despite being unmarked that parking usually fills up by noon. I took Maxx for a run on the beach and explored down the coastline to find a cache of cairns that somebody or more likely many people set up.
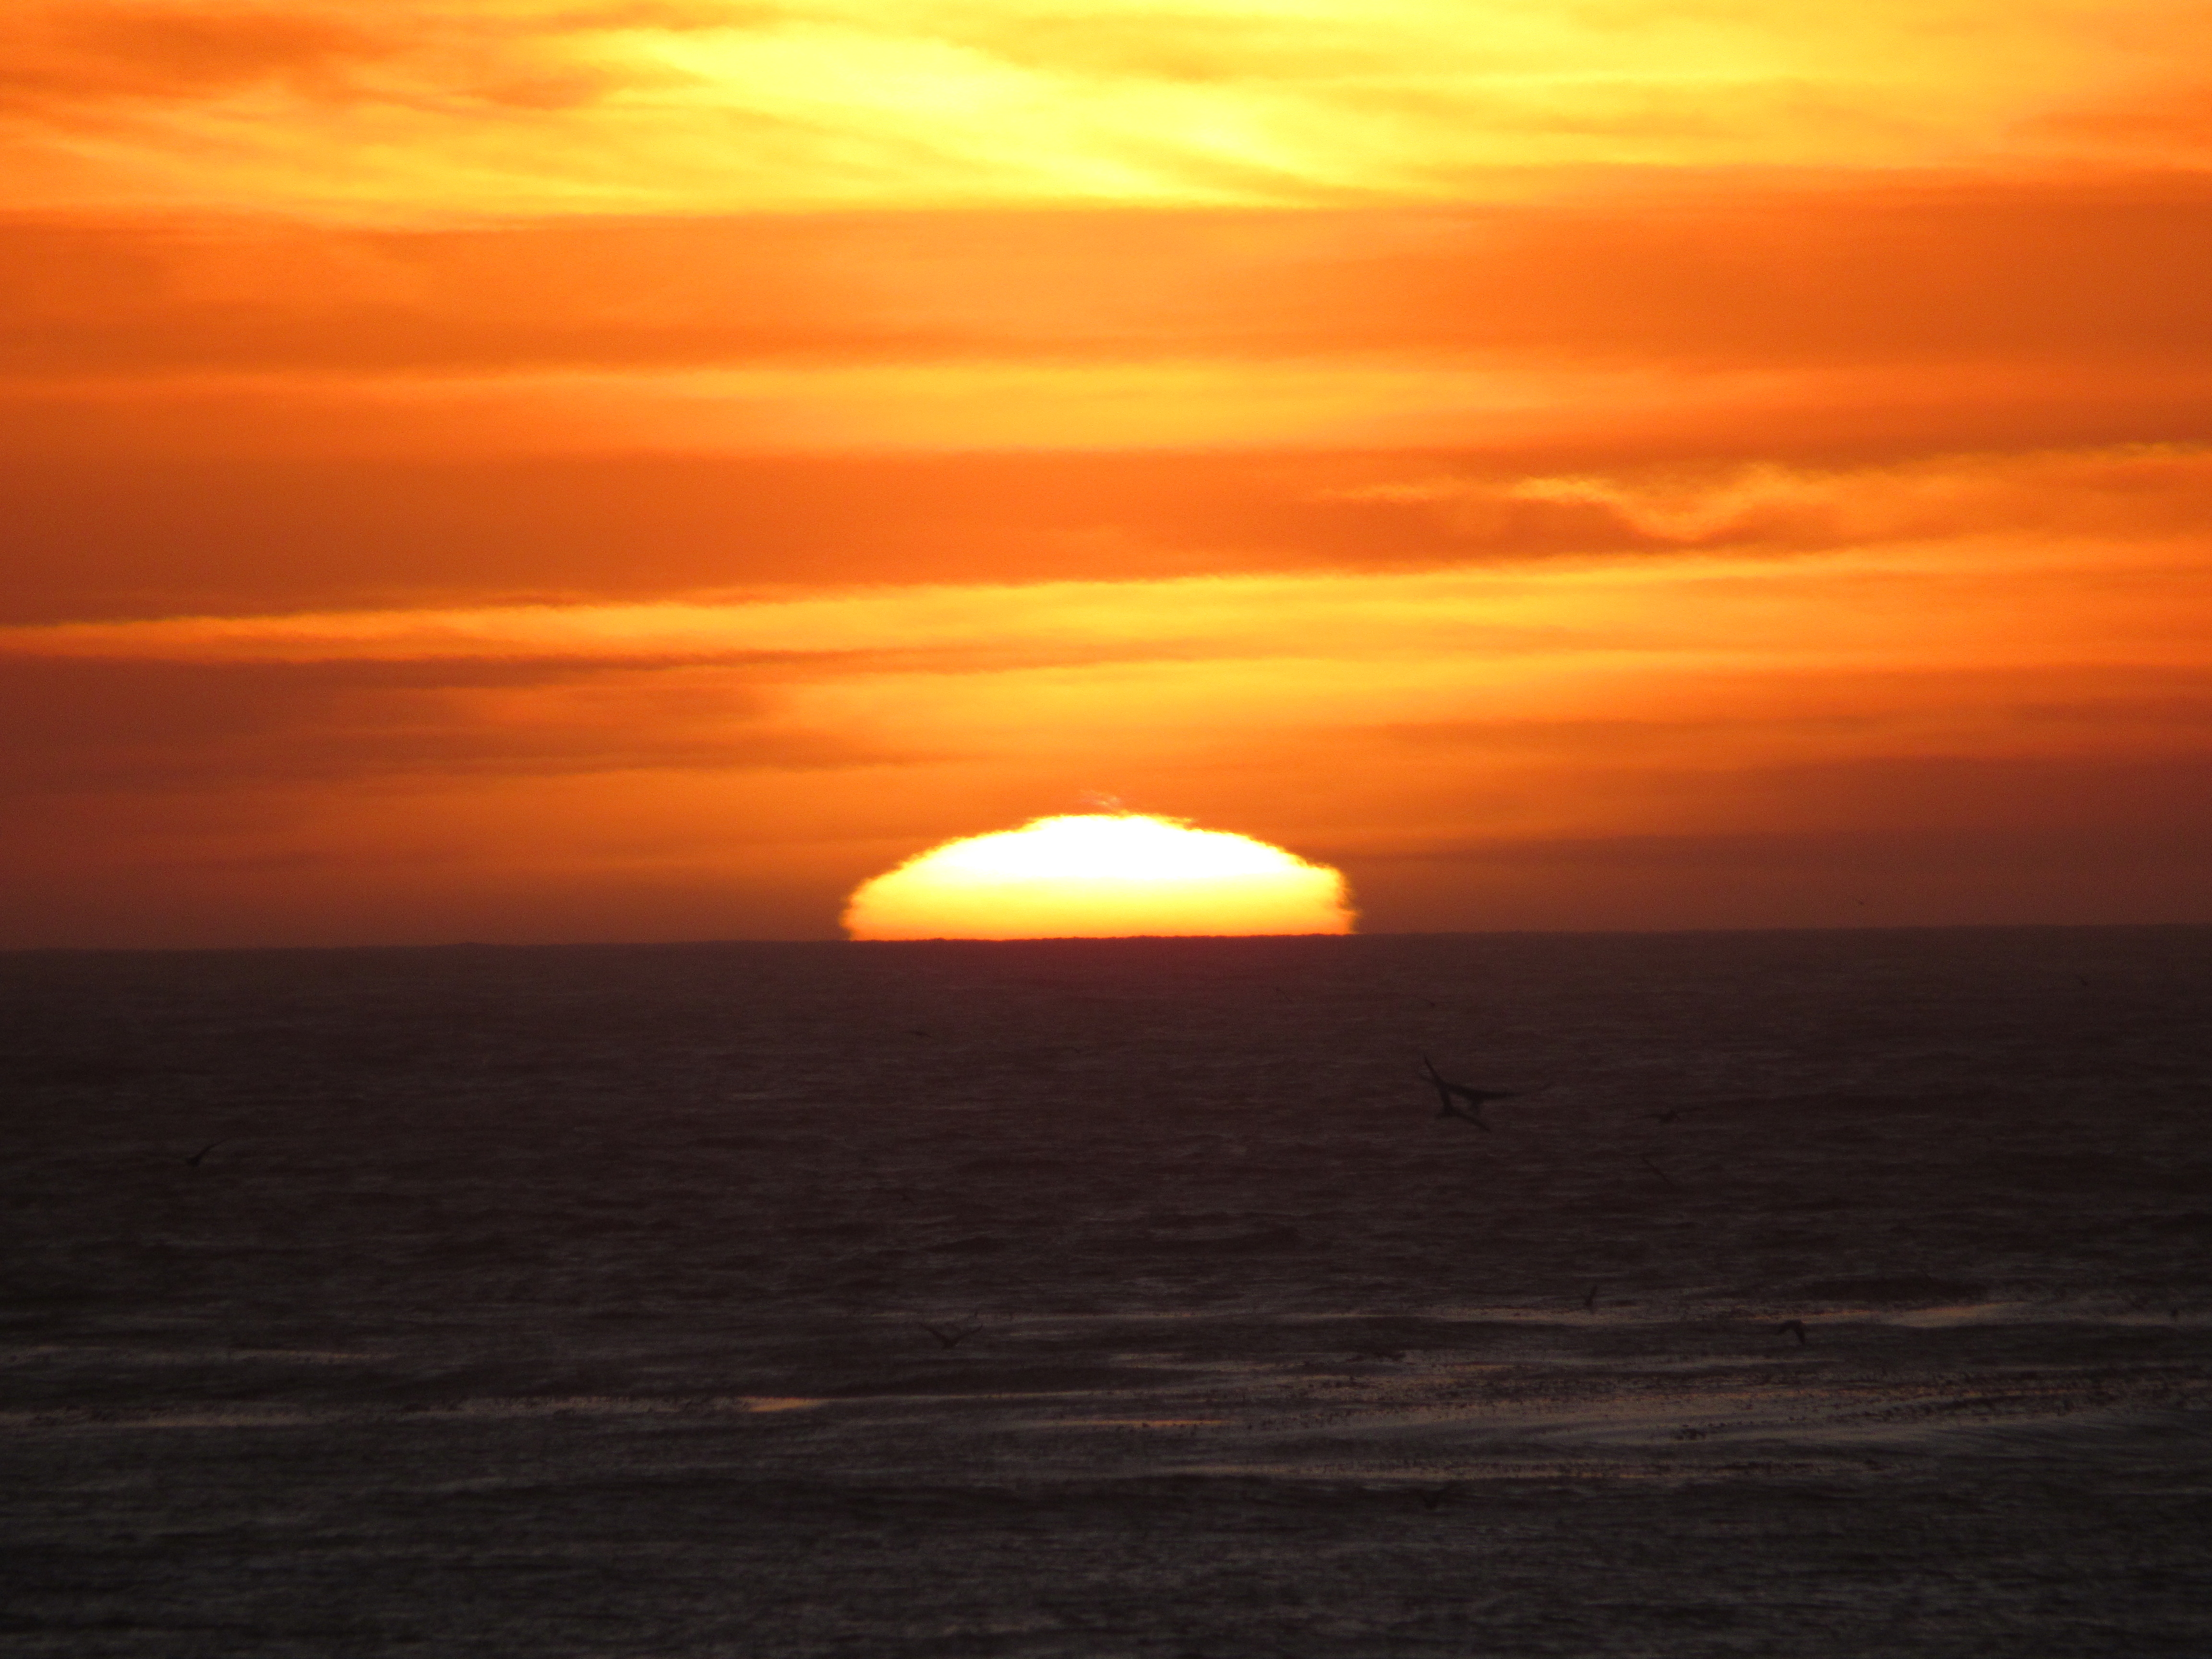
The rock outcroppings are full of holes that the water has dug out through them so that each time the water comes crashing in from the waves, they flood and shoot water out in every direction. Many people come here to photograph the sunset through the holes in the rocks.
One benefit of camping out on this beach was that my solar charger finally got enough sunlight to be useful. It was also good to have a more restful day at the end of our trip and hiking so much each day.
Just past the cairns was a small wooded section and I captured a photo that I quite like almost by sheer chance. The light was coming in at such an angle that it formed individual rays as it was broken up by the trees near the beach.


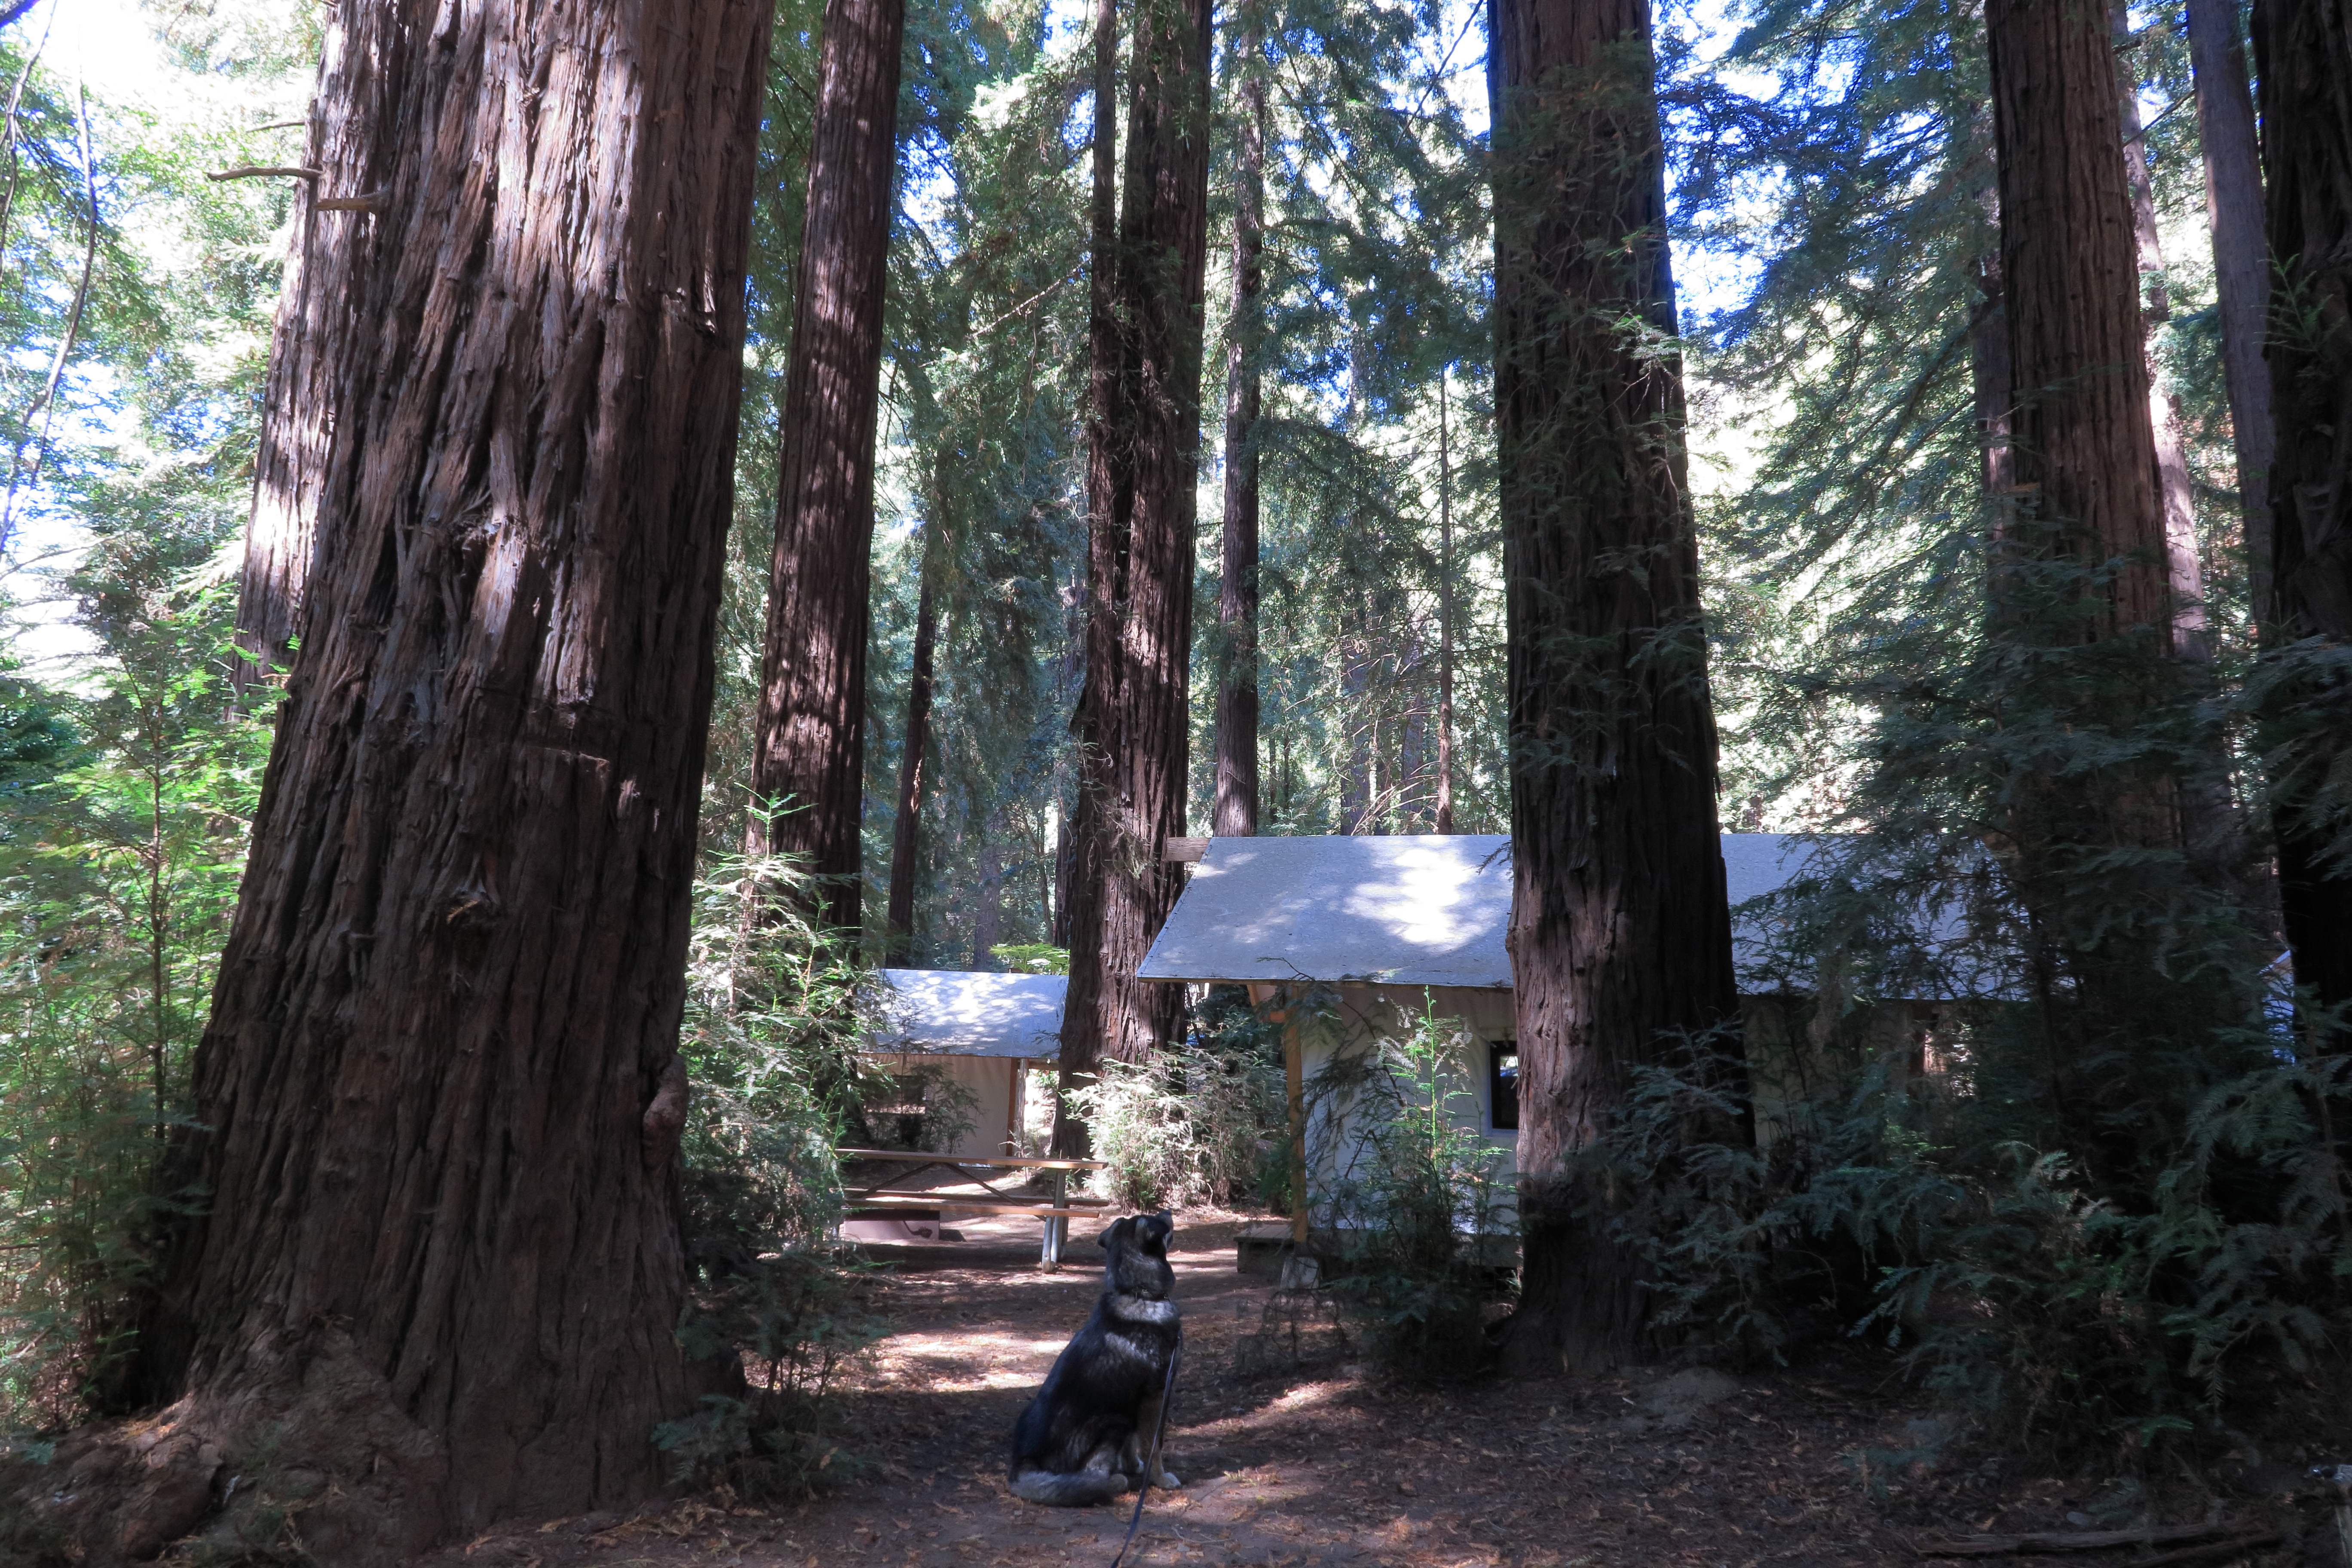
This campground allows dogs in some but not all of its sites. It is located down a steep one way road off PCH in a dense redwood grove. The map of the camp shows deer and that depiction is accurate as deer graze nightly down the sides of the Big Sur River. In the spring the river has enough flow to support tubing, when we went it was just strong enough to provide a constant flow of cool water to the area. We stayed in a tent cabin that had no electricity. Therefore it was a challenge to charge the batteries for our phones. Jamie quickly resigned to just having me keep my phone charged. I tried to supplement the car charging with a solar charger but the camp was just so shady that I only got a minimal charge this way.
Jamie and I had S’mores every night we stayed. Maxx enjoyed being able to be outside on a long lead instead of his short leash. Overall I would recommend the resort.
So that’s it. That is our trip and our photography from it. Check out a few additional shots we captured over in the gallery.
Carbon Canyon Regional Park
May 29, 2015
One thing Jamie and I buy every year is the OC Parks annual pass. It allows you to park in many different regional parks and wilderness parks throughout the Orange County. One of those parks is the Carbon Canyon Regional Park. Neither of us had ever been so we decided to check it out. The park functions as one of the entrances into Chino Hills State Park and while dogs are not allowed in that park, they are allowed in Carbon Canyon.

Jamie borrowed a Canon 5D Mark III and a couple of lenses to bring along with our Mark II and our 24-105mm F/4 IS USM L lens. The 24-105 is probably the best walk around lens you can own but it doesn’t let you specialize. Therefore Jamie borrowed a wide angle and a macro lens. These are two types of photography we both like but haven’t spent much time doing; probably because they each require their own special lens.
Carbon Canyon Regional has two sections. One is a large grass covered park with a small lake in the middle complete with fish. The other is a nature trail that ends into and loops around a grove of Redwood trees (Sequoia sempervirens) http://ocparks.com/parks/carbon/. The Redwood grove is small on aerial photos but once you stand in it, you suddenly feel small. These are not the biggest Redwood’s you have seen but they are big enough that the area has its own little sub-climate caused by the shade the grove casts.

Jamie and I took turns using the macro and wide angle lenses in addition the 24-105. We captured a lot of photos in only a two mile hike. In the middle of the hike, we both aimed out cameras at Maxx simultaneously. This is because he is very camera shy so with two cameras, we could trick him into looking into at least one of them.
I think now that I have used the macro and the wide angle lenses, I’m going to have to pick up one of them for myself. The question is, which one?

Photo walk at Crystal Cove with the Canon EOS M
May 17, 2015
Full Disclosure: I got to borrow the Canon EOS M for free.
Jamie, Maxx, and I did a photo walk along the bluffs of Crystal Cove State Beach. This allowed us to get some exercise for ourselves and the dog, get some food at Ruby’s Shake Shack, and finally get out and start photographing things again. We took the Canon EOS M with us and mounted the 18-55 mm IS STM lens as well as our 270EXII Speedlite flash. The EOS M is a mirrorless camera meaning it doesn’t reflect light into a viewfinder like an SLR. This means it can be significantly smaller and lighter.

If you are thinking about going to visit Crystal Cove, stop thinking about it and just do it. This park offers some of the most scenic coastline in California as well as a great beach, places to swim and body surf, and three different diving locations for those trained in SCUBA. Unfortunately dogs are not allowed on the beach or the one boardwalk trail on the bluffs. They are allowed on all of the rest of the trails on the beach side of PCH.
The EOS M is a camera that was discontinued over two years ago. Still it proved to be a good camera to use for this type of photo walk because it is small, light, and full featured. Essentially, if you have ever shot with any other EOS camera, the controls on this one will be familiar. It shoots in Canon RAW format using an 18 megapixel sensor and has a proprietary EF-M mount system that will work with EF lenses with an optional adapter. The replacement models for the EOS M are not available in the US market at this time.
Since I was shooting outdoors in full sun, I didn’t need the flash often. Still sometimes a shadow would be cast in such a way as to really detract from the image. That is where the fully functional hotshoe support for external flashes came in handy. I did have to remember one of the main principles of flash photography however. Namely that you use the aperture to control the flash exposure and the shutter speed to control the ambient exposure. Once I remembered that one important fact, achieving a nice balance of fill flash and ambient light was easy.
Once I was comfortable with the camera and working it’s touch screen controls, I focused on composition. I tried to work in the “rule of thirds”, color, leading lines, and abstraction in the various photos I took.

In post-production, I didn’t need to take anything into Photoshop. Instead all the adjustments I needed were available in Canon Digital Photo Professional which made the workflow a lot simpler. Really, not much tweaking was needed. Just a highlight here, and an angle adjustment there and I was ready to export.

Overall it was a fun trip and I know Maxx and Jamie had a good time. For me, the nicest thing about having a mirrorless camera around my neck was that my neck didn’t hurt after 6+ miles of walking. That right there is worth it.
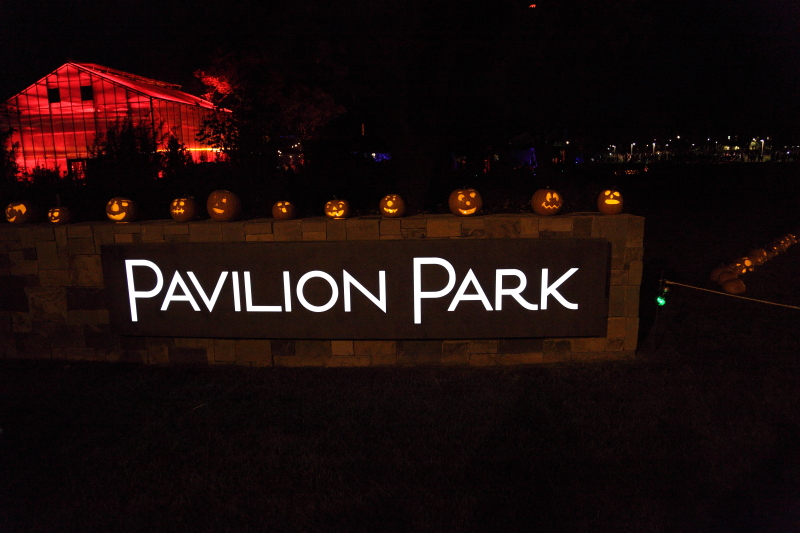
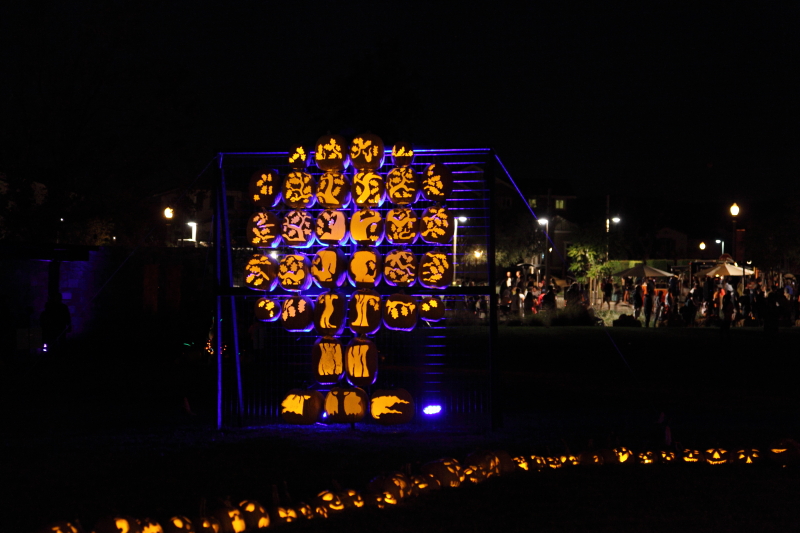
Night Photography (at the Pumpkin Glow)
October 30, 2014
Night photography requires some special techniques if you want to preserve the effects of lighting while still getting a decent exposure. Many people will trust that the camera knows it’s night time and will give you a correct exposure. However most cameras will still try to meter the entire exposure as if it was lit by daylight and therefore give you an incorrect exposure for some or all of the scene. In addition, most will try to pop up the flash and fill in the foreground with fill light even if that is not what you are photographing.
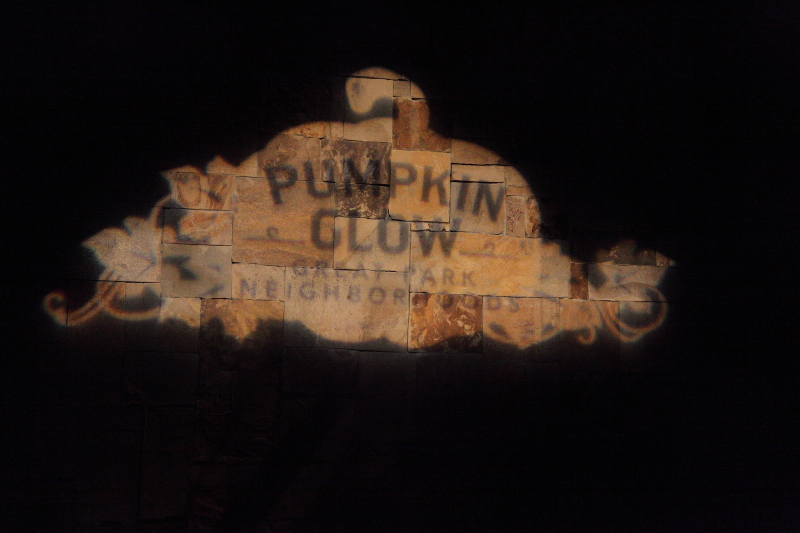 The first step is to place your camera into a mode that takes back some of the control over the settings. In a DSLR or mirrorless camera you can use a Program, Aperture Priority, Shutter Priority, or Manual setting. On a point and shoot, turn off the flash and adjust the settings available to you. Adjust the ISO high if you will be shooting handheld or bring a tripod or other gear to mount your camera if you will have plenty of time to take the shot. Night photography is best done with the camera supported but sometimes that is not possible. At the Pumpkin Glow for instance, the crowds meant we had to keep on the move so a tripod would not have worked out. Adjust the ISO as high as your camera can handle while keeping image quality good. For instance on the 5D Mark II I put it at 6400 but on a cropped sensor camera I would probably limit myself to 3200 or 1600.
 Next, if you are shooting in any mode other than manual, you must concern yourself with the metering and then choose how much to underexpose the metering. A simple trial and error can work here and I found that most shots needed me to underexpose by 2/3 of a stop with some requiring a full 2 stops of underexposure. The reason you need to underexpose is that most of your photo should end up black or very dark with just the subject exposed. However, if you shoot without underexposing, the camera is going to try to let in enough light to make that black look like a dull grey. Not only that but your shots will end up blurry most likely unless you are in shutter priority and have the shutter set to at least 1 over the focal length. Underexposing tells the camera to let in less light which is what is desired here.
 With the settings figured out, the next challenge is actually taking the shots. If you are shooting unsupported, you will still need to concentrate on holding the camera with your arms in and your camera pressed to your face to achieve the most stable platform for taking photos. If you have image stabilization, then this will help you out considerably. Most likely the subject is not moving at all or very much so the camera movement is the only variable that needs to be controlled.
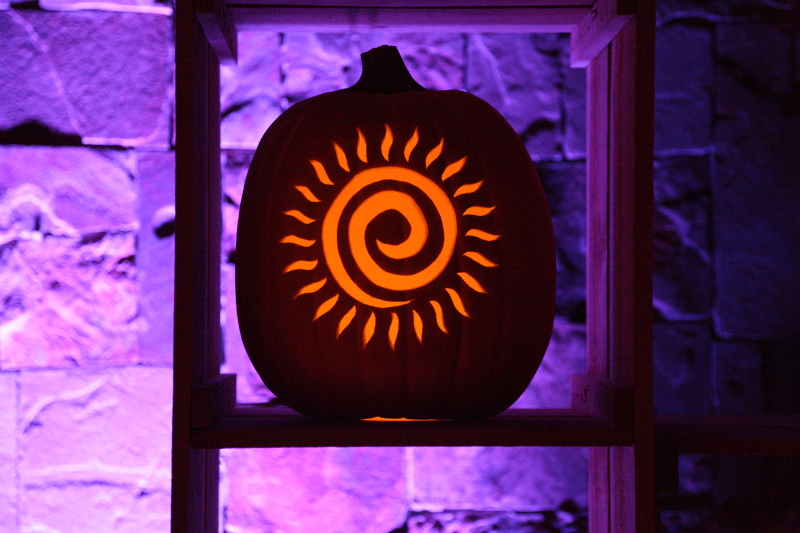 Finally, sometimes when you are shooting at night, you do want to fill the foreground with a fill flash because you are shooting people. In this case, off camera flash is best, external but on-camera is next, and pop-up or built in flash is the least desirable. The reason is simple; red-eye. The further the light source is from the lens, the less prominent red-eye is. Some flashes will pre-fire to dilate the subject’s pupils before the photo. Whatever you use, be aware of the features and turn on red-eye reduction if its an option. Keep the subjects close, but not too close. This way they will not be overpowered by the flash, nor out of its reach.
3rd Annual SoCal Women’s Half Marathon and 5k
June 8, 2014
Its back for another year. The SoCal Women’s Half Marathon and 5k is only a week away. Bookmark this page now so you can come back and find your photos or the photos of your family after the event. For race details see http://socalwinecountryhalf.com/
We’ll see you on the course and at the finish line.
UPDATE 6/16/2014
Your photos are here!!!! Visit our gallery to see photos from this years event!
http://shezphoto.zenfolio.com/f148468985
Thank you for participating!
Whale watching and sailing 2014
January 12, 2014

On Saturday I had the opportunity to go sailing on my co-worker, David’s 40 foot teak sailboat. We motored out of Shelter Island and the San Diego bay. On the way we passed various research vessels and submarines docked along the coast. We could hear the occasional thunder of Super Hornets taking off from the North Island Naval Air Station Halsey Field.

As we began to set sail and turn off the motor, David gave us some basic instructions into sailing. We soon learned the importance of tacking the sail when changing direction in relation to the wind. At least five whale watching vessels flanked us on our way out and they soon clustered together around a possible whale spotting.
I moved fore and tried to spot any spouts of water that would show that a whale was surfacing. Finally I spotted one and snapped a few photos. As soon as it was visible, it was gone again swimming under the dark surface of the water.
Our plan was to get in front of the whale watching ships and catch the next whale before it got to them. We sailed for a few hours and saw nothing until finally we spotted another whale and this time I was able to capture the tail fin before this one disappeared too.
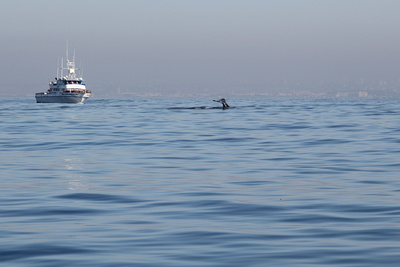
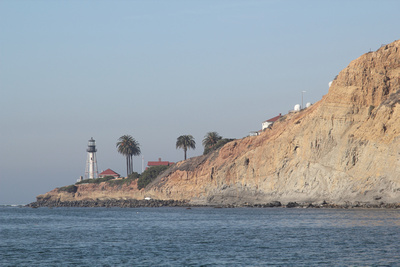
Shortly after this spotting, a very dense and low fog rolled in and visibility dropped to a few hundred feet at most. I took the helm and David turned on the Simrad branded GPS/RADAR navigation system. I turned us around while David and Dilip tacked the foresail. I used previous courses used by David to follow on the GPS and navigate us into the bay via instruments only.

A few hundred feet past Point Loma, we cleared the fog bank and it just became absolutely clear again. I managed to take a few photos while still at the helm. Once in the clear and since we were again under motor power, I turned into the wind and David took down the sails. I took us all the way into Shelter Island just to the point before heading down the actual slip.
David took over the helm but he mentioned to us that since it was just shortly past low tide that we might not make it into the slip. These predictions turned out to be true when we got stuck in the mud just a short while later. Since we were not soon going anywhere, Will, Dilip, David and I went down below and played cards while drinking port wine and eating artisan cheese while waiting for the tide to rise. I have to admit that this is not a horrible way to pass the time. Eventually we all saw movement out the windows and like that we were free of the mud and able to pull into the slip and get off.

Photo Credit: David